Photographing wildlife with Nick Rains

TIPS FOR NATURE PHOTOGRAPHERS
HERE IS A SEEMINGLY simple tip for wildlife photographers – simple to describe but maybe not so simple to achieve.
When we look at a photo of an animal (or a person) our visual system is programmed to always look at the eyes – if not immediately, then within a fraction of a second. They say that first impressions are crucial, and, in this case, if the eyes are not sharp then the image will be deemed out of focus. There are very few hard and fast rules in photography, but this would be one of them.
The only exceptions to this would be in images exploiting motion blur for creative effect or when the behaviour or subject is so rare that technical aspects of the image are entirely secondary.
Getting the eyes sharp is not always so easy. Birds and small critters are often photographed with long lenses and macro lenses – these can have minimal depth of field, often no more that the width of the eye itself, often less. This makes focussing absolutely critical, to the point where even autofocus is not accurate enough.

Dunnart
Canon 5D MkII EF85 f1.8 lens
Here are some pointers for helping you get that critical focus:
1. Shoot lots of frames, but not bursts. If you hold your finger down you will usually get a sequence of identical images and if the first one is not bang on the focus then the others won’t be either. If you have time, refocus each shot and shoot multiple frames – this will tend to average out tiny focussing errors that might not be apparent at the time.
2. If the subject is relatively still, consider using manual focus for long lenses. It’s not that AF systems are inaccurate – far from it; it’s just that the focussing point may not align with where you want the eye to sit in the frame and so you’ll need to recompose each shot. There is nothing more infuriating that getting lots of shots of a sharp nose tip but out of focus eyes!
3. The centre focus spot is always the most accurate.
4. The big expensive telephoto lenses with wide maximum apertures not only give you a better shutter speed in the same light, but more importantly, they let in more light for the autofocus system to work with – the result: better focussing accuracy.
5. For macro close-ups, set the focus manually and then move the camera back and forth to get the right focus. This is easier and more accurate than using the focus ring or the AF.
6. Consider using an external flash set to low power to fill in shadows – not only is the contrast reduced, but the flash highlight in the eye makes the subject look more alive and the image looks even sharper.

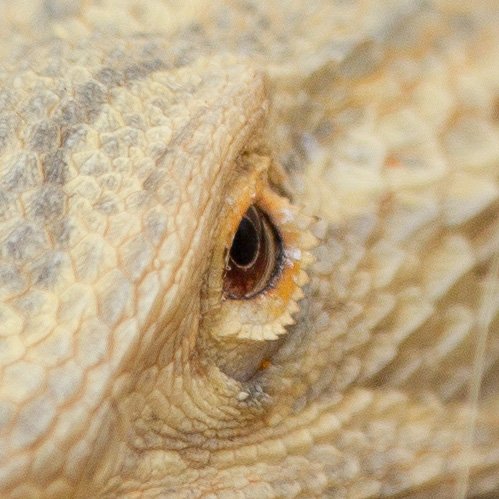
This is a 100 per cent zoom of the inland bearded dragon shot above.
Note that the centre of the eye is still sharp even though the scaly rim of the lid is not, due to movement.
More photography tips
We asked award-winning adventurer and AG photographer Chris Bray for his best advice from behind the lens.
Shooting subjects in a snowy setting is a different craft altogether, as resident Alps photographer Nolen explains.
AG Photographer Barry Skipsey has crossed Australia with tripod, camera… and guitar.

