
Nail the ideal lightweight camping setup for your human-powered adventures and we can pretty much guarantee that laying your head down for a kip in the great outdoors will always be a pleasure, whether it is that isolated rock shelf reached after an all-day epic trudge, that remote riverbank/beach that greets you and your paddling companions, or that tiny out-of-the-way site off the dirt road you’ve been cycling along all day. Take too much gear – and weigh yourself down as a result – and your first ‘lightweight’ camping experience will be anything but enjoyable.
Pack it in
The backpack is the primary load-carrying item for hikers (and some bikepackers), and this means you need to pay close attention to two key component: the harness and frame. How these two features of a backpack combine together is the key to comfort – and the durability of your pack (overload it, and it’ll soon, literally, start splitting at the seams). The pack harness needs to fit you perfectly, when fully loaded, and also allow for ample adjustment to attain that fit. A harness system will offer size adjustment, and varying degrees of padding in key areas, such as the waist belt and the shoulder straps. Your lower torso/back is where most of the load weight should be situated, so ensure the waist belt is comfortable and fully adjustable. Padding on the shoulders and waist is a personal thing – and is different for each gender (most pack manufacturers offer female-specific packs). In regards to the frame: nearly all large trekking packs on the market offer internal aluminium frames of various sizes and configurations, but that are all designed to support the weight, and direct that weight to load-bearing areas of your body.

Most modern packs utilise synthetic fabrics – primarily nylon and/or polyester, with ripstop and other tear-resistant technologies, but there are still “old school” canvas packs available. The benefit of canvas is its longevity – a canvas pack, if cared for, will last for decades, although you will pay a weight penalty. Having said that, today’s canvas packs are not as heavy as their predecessors and are DWR-treated for increased water-resistance – key for this material as canvas does become heavier when wet. Synthetic packs have long ditched the question of durability, with modern variants extremely robust and, although they may not last as long as a canvas pack (and the jury is still out on that), the lighter weight is appealing.

Most packs offer varying degrees of water-resistance, with some claimed to be totally waterproof so, depending on intended use, these are an option. Regardless of ‘waterproof’ claims, we’d still recommend always using a dry bag as an inner liner for your pack – and putting all your gear inside this, and then in the pack. Also double-bag the sleeping bag; nothing ruins a good night’s sleep than a wet, cold sleeping bag. Speaking of bags that keep things dry…
Dry bags and/or waterproof hard cases (or barrels) are absolute essentials for water-borne campers – they are most definitely a paddler’s best friend as they will protect all your camping and electronic gear, as well as foodstuffs and other moisture-averse equipment. The dry bag is of very basic construction. It is usually made from heavy-duty plastic-coated fabric (vinyl is popular), or waterproofed fabric, with the joining points stitched (and then covered with seam tape), welded, or glued together. They are easy to use: roll the top opening over itself three or four times and clip the buckles together to ensure a waterproof barrier (check by squeezing on the bag; if it doesn’t deflate/contract, it is sealed). Once that’s done, it’s an easy task to secure the dry bag to/in your watercraft.

For bikepacking, it’s a bag of a different type. A frame-bag, plus other alternatives – handlebar bag, seatpost bag, etc. – is de rigeur for the off-road cyclist. These are usually made from ripstop poly/cotton canvas and are – usually – waterproof as they rely on the same sealing system (a rolltop closure) as drybags. The frame bag is usually the only bag that may feature a zip of any kind, but even this includes an over-cover for the zip section. There are some bikepacking rack systems that can also carry drybags, with NZ brand Aeroe an excellent example. The racks are light in weight and provide a stable platform for your bags – and they work with any type of bicycle.
Gimme shelter
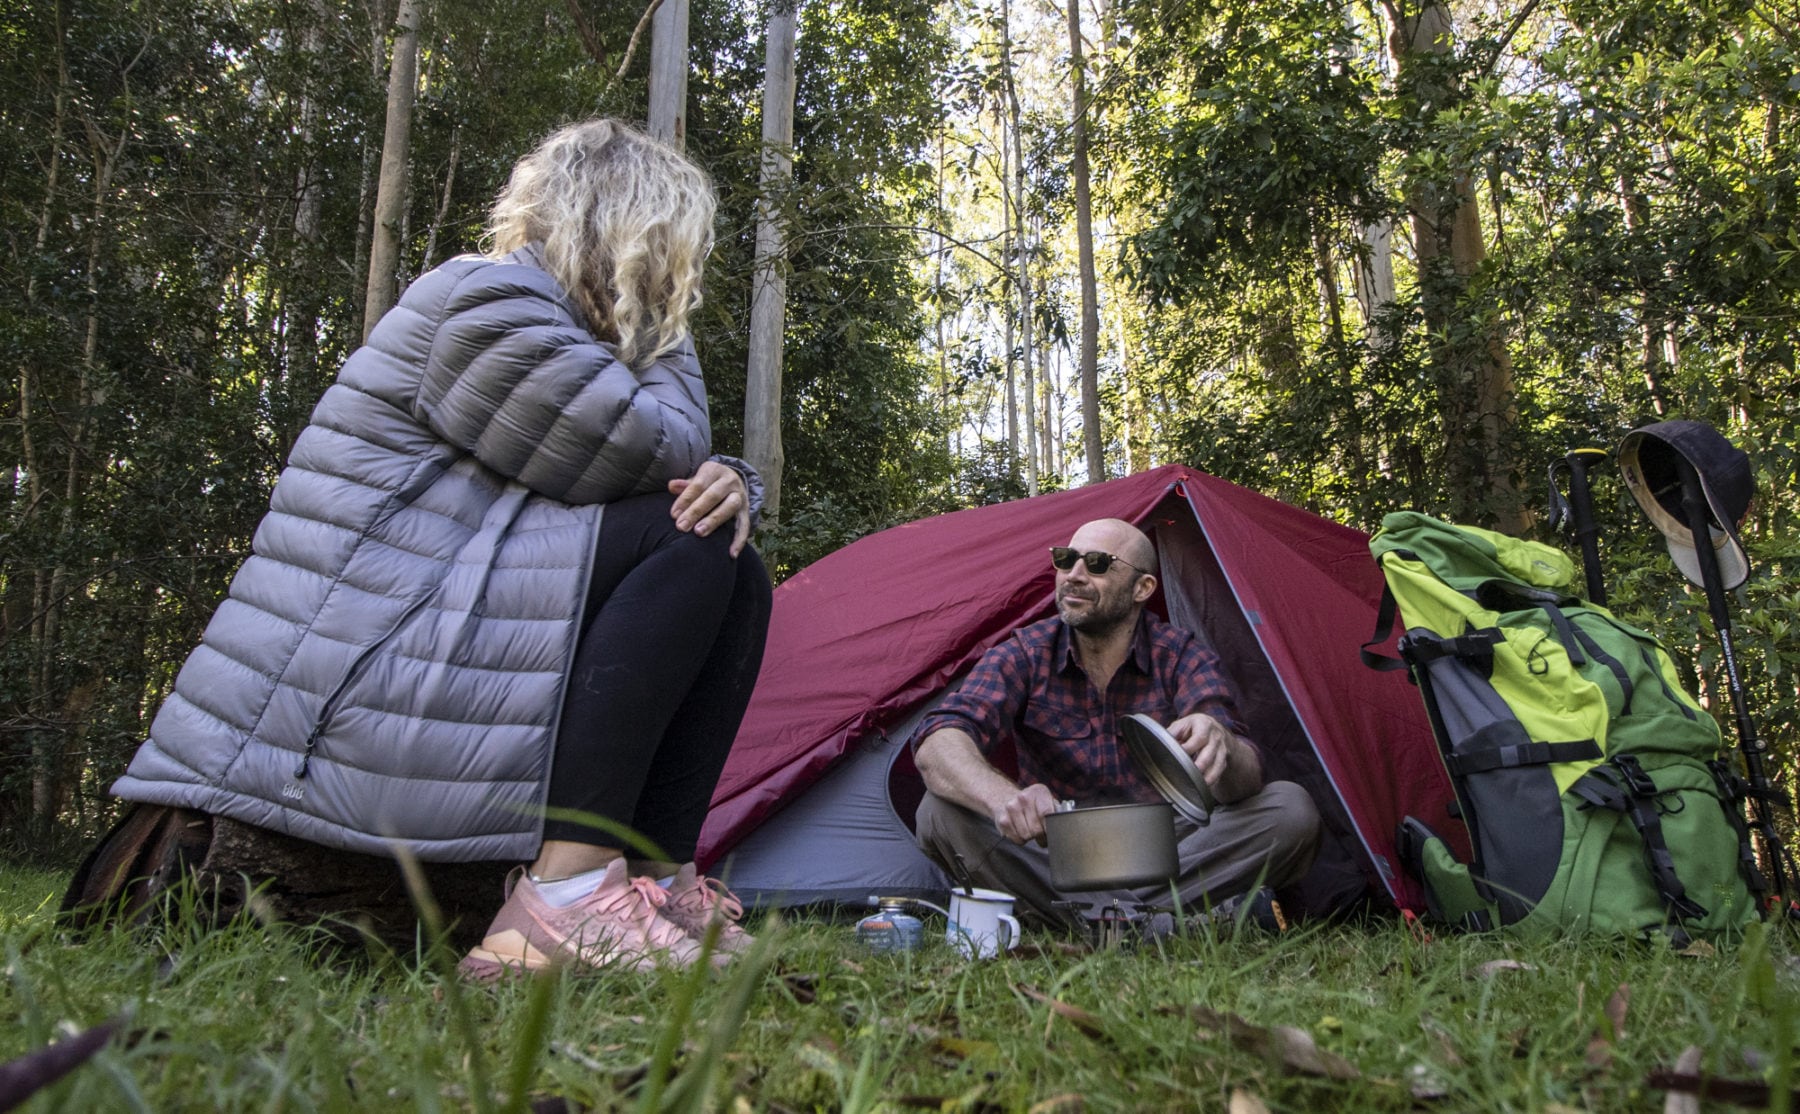
For solo or two-up hiking, a three-season, two/three-person tent – with a separate inner and outer section – is ideal. For paddlers, the extra load-capacity of a sea kayak or canoe means you can splurge on a larger tent (especially handy if you are canoe camping with the family). If you’re on the bike, weight is of vital importance – as is the packed size of your shelter. So, for bikepackers and cycle tourers, an ultra-light one/two-person tent is desirable, and there’s also the option of a bivy. These ultra-light and ultra-compact shelters (a favourite with alpine climbers) often resemble a cocoon as they are narrow, low to the ground and truly minimalist in the amount of ‘spare’ space they offer. Besides a bivy, another ultra-light/compact option for bike- and foot-borne adventurers is either a simple lightweight tarp, or a bug/tarp shelter combo. Where you intend travelling will play a role in how ‘substantial’ your shelter of choice is; no-one wants a flimsy single-skin tarp (with its minimal ventilation) when braving Tassie’s notoriously fickle weather, just like no-one wants to lug a full four-season tent on a summer overnight hike or bike ride on the eastern seaboard or Australia’s tropical north.
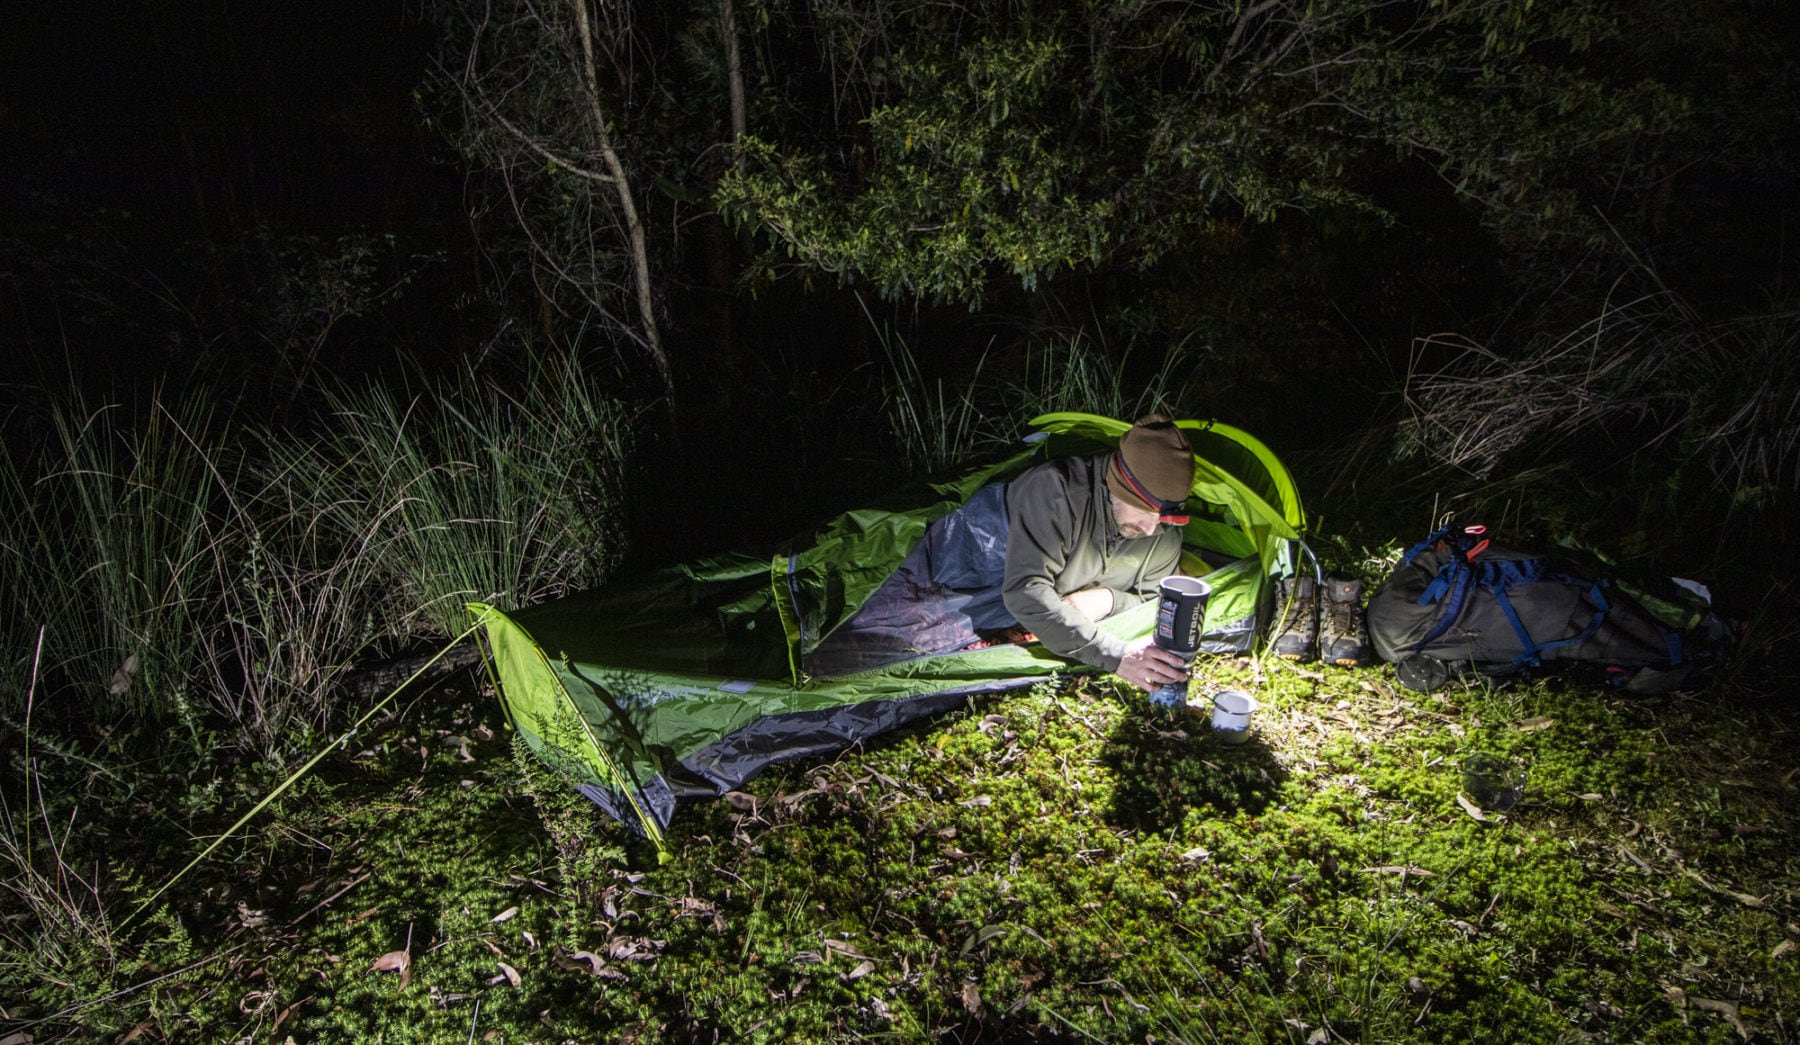
Whichever size tent you opt for, look for one that has ample ventilation (vents down low and up high that will keep air circulating and thus maintain a dry inner), and enough space for occupants and gear. You will probably have to satisfy yourself with two of those three.
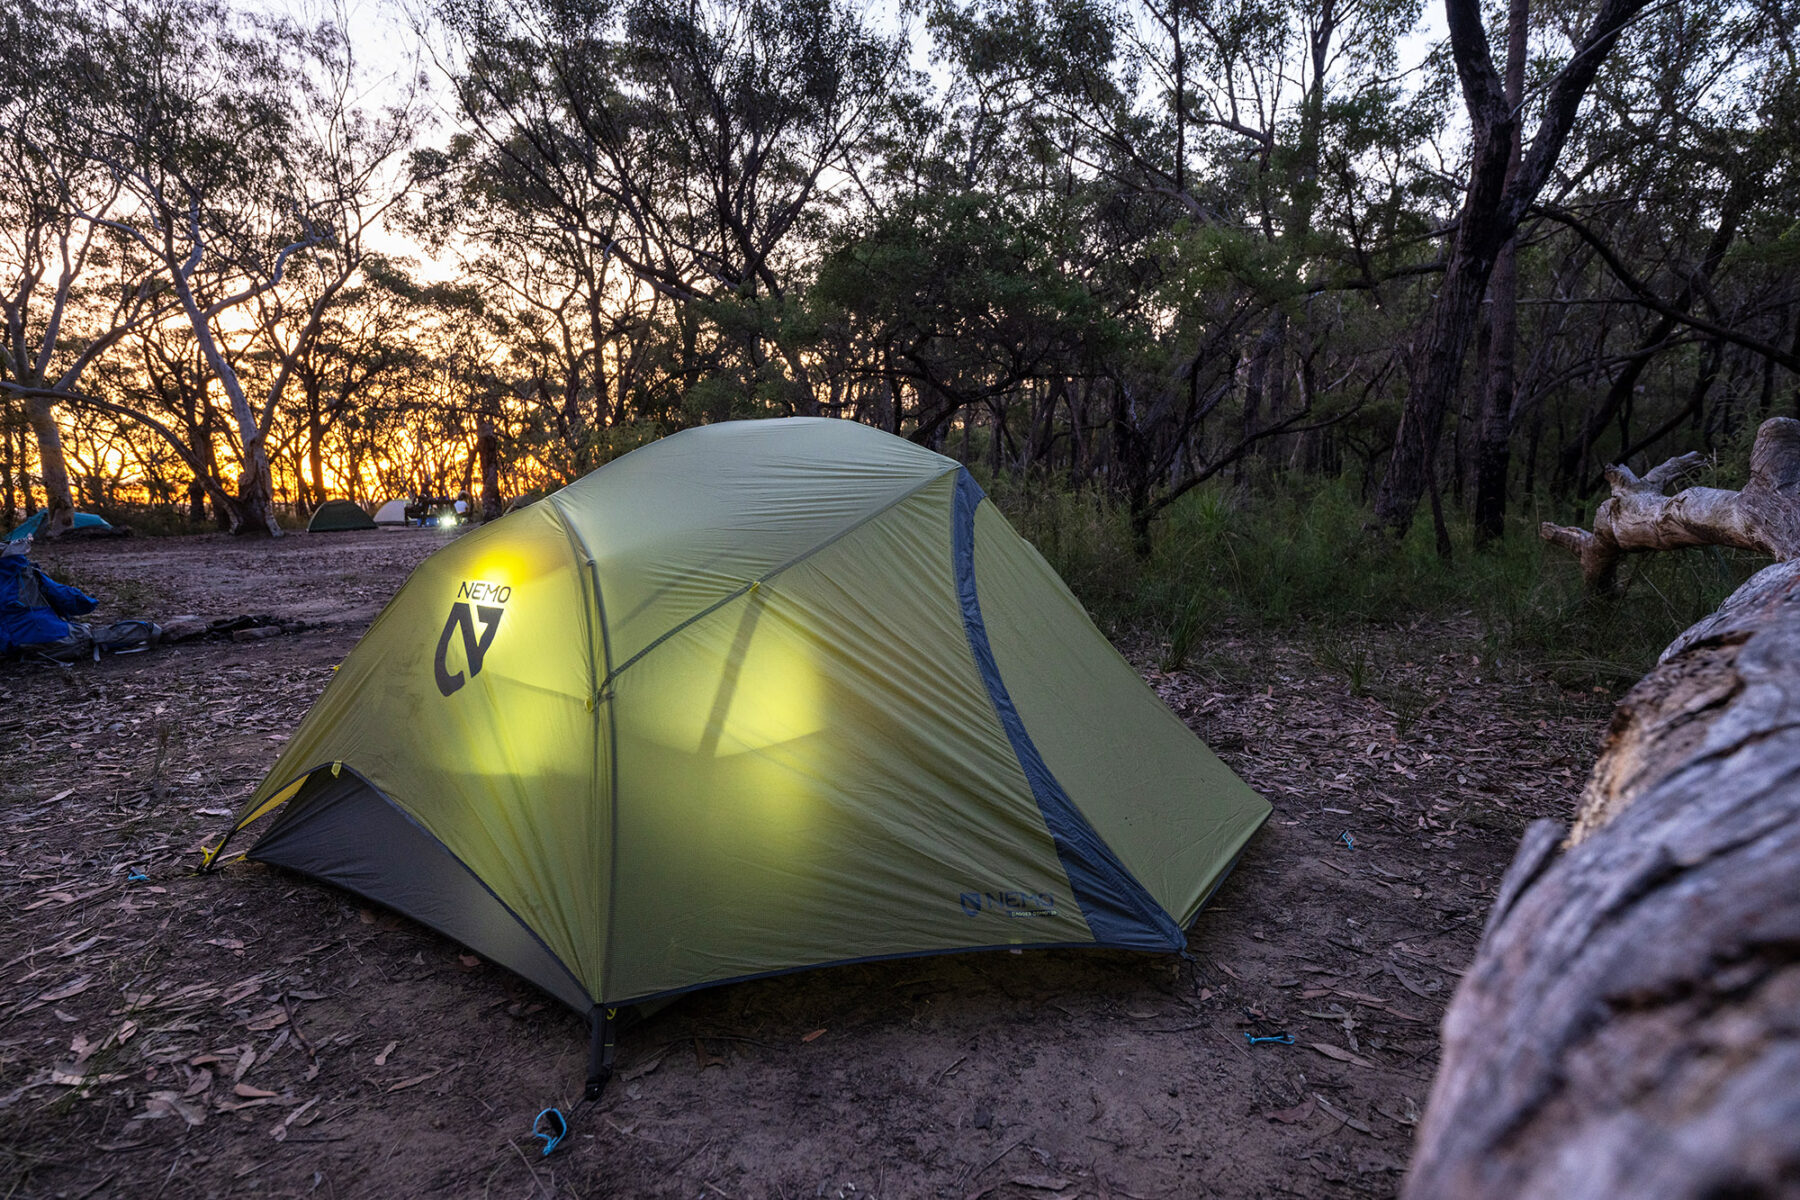
A three-season tent, such as the Mountain Designs Redline 2P tent, the Nemo Dagger OSMO 2P, and the Mont Moondance EX tent, may offer anything from a full mesh inner, through to an inner that either comprises a 50/50 split between mesh and material, or one that possesses an extra material door; having the ability to cool the tent interior on warm days but also shut it up snug on far colder ones adds seasonal versatility, albeit with a slight weight penalty. A tent that offers two vestibules, ample dimensions, plenty of tie-down points (the more tie-down points, the more stable/secure the tent in wild weather, and an easy set-up will win every time.
Tents that pitch inner-first are great if it is hot as you can just pitch the inner (or outer) and sleep under the stars. However, if it is raining when you get to camp, an inner-first design means your sleeping area will get wet during set-up. Integral-pitch tents (such as the Macpac Microlight) set up all-in-one and, in wet conditions, keep the inner dry. Most two-person tents (there are exceptions) are really only for singles (or couples) but you will find there are plenty of impressively lightweight three-person tents on the market these days that allow for more space. Yes, you will pay a premium for a larger, lighter tent, but the investment will be a sound one.

Nylon and polyester, with siliconised and non-siliconised variants of both, are the two main tent materials. Polyester is more resistant to UV rays than nylon and won’t sag as much when wet, while siliconised versions of both materials are more durable. A tent fabric’s water-resistance is measured in Hydrostatic Head (HH) which indicates the pressure of water needed to penetrate a fabric; the higher the number the better. Most tents will have a fly fabric rated to at least 1500mm HH, but we reckon a figure of 3000mm is what you should ideally be looking for. This same measure applies for floor materials but is even more important as that is where most water-ingress problems begin – the higher the better! Just be aware that, generally, the higher the HH ratings, the heavier the tent. As with large touring/family tents, aluminium is the only choice for tent poles (unless you have the dosh for some super-light and tough carbon poles), with manufacturers offering poles in various grades of aluminium and diameters – both of which can influence the tent’s asking price – and its weight.
Before you do head off though, make sure you check that all your gear will definitely fit in your flash lightweight tent; there’s nothing worse than having to store gear outside then watch it get drenched in a rainstorm because you don’t have the space inside to store it. A bit more space for a tiny weight increase is more than worth it.
Sleep easy
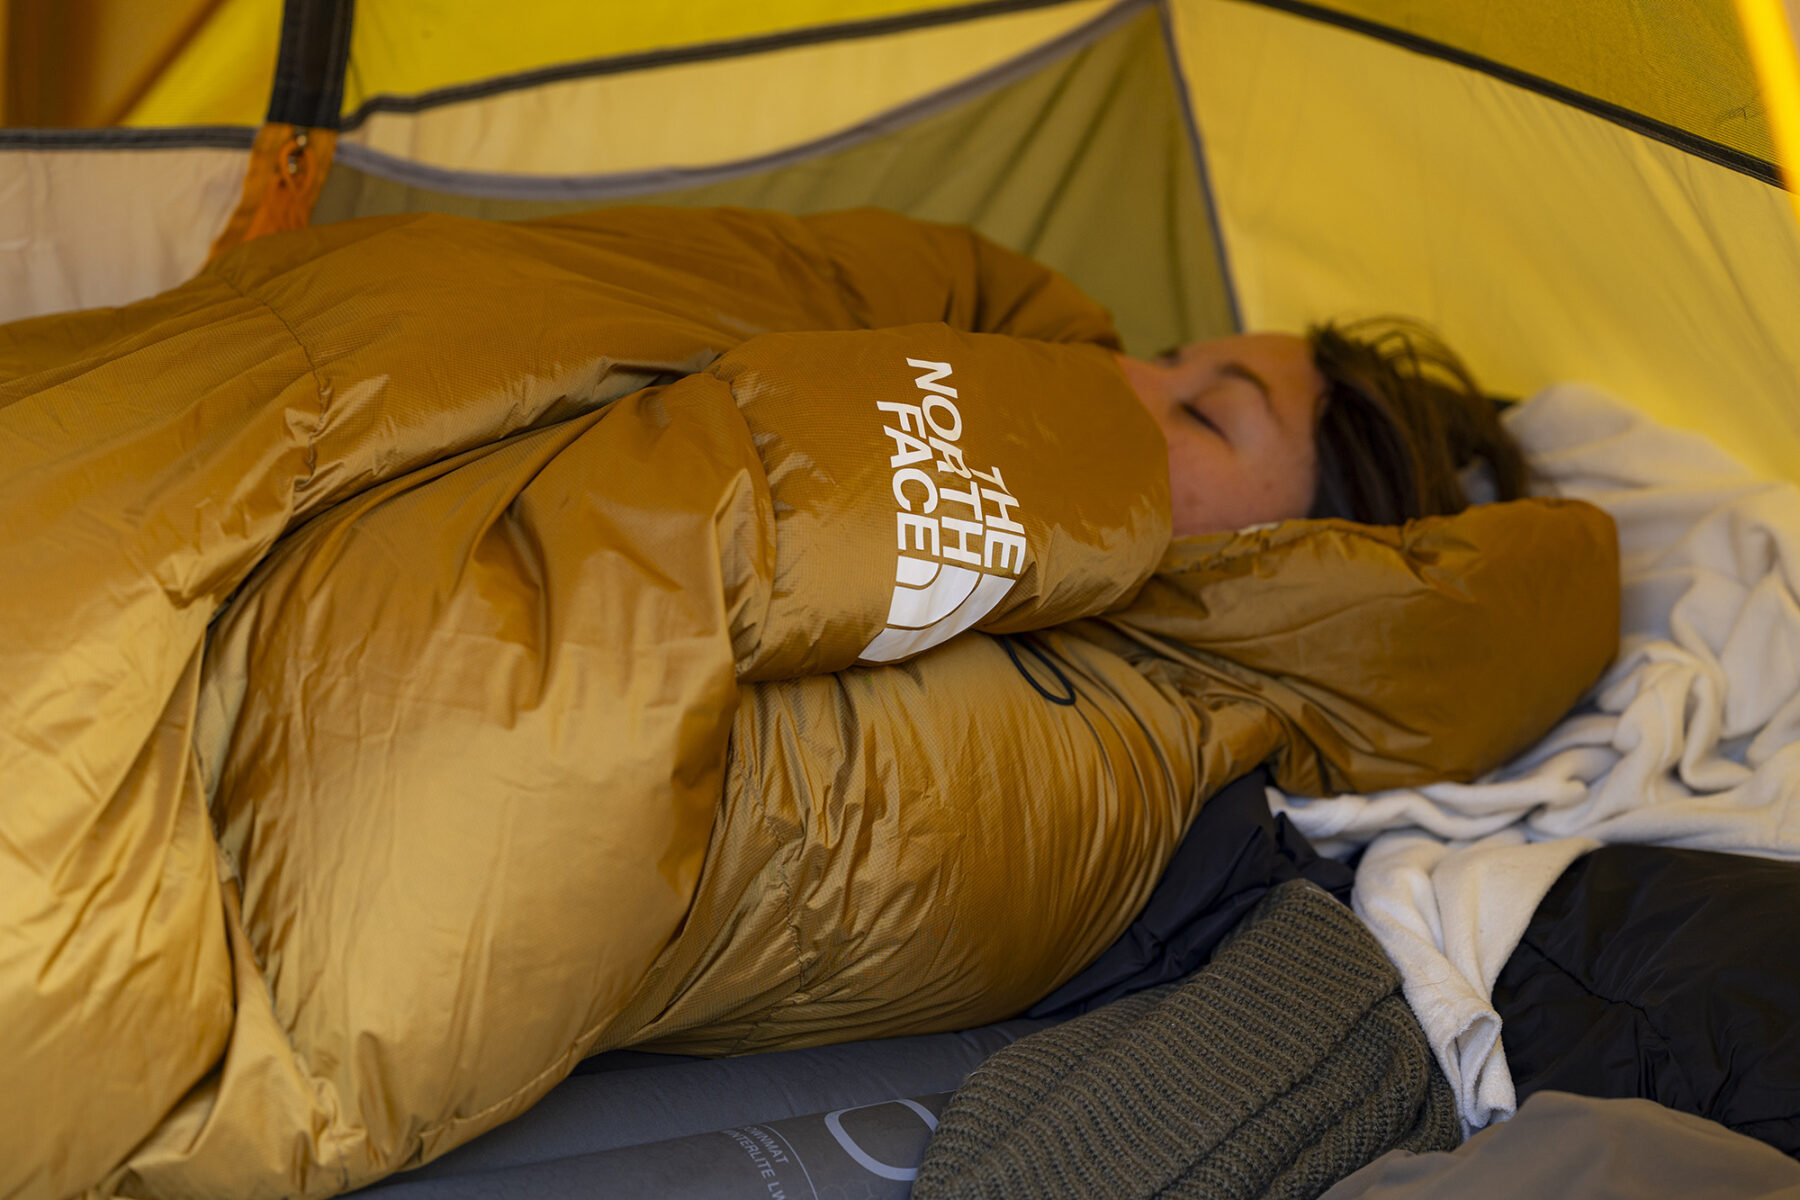
Mummy, rectangular, or semi-rectangular shape? Down or synthetic fill? Yep, there are a multitude of questions when it comes to choosing a sleeping bag for lightweight adventures. Sleeping bags are designed to trap and utilise the occupant’s body heat to keep them warm and, at the least, whichever bags you look at, they should have a hood, draft collar, zip and neck tubes. For the ultimate in light weight and optimum warmth retention, a down-filled mummy-shaped bag is the best option by far. Its snug fit means that your body heat is retained efficiently as there is minimal “dead space” in the bag for your body to have to heat up.
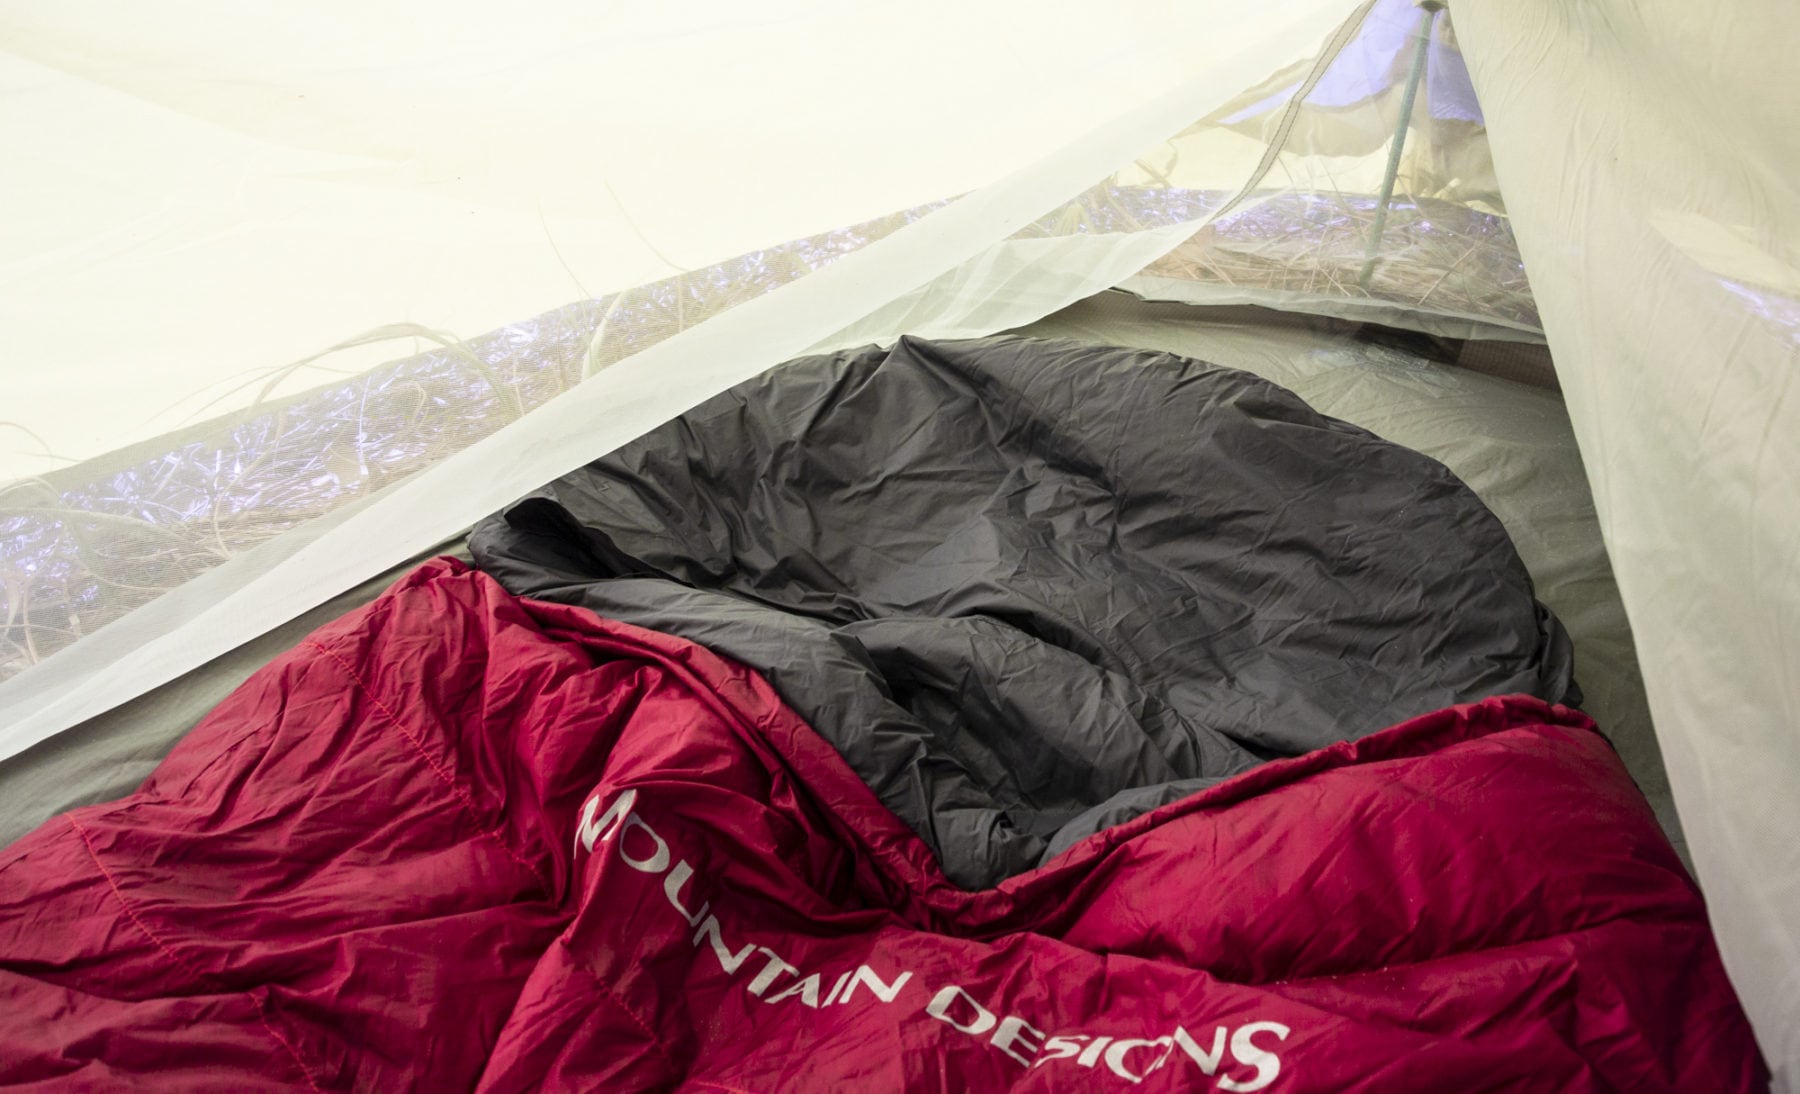
The mummy-shaped bag’s light weight and compact packed size, which affords it that excellent warmth efficiency, is also its slight negative. The rather snug fit can be hard to accommodate when you’re trying to get some shut-eye – not everyone can sleep so confined, although newer “relaxed” mummy bags go some way to addressing this.
Rectangular bags are out thanks to the larger dimensions that add bulk and weight, while your body works overtime to try and warm up all that ‘dead space’ around it at night. Even for canoe/kayak touring, we’d steer clear of these bags; both watercraft offer more stowage space (especially the canoe, as mentioned earlier) but trying to stuff a couple of these big sleeping bags into compartments and/or drybags will soon see that space advantage disappear.
Semi-rectangular bags are a good “all-rounder” option with less empty space to have to warm up than a rectangular, as well as handy inclusions such as full-length zips (side and foot sometimes separate), and the ability to be opened right up to form a large duvet. (handy if you’re travelling as a couple as, in more temperate conditions, you may only need one bag between two). You pay a slight weight and bulk penalty with semi-rectangular bags compared to a mummy, so these would be probably off the radar for bikepackers, where every gram (and millimetre) of weight and size counts when packing bike-bags. You can definitely get compact semi-rectangular down sleeping bags but the technology (and high grade of down) involved in achieving this means the asking price can be astronomical.
In terms of a bag’s warmth rating, look for those bags that adhere to the European standard EN 13537, which provides standard “comfort”, “limit of comfort” and “extreme” ratings. And then, there’s the question of fill…
Synthetic and down are your two choices for bag fill. The term “fill” describes the material that is used to fill the space between the sleeping bag’s inner layer and outer shell; it is the stuff that will keep you warm. In terms of warming and compact size bang for your bucks, down is the winner for lightweight packing, but please note that not all down is the same. This natural material (the small fine feathers hidden underneath a bird’s larger exterior feathers, often on the chest) is graded according to “loft”, which is used to explain the ability of down to expand and fill an empty space – in this case the baffles in your sleeping bag. Basically, the higher the loft number, the higher the capacity to retain warmth. Down’s, er downer, is the fact that, when it gets moist/wet, it offers zero insulative qualities, something that could be dangerous in certain conditions. However, there are a lot of (relatively expensive) water-resistant down fill bags now on the market.
Synthetic fill does retain some insulative capability when wet – and it will also dry out faster than down. Synthetic-fill bags are also cheaper than their down equivalents, although they will be bulkier and heavier; to gain an equivalent warmth rating you’re looking at an average 25% increase in weight and packed size. Again, for the bikepacker, this may preclude synthetic-fill bags as an option, especially if you’re cycling in colder locations. You simply won’t get as much warmth per gram with synthetic as you will with down, much less the packed size. Synthetic fill also isn’t as breathable as down so is more susceptible to retaining odours but, conversely, is easier to wash and is also low-allergenic. For hikers and paddlers, a synthetic-fill bag is a viable option.
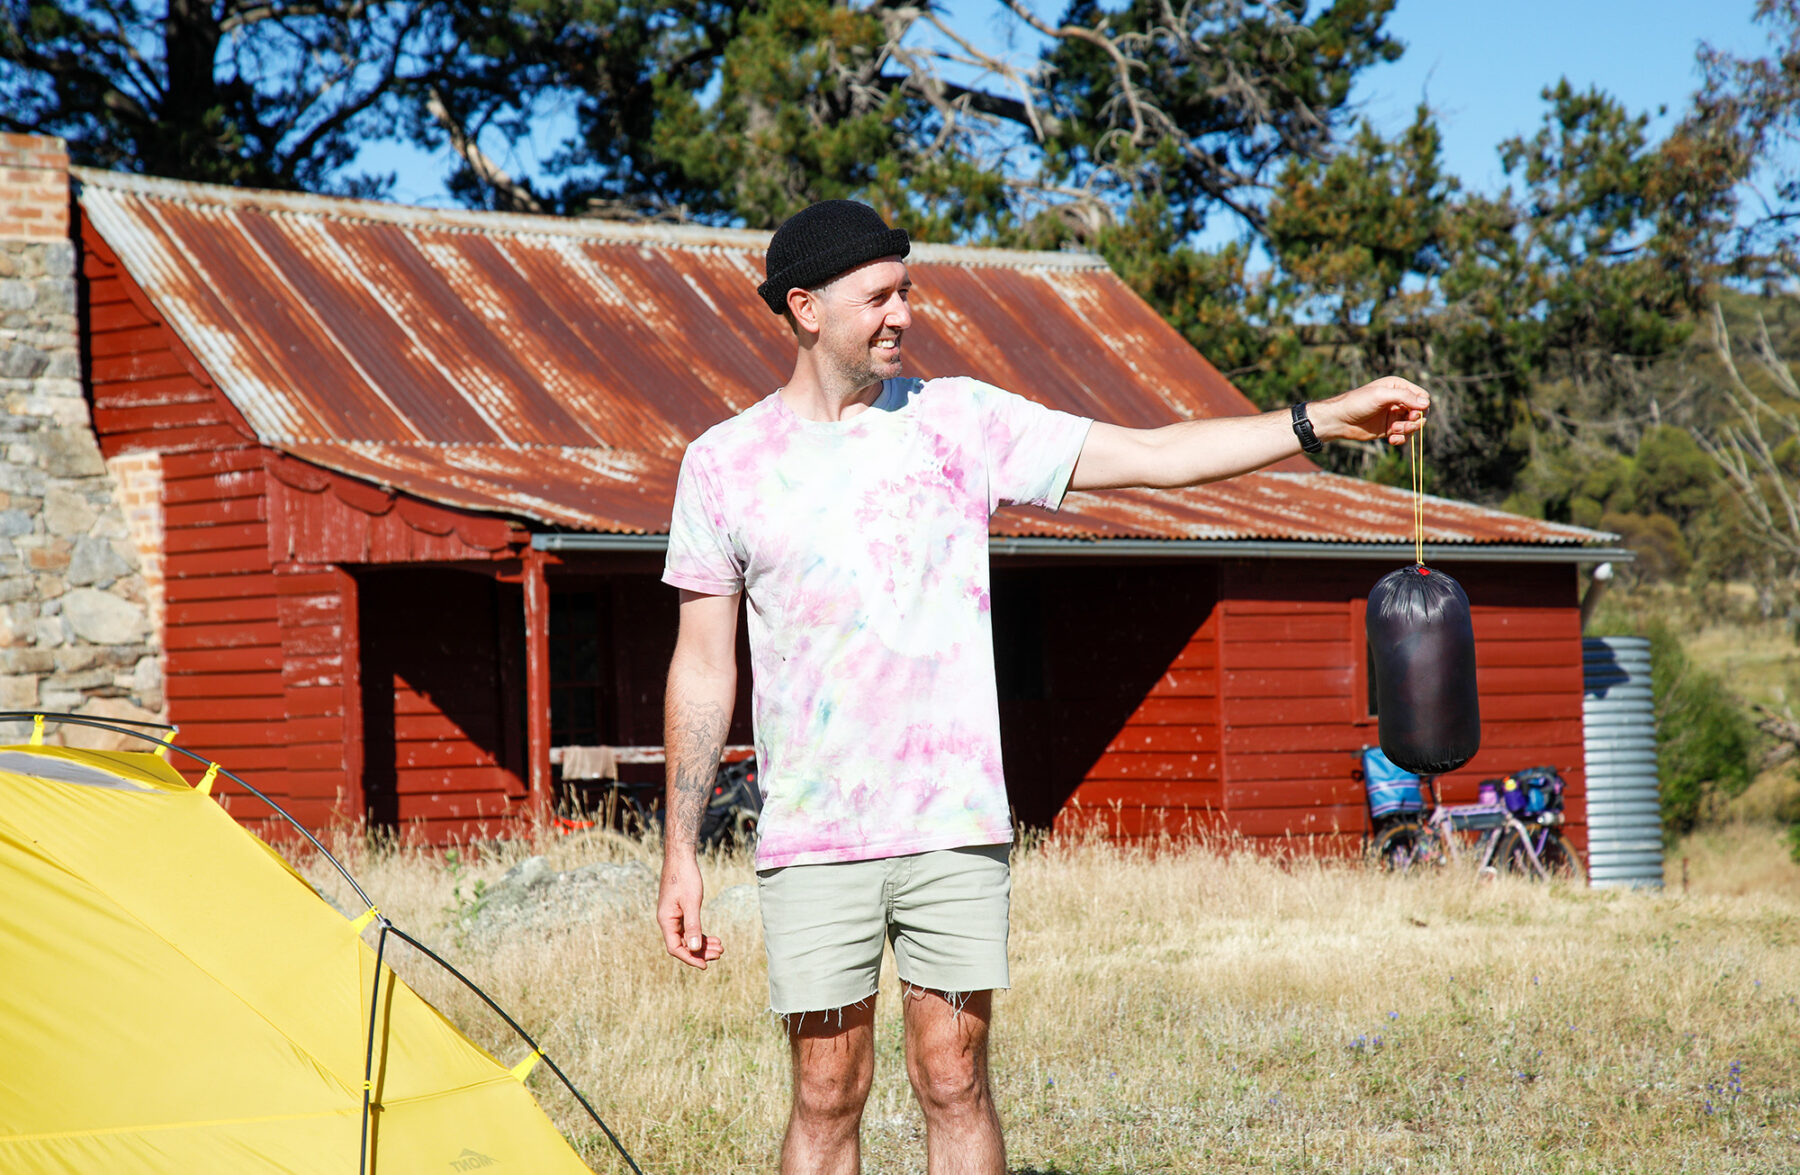
Lay me down
You can go totally ‘old school’ with lightweight camping and sleeping mats and opt for a solid foam mat (which will never fail or lose air at the most inopportune time) or you can choose the latest in hi-tech (and lightweight) inflatable sleeping mats. It is worth noting that the solid-foam mat has actually been subject to a lot of technological advances, with a number of respected outdoor brands offering these – and with promised more comfort! The disadvantage with a solid-foam mat (besides that lack of mattress height) is that they are still relatively bulky when packed. This is not an issue for hikers or paddlers, but bikepackers will need to look elsewhere, to the wide range of inflatable mats on the market.

Inflatable sleeping mats – whether self-inflating or via a pump (or your lungs) – are more expensive than the solid-foam mat but do raise comfort levels significantly. There are many variants, with some offering different types of insulation (both natural, in the form of down, and synthetic), while others offer reflective material inside the mat that is claimed to reflect and retain your body heat. Then there’s the range of mat heights on offer; depending on how much ‘plush’ you like, you can find mats with heights ranging from 25mm up to 100mm. For hiking and bikepacking, mats in the 25-50mm height range offer the best combo of light weight and compact packed size, while paddling campers can up the comfort levels significantly to the 100mm jobbies if they so desire.
The outdoor pop-up cafe
For some reason, food always tastes nicer when it’s been cooked in the outdoors. When you’re on a big adventure – whether a hike, paddle or cycle – food choice is important, with both caloric needs to attend to, as well as the overall weight of the ingredients.
Firstly, food is heavy, so you really need to balance out the ideal of eating ‘fresh’ every day with perhaps mixing it up a bit and including a few dehydrated meals. It is here that the paddling adventurers win; being able to lug more fresh ingredients thanks to the additional load-carrying capacity afforded by their respective water-craft.
Hikers and bikepackers need not despair. Dehydrated meals are at the point where they are relatively close to the ‘real thing’, and simply require boiled water poured into their bag and, minutes later, you’re digging into a what seems like a gourmet extravaganza.
Food aside, we’d also highly – and we can’t emphasise that word, ‘highly’, enough – recommend a water filter, or preferably two. Whether you opt for a tablet-based water purifying system, or go for a more advanced physical unit, don’t go without them. The last thing you want is a stomach bug when you’re in the outdoors.
At the furnace
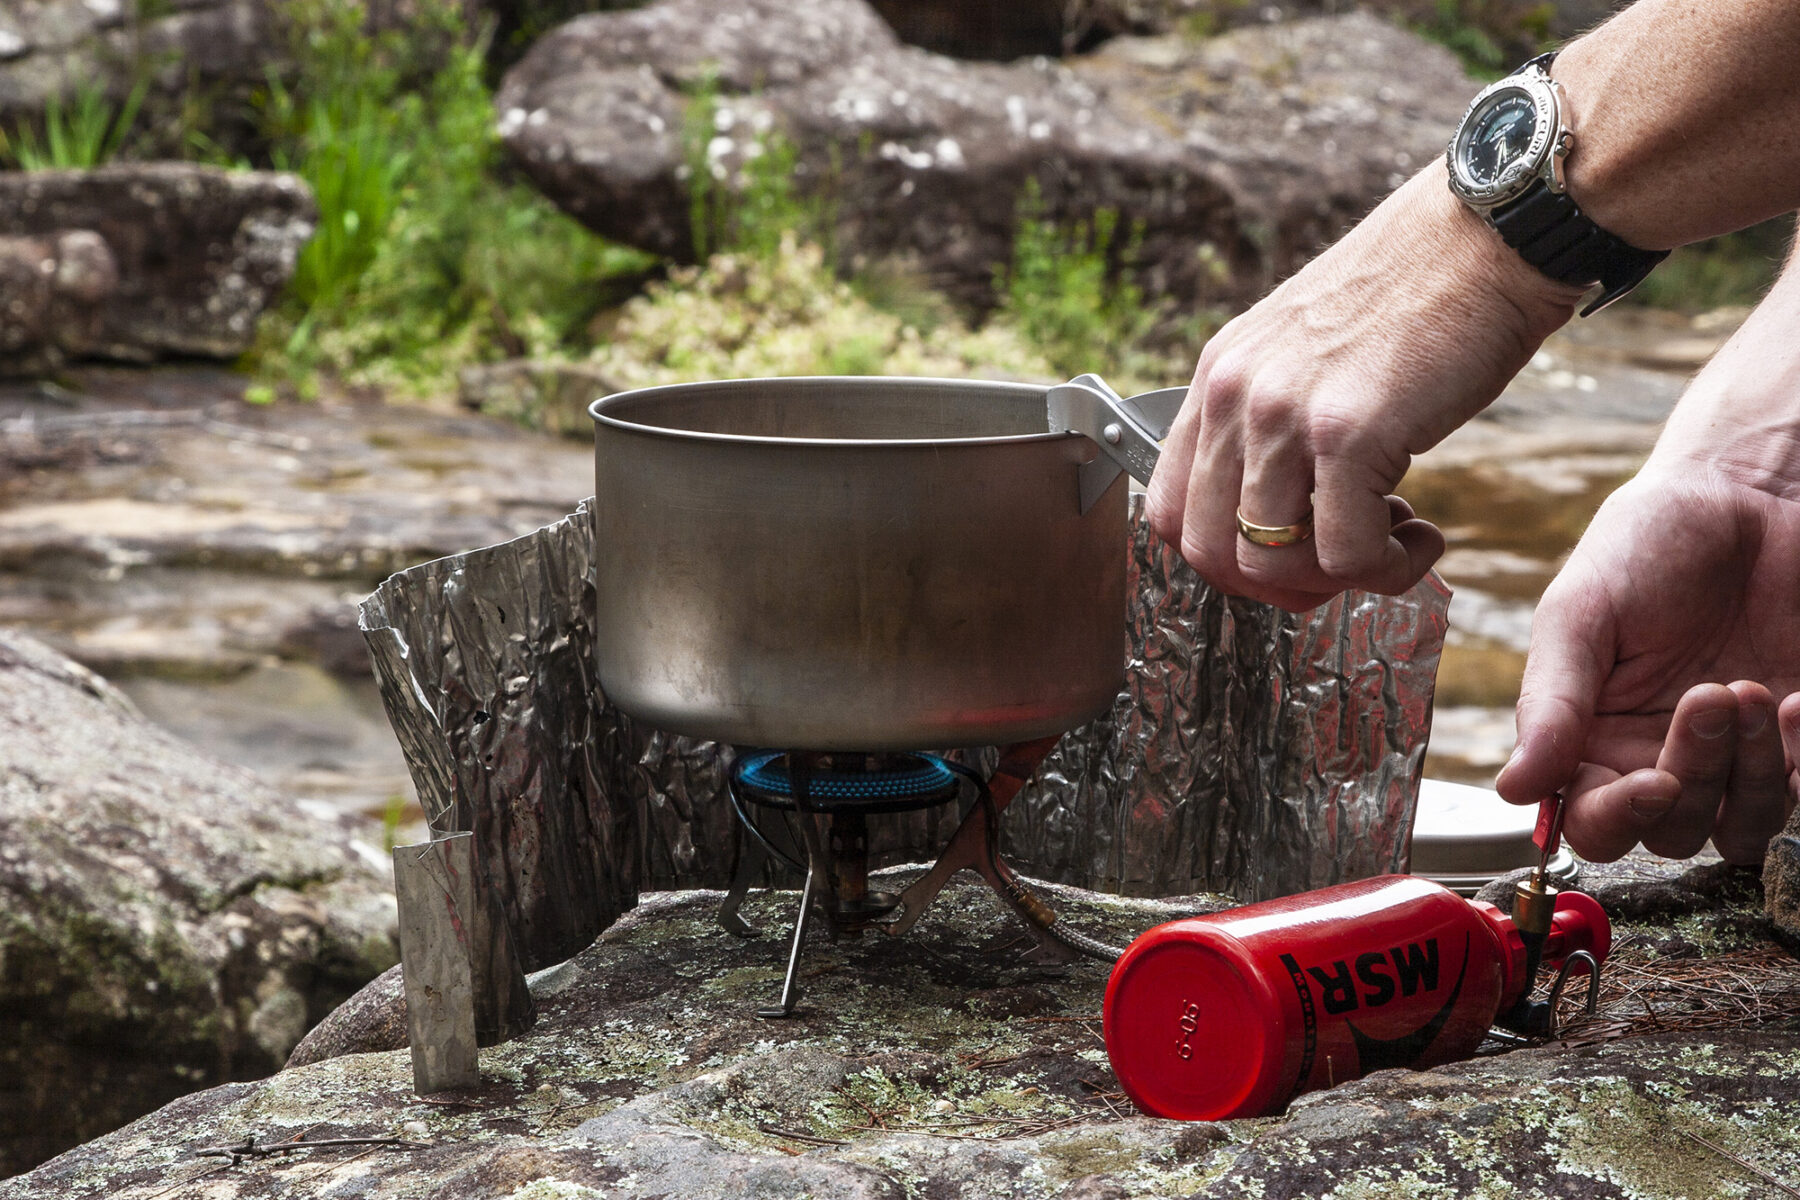
Reliability and ease of use is key when it comes to stoves for hiking, paddling or biking. The final choice will come down to what type of meals you wish to cook, the length of time away, and the conditions in which you will be cooking them. A stove’s fuel type governs stove designs and, along with the type of meals you usually cook when outdoors (boil-in-the-bag; meals using fresh ingredients), will influence your stove choice. There are three main types of stoves suited to lightweight adventures: canister (liquid gas) based, liquid fuel based, and natural fuel based. Each of these will have advantages/disadvantages to the other and choice will also depend on where you intend going.
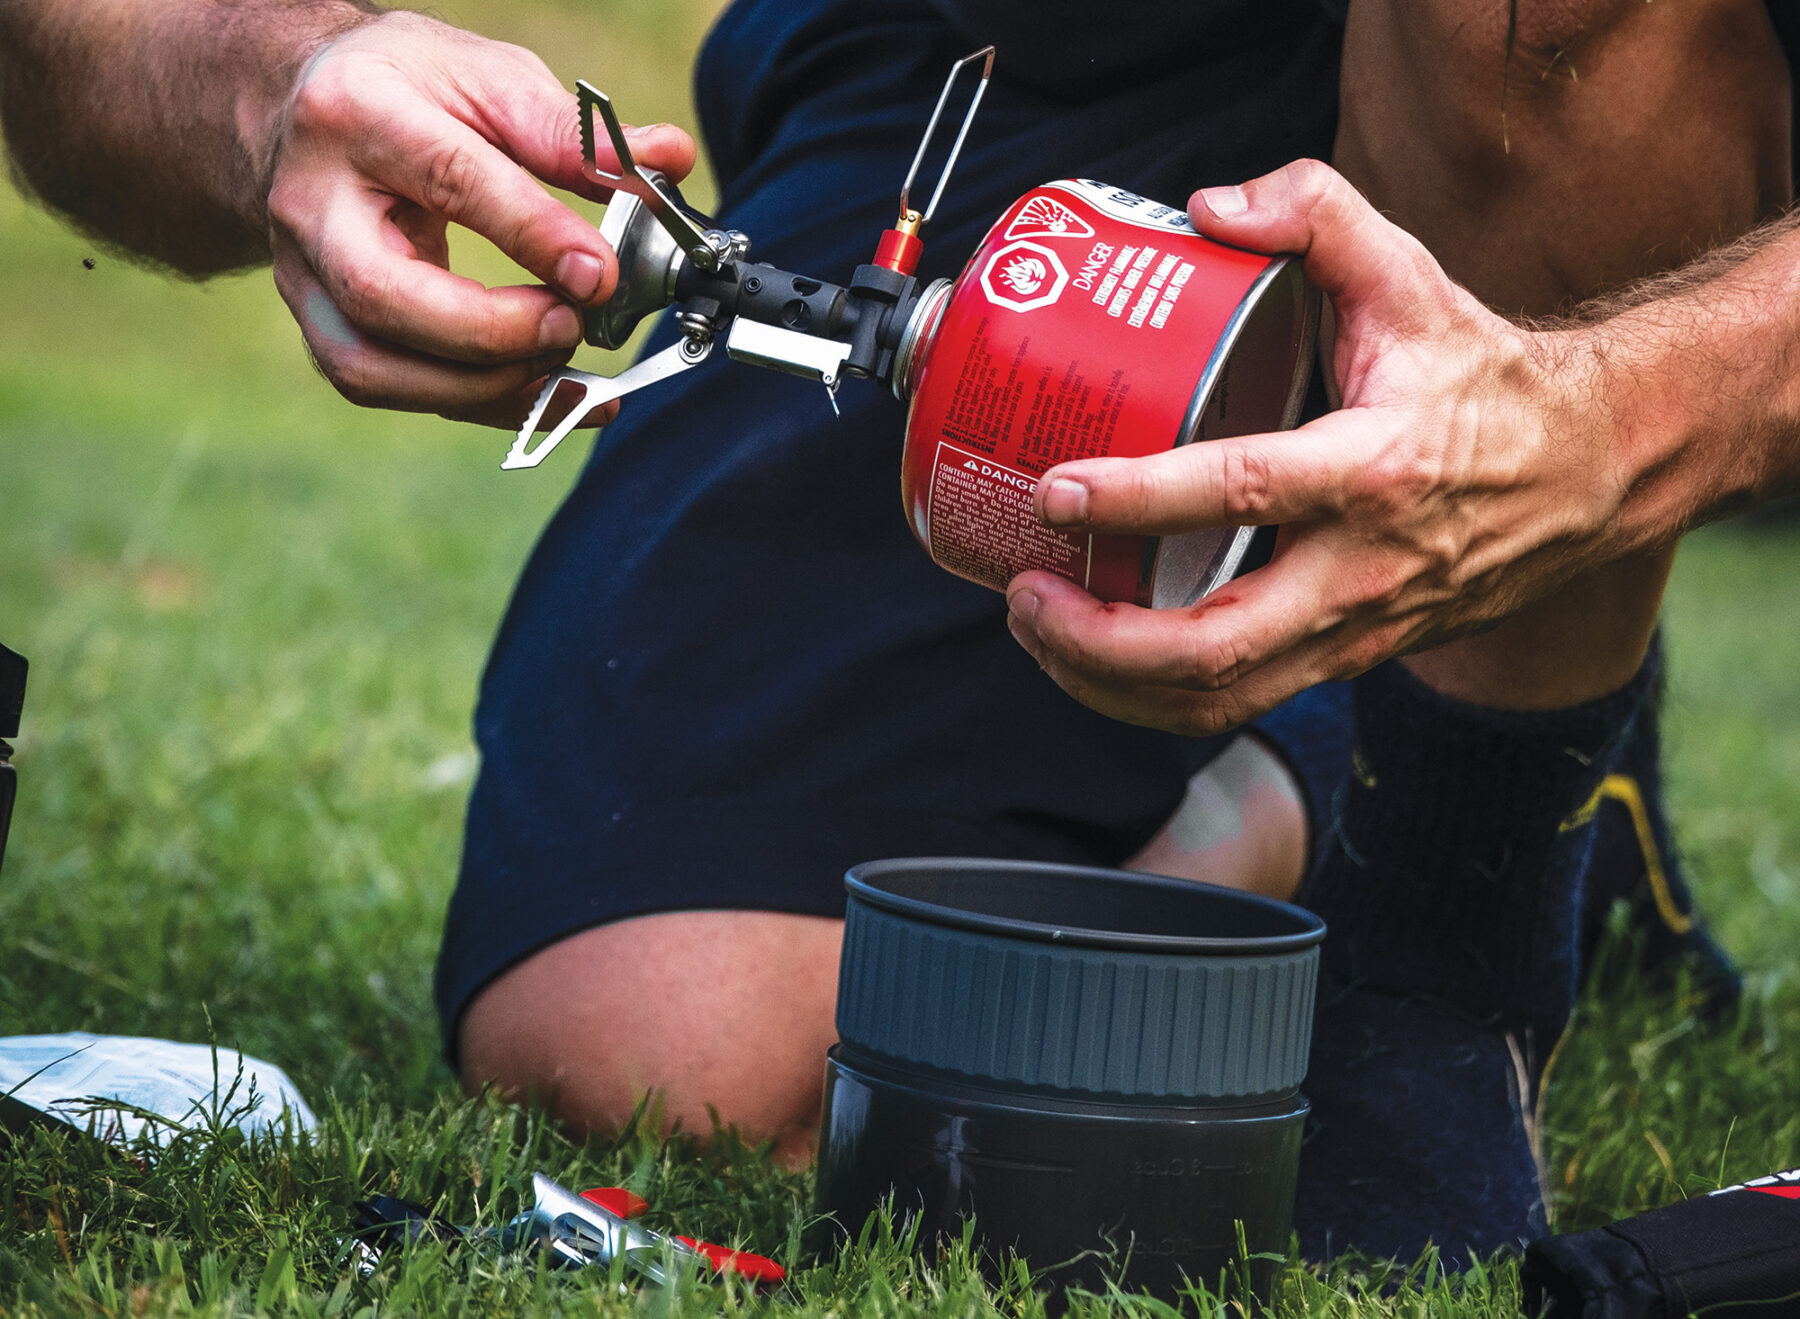
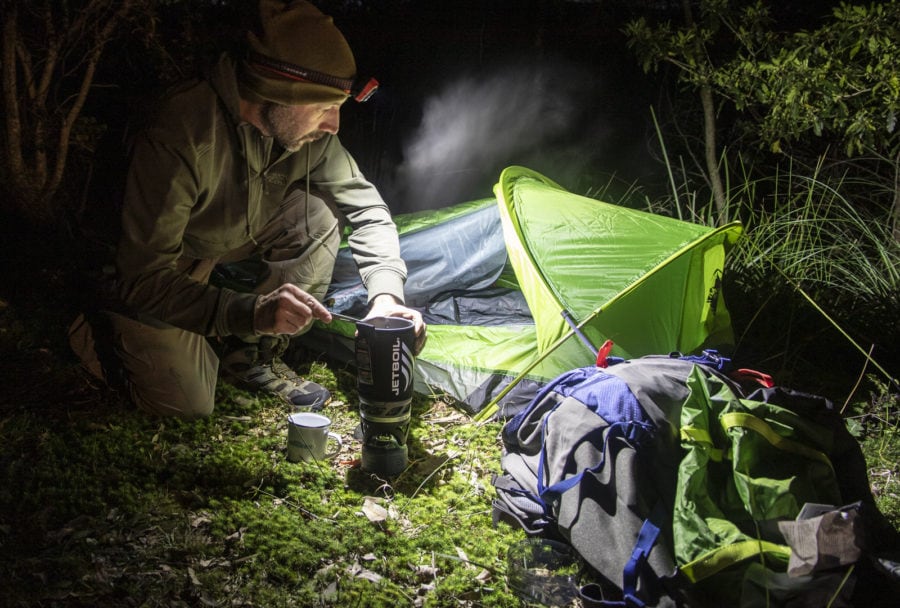
Most human-powered adventures in Australia take place below the tree-line, which means you will be either cooking simple meals or boiling water, making the gas canister-based stove probably the best option. Canister stoves can include fuel types such as propane, butane and isobutane (or a mix of these) and are generally very quick to bring water to the boil; the Jetboil Flash is a great example of this stove-type. Be aware, however, that these fuel types boil at different temperatures, which will be a consideration if you’re heading for colder environs; butane boils at -0.5C, while propane boils at around -42C – a big difference. For this stove type, the canister generally screws into the burner itself and they are set up in an upright position.
There are also canisters that connect via a hose to the burner, aiding stability and allowing users to invert the canister for better performance in colder conditions. Plus, with the burner on a small stand, you gain a more stable base if you bring along a pan, for example. This stove-type offers excellent simmer control as well. A notable disadvantage of those all-in-one canister stoves that have a ‘tall’ pot attached when in use, though, is their stability. Relying on just the canister (or, in some cases, a small attached stand) as a base and then having all that weight of water/food in a vertical pot, means they are very top-heavy and easy to knock over if not being attentive.
Liquid-fuel stoves are more ‘cold-friendly’ and (depending on the model) can burn different fuel types, too, with Coleman, MSR and Optimus some of the many brands that produce a range of these stove types. The liquid-fuel stoves comprise a pump, tank, fuel hose, burner and a valve to control output, with the burner connected to the fuel bottle via the hose, thus the burner provides a more solid base for larger pots and pans. Operation is more complex than the screw-in canister stove, whereby you use the pump to pressurise the fuel inside the fuel bottle, forcing it down the hose to the burner.
Fuel used is most commonly Shellite (also known as ‘white gas’), but some units can use kero, diesel or petrol, which is super handy in more remote areas where gas canisters (or Shellite) may not be available. Some liquid-fuel stoves are designed to just blast out fast heat to melt snow, whereas others offer reasonable simmer-control, allowing the camp chef in you to expand your menu somewhat. One thing to note with the liquid-fuel stove is that it will take up more space in your pack/bikebag/drybag. For hikers and paddlers, this may not be a big (excuse the pun) issue, but for bikepackers it may be.
Alcohol-fuel stoves are another option, with methylated spirits the most popular of this fuel type (the Trangia stove is an iconic example). These stoves are very basic in operation (you simply light up the small amount of fuel in the ‘bowl’), and this simplicity makes them incredibly reliable. This stove type is also very stable, due to its pot/base all-in-one design, although it is bulkier/heavier than gas-based options. You will need to be more patient, though, the alcohol fuel stoves take longer to boil water/cook food than a canister or liquid-fuel stove. Plus, cold weather can stretch that cooking time out even more.
Camp cutlery
Pots, pans, cups bowls and cutlery – there are myriad options for the lightweight chef.
Stainless steel is the heaviest pot/pan material but a great conductor of heat. It is also the most robust, by far. Titanium is the lightest and most expensive, while offering decent heat conduction and, if you are adamant you want metal cutlery – and can afford it – this is the best option (and still incredibly durable). The best compromise for weight, performance, cleaning and cost is aluminium, coated with a non-stick material. There is also a wide variety of collapsible cutlery on the market – usually made from silicon – and this is fantastic for the lightweight camper. For utensils, such as knives, spatulas, forks, etc., any of the above materials work well but also consider synthetic alternatives – they are tough, durable and lighter than their metal-based equivalents.
Light your way
For such a simple device, the head torch is available in a plethora of lightweight designs. Manufacturers have approached lighting technology in a variety of ways but the constant is the use of Light Emitting Diodes (LEDs) as the light source. Some torches offer one large LED, usually with a variety of lighting levels and a spread and/or pencil-beam as the light’s shape. Others combine small, (5mm) LEDs with a larger high-intensity LED, along with modes allowing the user to switch between small or large lights. Steer clear of those with a separate power pack; most of today’s compact head torches provide more than ample campsite illumination, without the added weight, bulk and complication of a separate power pack.

For those only using their head torch for close-in lighting (say, around camp/when cooking) a torch with standard 5mm LEDs will suffice. If you plan on doing a lot of night-time exploring around camp, opt for a head torch that includes a high-power LED of at least 1W (preferably 3 to 5W) but also has standard LEDs so you can switch between light levels. Most head torches offer a reasonable degree of water resistance but, if you can, opt for a waterproof model. The type of battery can vary. Most use alkaline batteries, while other, often more powerful, models (generally – but not always) with an additional power pack use a Lithium battery, which has the inconvenience of needing to be recharged – not easy in the bush.
Footwear
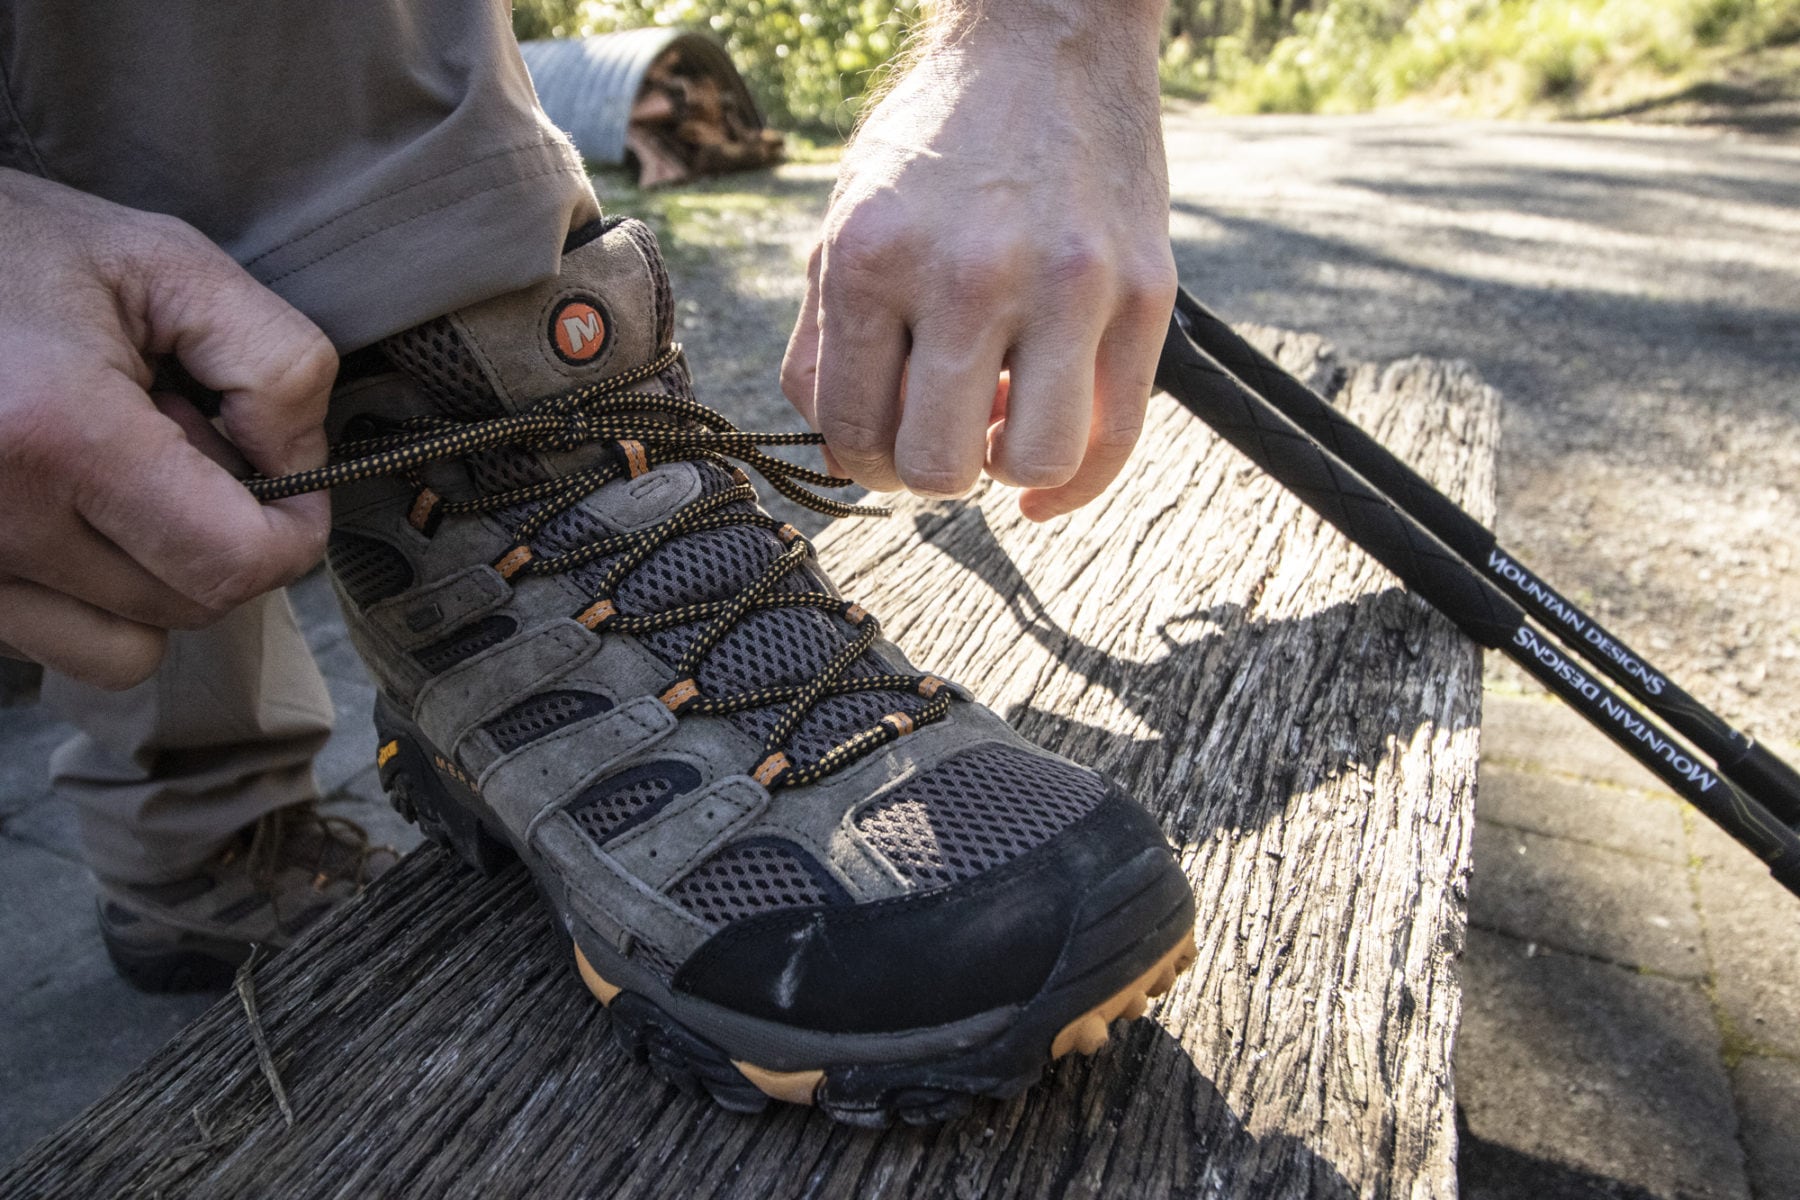
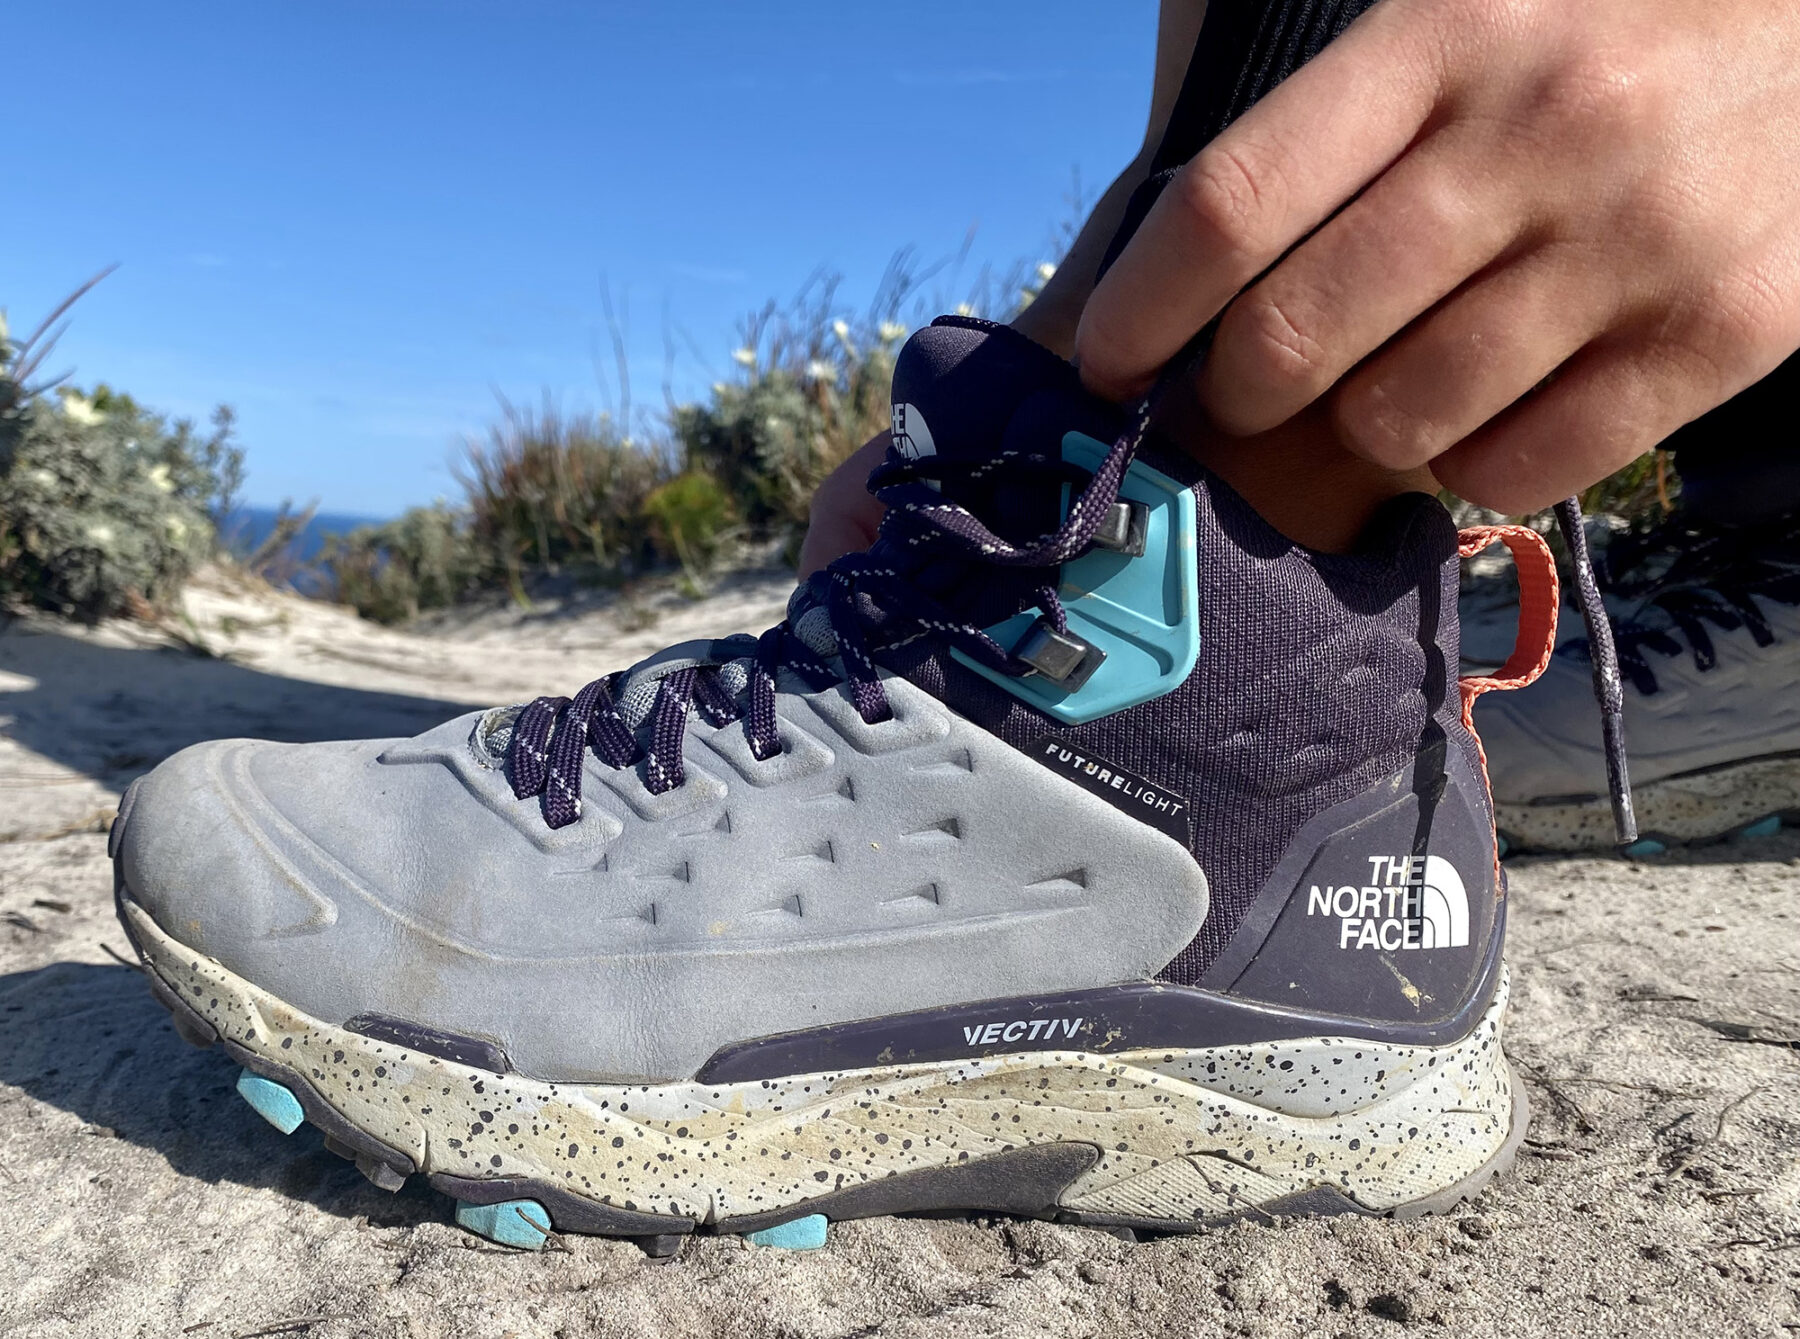
Softer nubuck or suede leather, hybrid leather/synthetic, or straight synthetic boots are all great options for hiking, with the final choice governed by the terrain you will be walking through/on. Due to improved manufacturing techniques, people are getting nearly the same amount of wear out of these (much) lighter boots, without a leather boot’s inherent weight penalty – or the lengthy wearing-in period of full leather. Just be sure that, no matter which material(s) option you go for, you try as many different brands and models on as you can before throwing down your hard-earned. An ill-fitting boot can destroy a hike through blisters and/or muscular aches.
For paddlers, it’s all about keeping your feet dry – not easy when you’re in a sea kayak or canoe and in and out of the water… There are a number of ‘water shoes’ on the market that promote fast-drying or ultra-grippy soles, but for the best bang for your bucks, a pair of Dunlop Volleys are close to ideal (and still quite popular with paddlers today). These ‘old’ shoes provide excellent grip on wet and slippery terrain and are light in weight. They will take a wee bit longer to dry out compared to the modern all-mesh water shoes (with additional drain holes in sides, on the sole, etc.) but are seriously good bang for your bucks if on a budget. Add in an additional pair of around-camp runners or sandals stored in a dry-bag, and you’re good to go.
If you’re on your pushy, it’s about finding a shoe that is both comfortable on the bike when pedalling, but still enables you to walk around when off it. That way, you immediately save the weight of a second pair. Companies such as Five Ten and Shimano offer both clip-in and flat-pedal shoes that can do double-duty. If you do want to give your feet an airing, there are a number of ultra-light sandal/thongs on the market that pack down nice and compact.
Layering-up for lightweight camping
Having the correct layers is an absolute must for any camping trip, no matter how you get yourself to the campsite. Whether a hiker, cyclist or paddler, the ideal layer system for the day’s activity is a base/thermal layer against your skin; a mid/thermal layer over that and, dependent on conditions, a wind/waterproof outer layer (also termed an outer shell).
Wearing multiple layers means you are more easily able to regulate your body’s temperate, reducing the chances of overheating, or becoming too cold. Your base layer should be close fitting and highly breathable, as well as effective at transferring moisture (known as ‘wicking’), in the form of your sweat, away from your body and to the outer garments, so as to keep your body temp stable. The mid/thermal layer is the one you will be removing or adding the most during the course of a day, dependent on how warm/cold you are at any particular time, so it does the lion’s share of retaining wearer warmth.
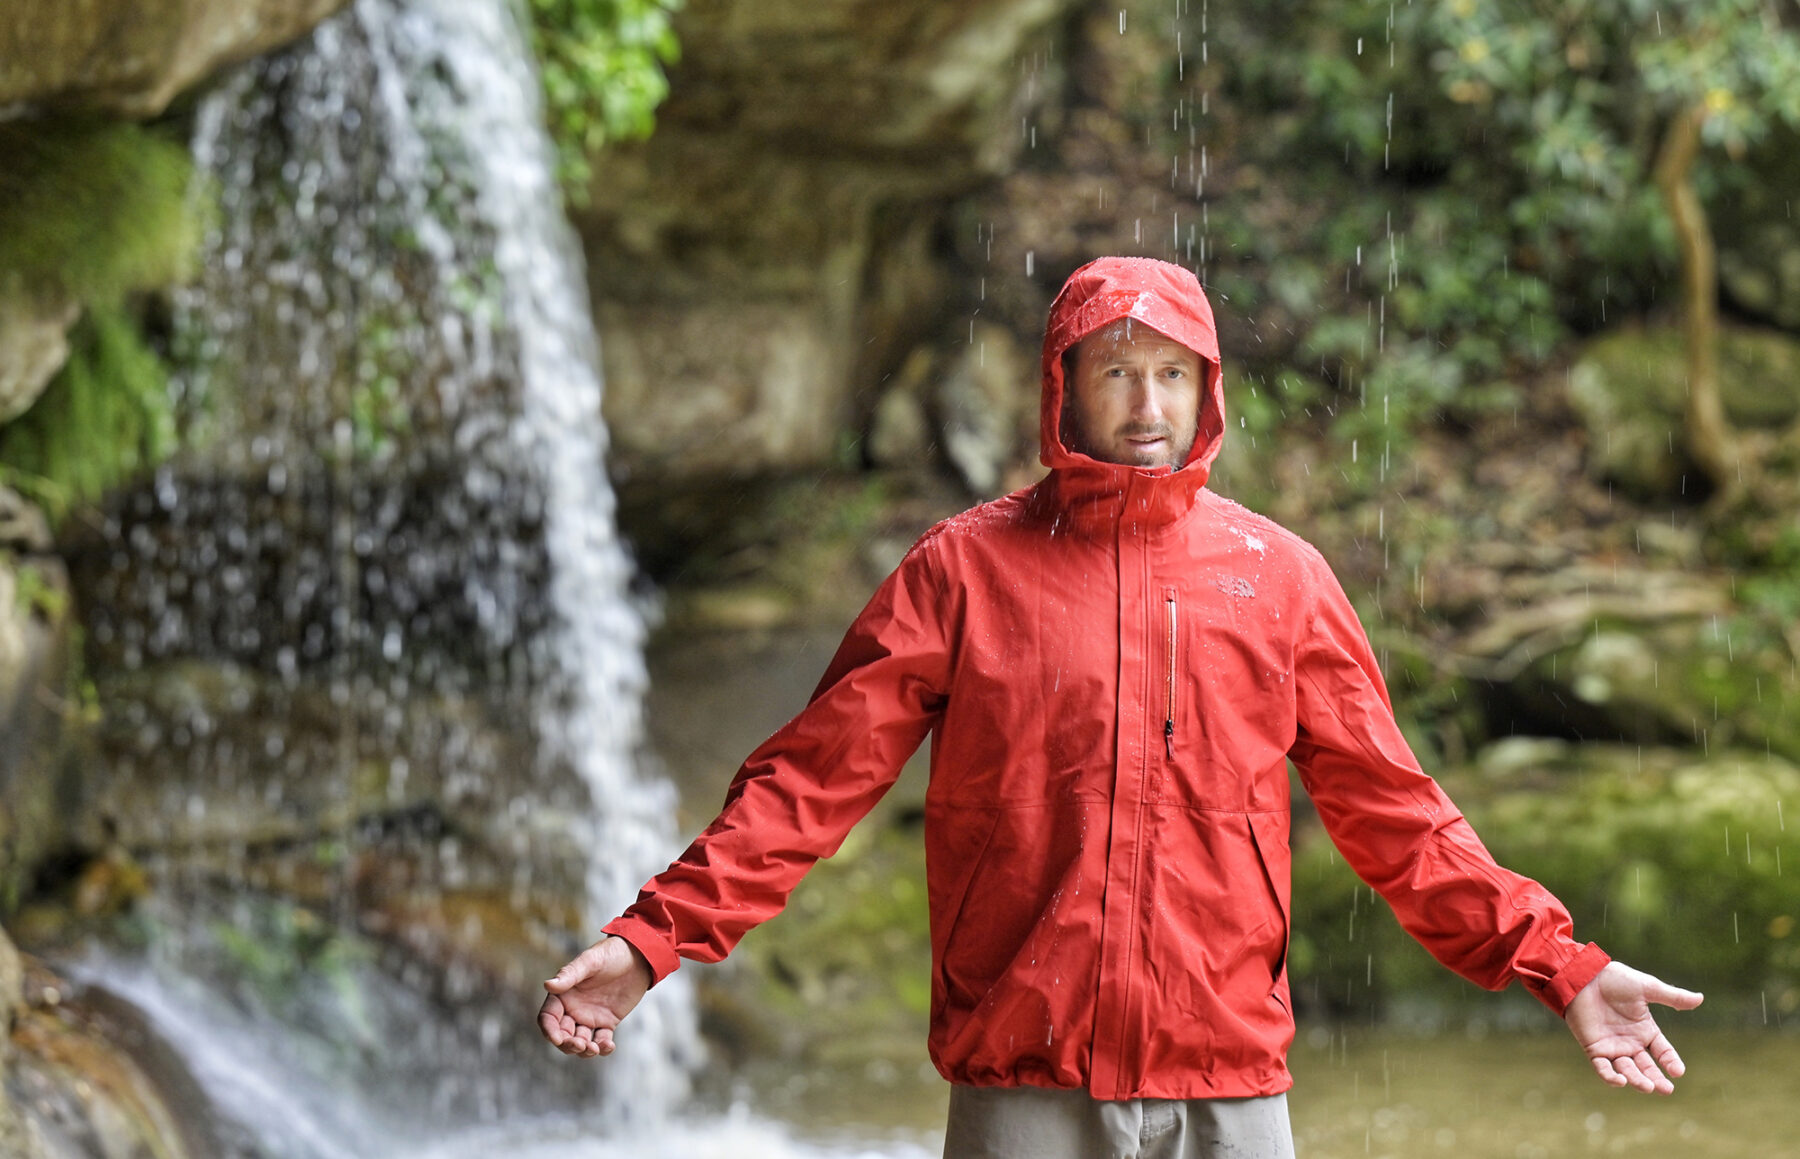
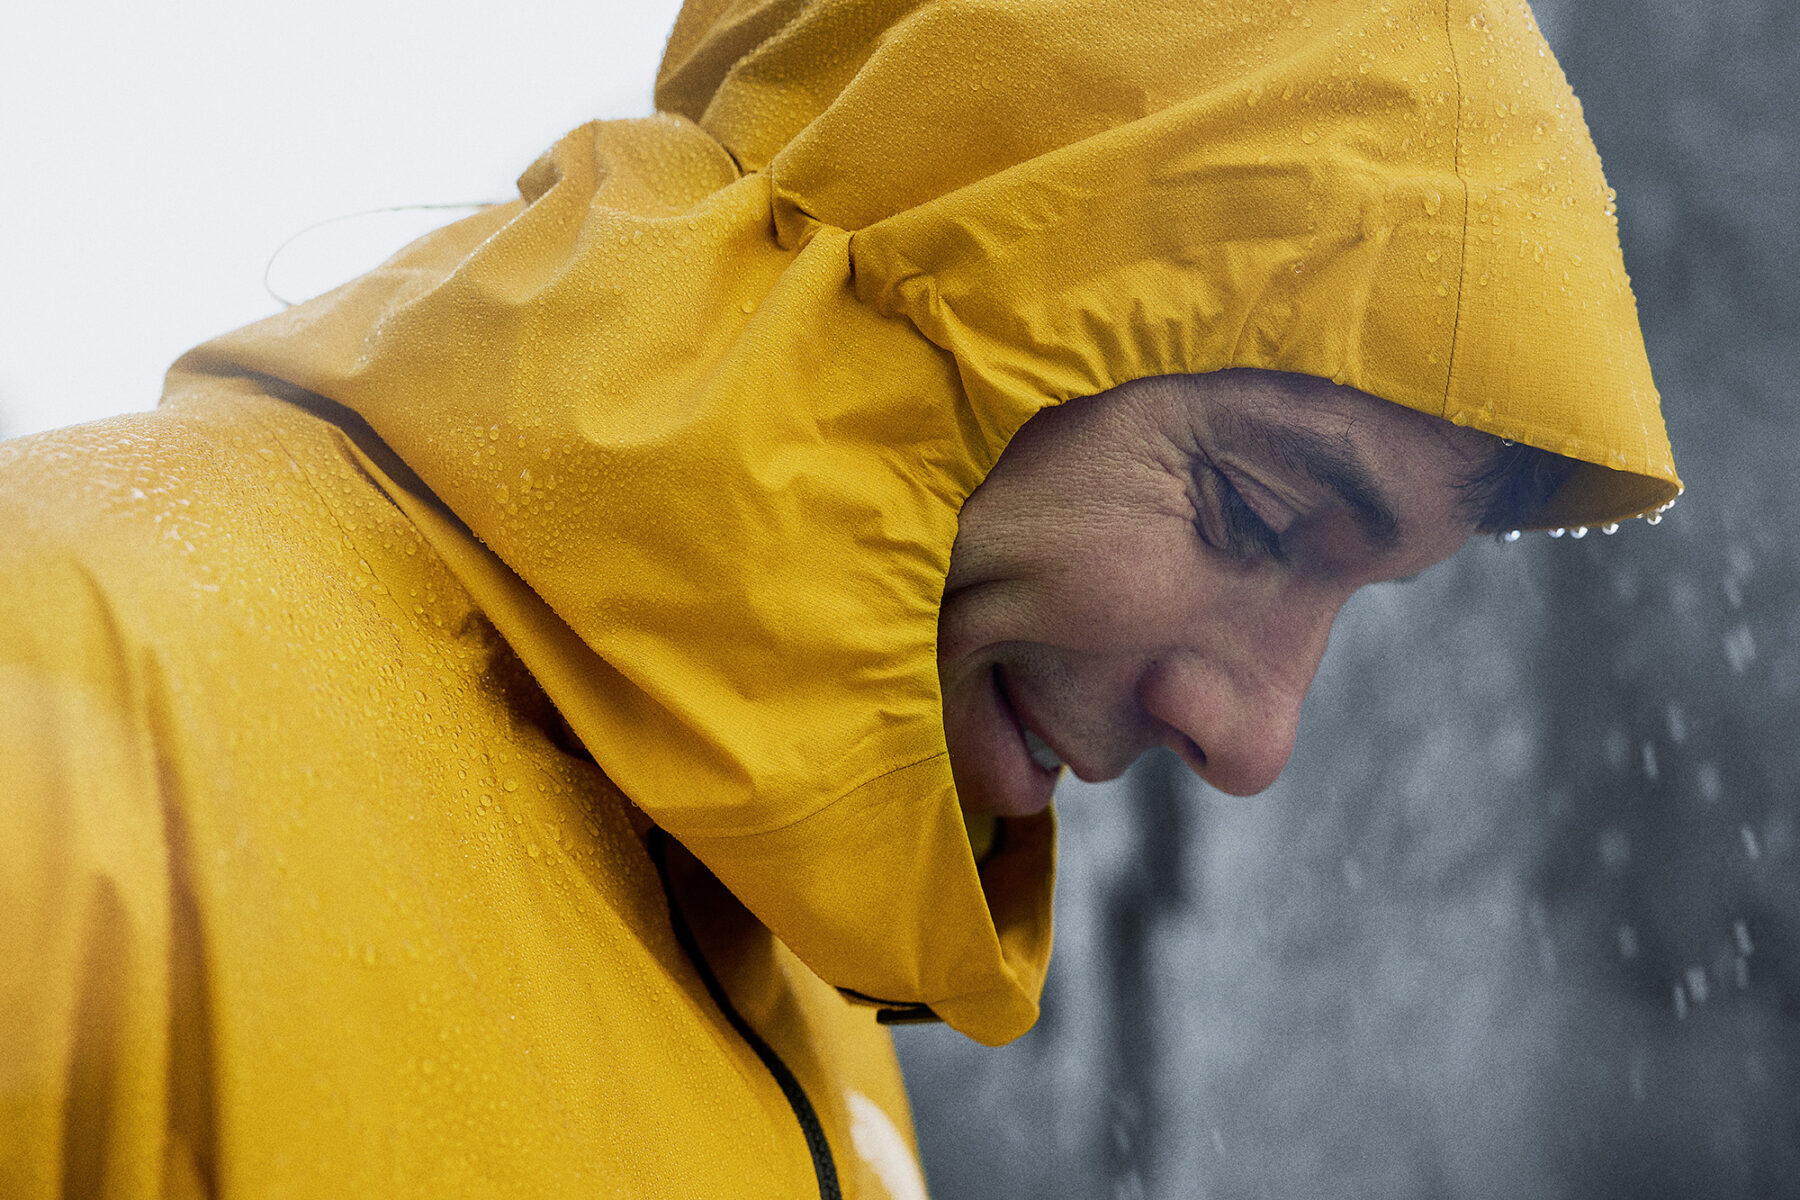
The term “outer layer” is used to describe an outer shell garment, primarily a water/windproof jacket. The outer layer is your main safety net when it comes to rain and wind, whether during the hike/paddle/ride, or at camp. Eliminating the impact of these weather conditions on your body ensures you stay far more comfortable – and don’t get too chilled, which can lead to hypothermia. And make sure your socks stay dry and/or warm at least (merino is the go here). There’s nothing worse than mooching around camp with cold/wet feet. Always pack a spare pair or two of socks for this.
One final essential, and in all but the middle of summer, we’d still suggest packing a compact down/synthetic fill jacket for lightweight camping. It sounds like overkill in Australia, but these items are surprisingly light in weight and pack down small while offering protection not only against the cold but also wind and (if waterproof) to rain. Plus, if you don’t use it for that, it’ll still be useful as a pillow!
Other around-camp apparel will include long pants and clean socks, base- and/or mid-layer, and a sunhat or (if colder) a beanie. With the use of both natural (merino) and synthetic wonder-materials, you can take a bare minimum of layers with you for lightweight camping and still be comfortable. Speaking of material matters…
It’s a material world
Merino wool or synthetic fibre – these are the two material choices for outdoor clothing, and each has its advantages and disadvantages. Merino wool has become the favourite of many, and not just because it is seen as “natural”, renewable and stylish. Merino wool fibre is highly breathable, so it regulates body temperature very well. It is also odour-resistant, to the point where merino tragics spruik their days or weeks of wearing without washing! Merino’s other big advantage over synthetic is that it still retains heat when wet and is also fire-retardant. The trade-off with merino is that it is heavier per gram of fibre, more expensive and, because it can soak up close to 30 percent of its own weight in moisture, can become heavy when wet. It is also less durable than synthetic – although at least holes can be re-darned. The final slight negative: it costs notably more.
Synthetic fibre (polypropylene is a common example) balances the ledger against merino by being lighter in weight per gram and, most importantly, faster drying. It also trumps merino regarding moisture transfer (wicking of sweat, rather than absorbing it) and, when dry, provides great warmth for less weight (think lightweight fleece). Plus, there are now synthetic garments on the market that offer anti-microbial treatments to reduce that “poly pong”. You will also pay less for a synthetic-fibre garment (in general) compared to an equivalent merino. Negatives are, when wet, there’s minimal heat retention (the material feels very cold against your skin when wet), and it is flammable.
Synthetic still rules when it comes to a waterproof/breathable outer shell, with waterproof membrane fabric technology, such as Gore-tex and The North Face’s FutureLight two excellent examples. This technology is featured in ever-lighter outer shells, too, meaning you do not sacrifice protection from the elements with that lighter load.
If you look at your layers as a system and buy items accordingly, you won’t go wrong. Merino products will cost you more – and are heavier in your pack – but offer plenty of warming and comfort bang for their bucks. If you’re on a more limited budget, the odour-resistant synthetic-fibre outdoor clothing now available is a smart purchase.
Lightweight camping: The final word
A focus on light and robust gear selection, followed by some shorter hikes/paddles/rides are the best way to get comfortable with your lighter kit. A lighter load means you can travel more distance each day of your adventure, and you’ll be amazed at how much ‘fresher’ you will feel at each day’s end as a result of carrying a lighter load. The perception of lightweight gear being overly fragile will soon be a distant memory as you come to trust and enjoy the freedom – with no drop in function – that lightweight gear allows.