Touring on bicycles is far from new, and neither is venturing off-road to do so. Indeed, Australia has a strong history of bike-borne explorers, dubbed the “overlanders”, who criss-crossed this vast country in the late 19th and early 20th centuries. Since then, jumping on your bike and heading into the great unknown has been popular, world-wide. So, where has this ‘new’ activity come from, and why has it got outdoor enthusiasts so excited? Well, that’s actually pretty simple to answer: bikepacking borrows partly from the North American term ‘backpacking’, used to describe self-supported multi-day/long-distance hiking.
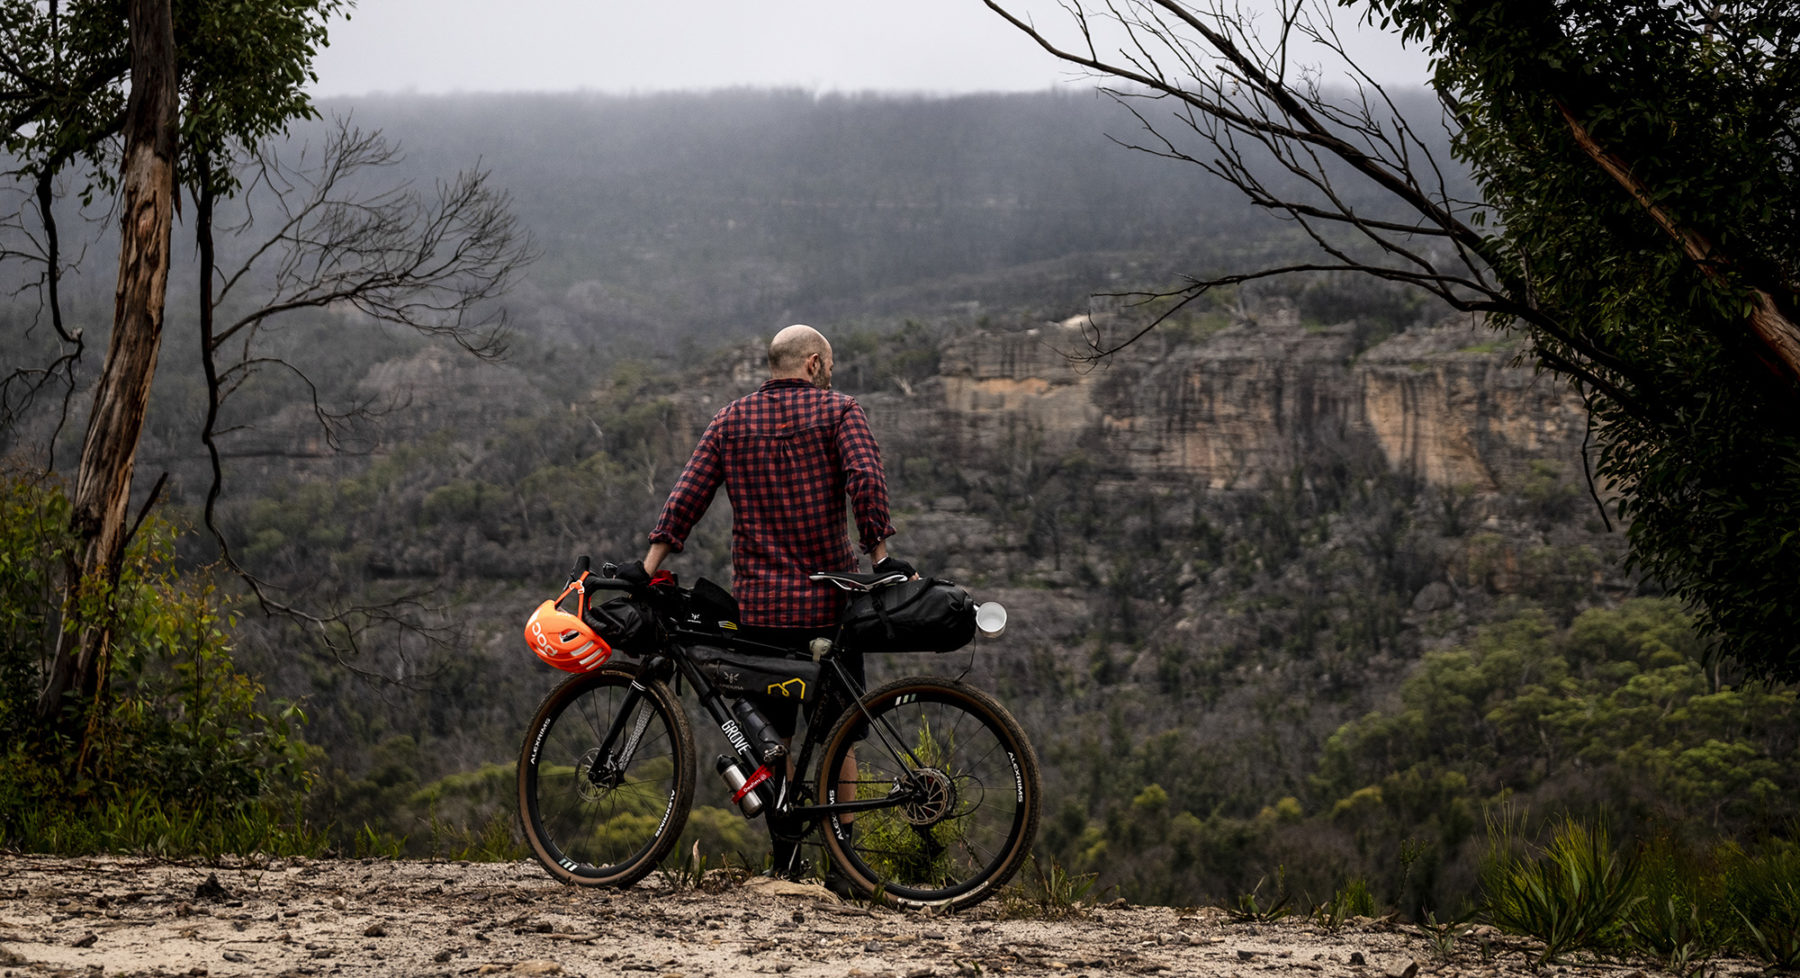
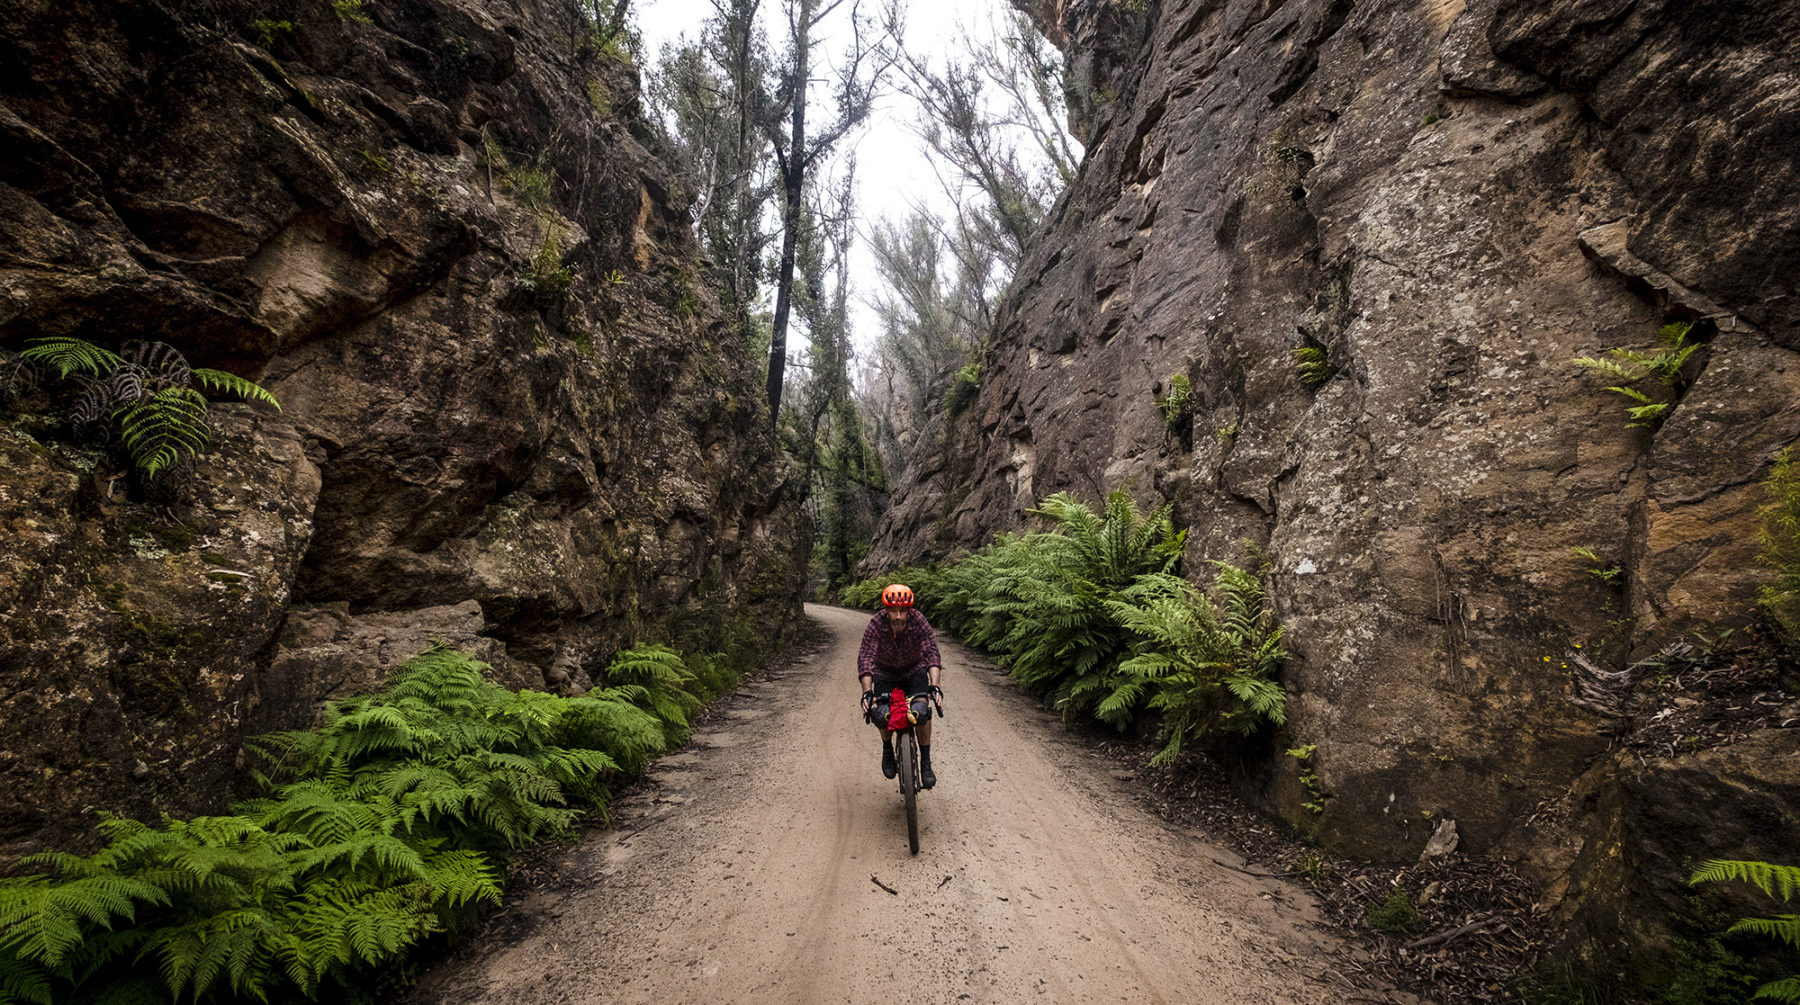
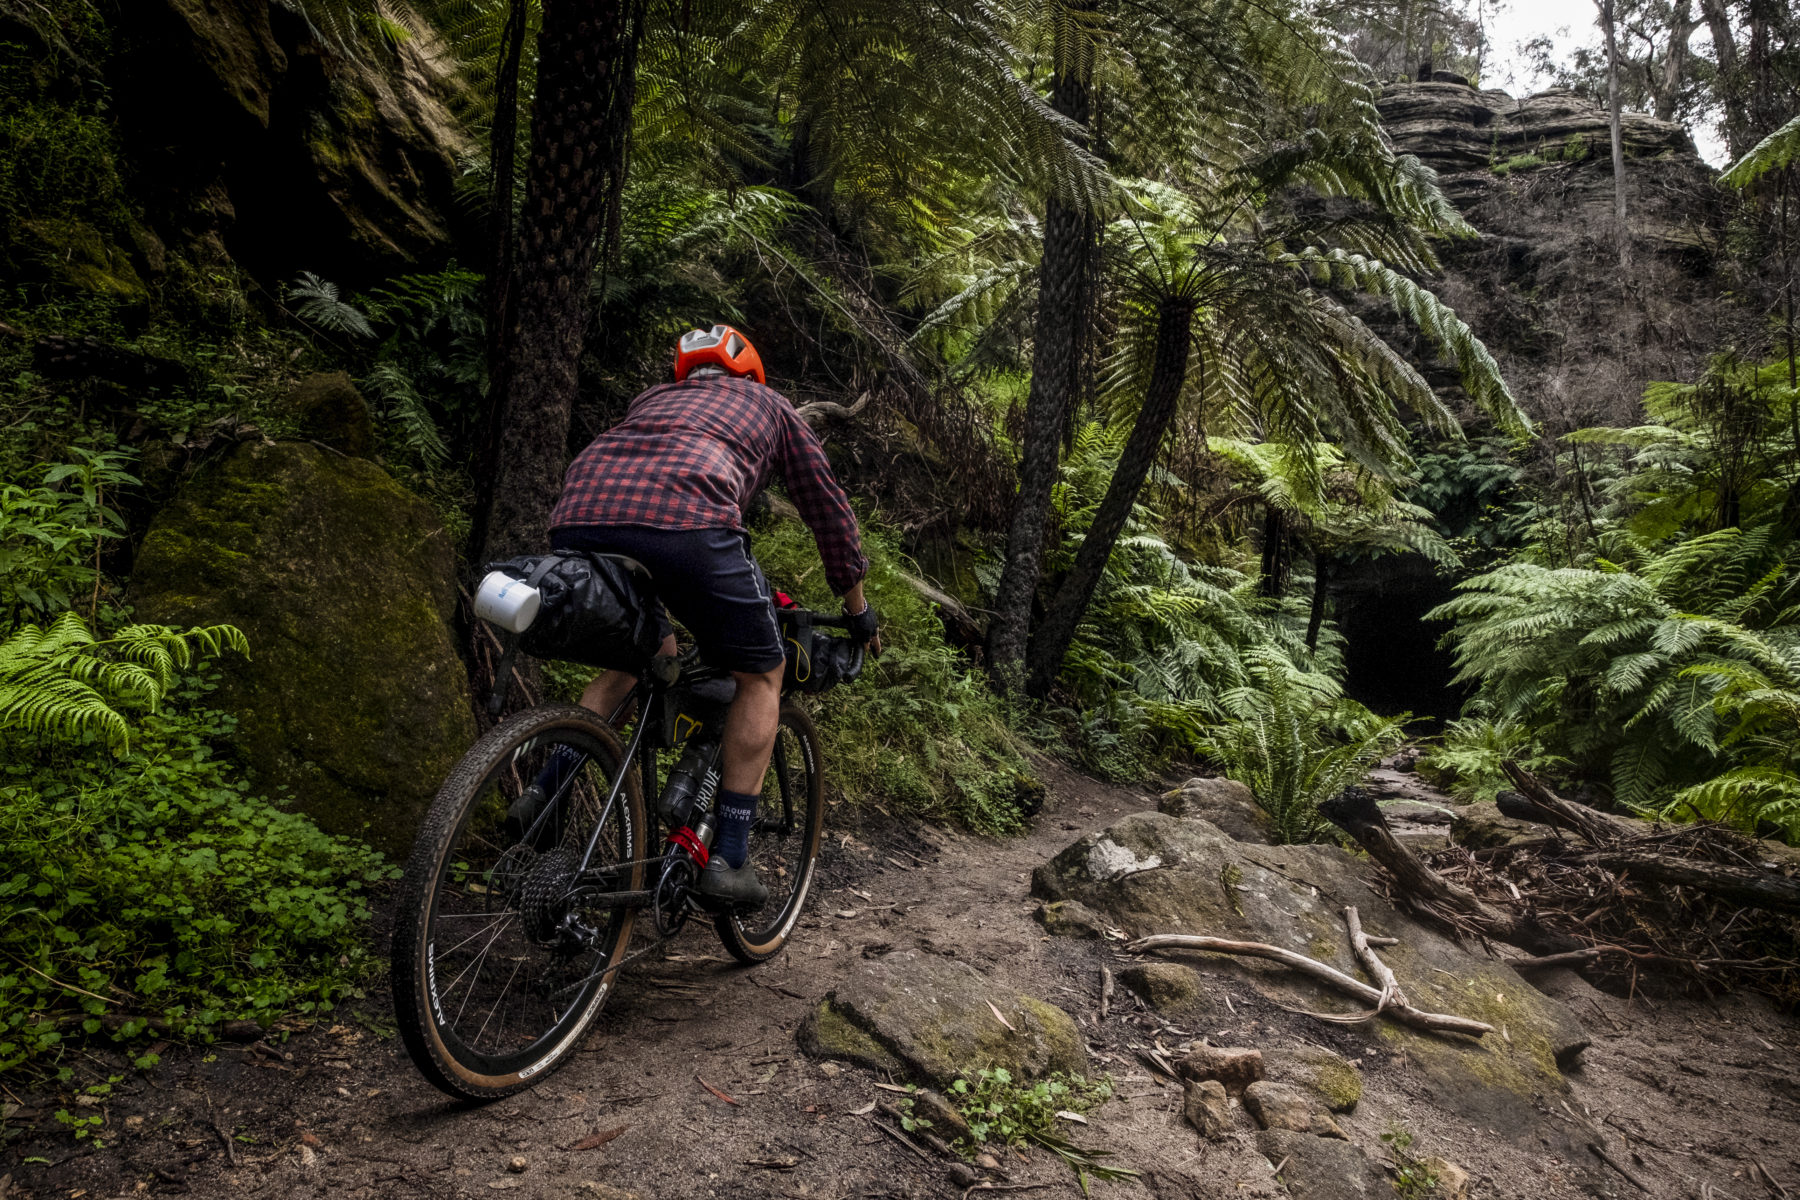
To pare it down, bikepacking is the bicycle-based equivalent of ‘backpacking’, where you load all your required food, shelter and gear on to your bike (as compared to in a backpack), in specialised bags that attach to your frame, your seat-post, handlebars and (in some cases) your front forks, and venture into the wilds. Bikepacking takes you further, following fire-trails, stock routes or – even more fun – singletrack, through wild and remote parts of the world, camping along the way and covering more distance than you’d ever hope to if you were hiking.
Yeah, it’s awesome fun. In fact, we reckon – with honesty borne from our own (and others’) experiences – that it’s close to the most fun you can have on a bicycle or, indeed, in the outdoors, full-stop. Impressively, bikepacking is easily accessible to anyone that can ride, and it isn’t that hard to get a set-up sorted that allows you to explore. Happily, that means that, even though there is some bikepacking-specific gear you will need, it is not as much as you think, thus keeping costs down. And yep, that includes the bike…
THE BIKEPACKING MACHINE
“Run wot ya brung” is the pared-down explanation as to which bike is ‘best’ for bikepacking. The simple fact is that there’s no one ‘best’ type of bike; it will depend on the route(s) you plan on riding. Generally, the bikepacking rig of choice is down to two or three types: the hardtail mountain bike, the gravel bike, or the dual-suspension MTB, and made from either steel, aluminium or carbon-fibre.
Steel is probably the most popular frame material for bikepacking-specific bikes. This is due to its inherent strength, ride quality and ease of repair. Carbon-fibre brings plenty of strength but also fragility, with sharp impacts having the ability to ‘crack’ a frame – and it is not easy (and is very expensive) to repair. A carbon-fibre frame will be lighter than a steel or aluminium equivalent. Aluminium is light, and it is cheap, but you will cop a jarring ride and it is not as easy to repair as steel. Titanium combines the best of steel’s forgiving ride, with the light weight of aluminium and carbon-fibre and will last nearly forever. But it’s bloody expensive, and very difficult to repair.
The gravel bike
While a gravel bike might cut a similar silhouette to a road bike, the presence of drop bars is just about where the parallels end. Gravel bikes have longer wheelbases for stability, far bigger tyre clearance and a more upright riding position with wider bars as comfort takes precedence over aerodynamics. You’ll also find more water bottle mounts and rooms for fenders and frame bags. As with the hardtail MTB, the gravel bike frame can be made from steel, aluminium, or carbon-fibre. For the well-off, there are titanium-frame options.
For a lot of riders, the gravel bike is the ideal bikepacking rig; for most Aussie routes, you are riding on dirt roads and fire-trails in the main and these lightweight mile-munching machines, with their 700c wheels size ( you can use wider 650b hoops as well) are perfect for that. And, you can definitely still rail singletrack on them – yeah, it’s a hoot.
The hardtail MTB
A hardtail mountain bike, whether it is one with rigid front forks or front suspension forks, is a popular bikepacking rig. These, along with gravel bikes, offer the most frame ‘real estate’ for your bike-bags (more on these later) thanks to having no space taken up on the frame by a rear shock. No rear shock also means they are relatively simple mechanically, too. If the majority of your bikepacking is fire trails and singletrack, they offer a more comfortable and safer ride, due to their construction, than, say, a gravel bike.

They are equally at ease on sealed and unsealed surfaces. The MTB’s more upright riding position and wide tyres aid comfort over longer distances, and you can add bar-ends to your handlebars for more hand-position options.
The dual-suspension MTB
The ‘dually’ may seem a surprise choice as a third rig option. With the complexity of an additional shock, plus the associated links and bushes and the fact that the rear shock robs the frame of bag-space, you’d think it’d be ‘too much trouble’. However, for gnarlier adventures – NZ’s Paparoa Track and Old Ghost Road are two examples – where the terrain is uneven, loose, steep and rocky, the ability of the dual-suspension MTB to deliver a comfortable and safe ride is its main party trick.
Yes, you will lose bike-bag space, but you still have the usual bag options, they will just have less volume, and there are also some nifty cargo-carrying options, such as Aeroe’s Spider Rear Rack, Handlebar Cradle and accessories (see our review of this set-up, here). As long as your bike has been well serviced, there’s no reason that a dual-suspension MTB of yours can’t do double service It’s all about compromise in bikepacking.
Wheels and tyres for bikepacking
Wheels and tyres on your bikepacking rig are governed, in the main, by what type of bike you opt to use. For MTB-based riders, the two most popular wheel options today are 27.5-inch (also known as 650B) and 29-inch. You will still find hundreds of thousands of secondhand MTBs with the ‘old’ 26-inch wheel and, if your bikepacking goals tend to global, out-of-the-way destinations, a 26er is a viable option, owing to the fact that wheel size was the only MTB size up until the early 2000s. Since then, both 29 and 27.5 have become the sizes of choice, with 29-inch wheels the preferred of the two, owing to the larger rolling diameter and thus efficiency, at the slight expense (compared to 27.5) of nimbleness. Nearly all of today’s MTBs and gravel bikes run through-axles, rather than the old ‘quick-release’ systems, as this increases strength and stability of the wheel. For tyre widths, we’d recommend between 2.25- and 2.6-inch.

As mentioned earlier, gravel bikes come with the standard road size wheel – 700C (equivalent to a 29-inch wheel) – and these are great. The only issue with that larger (and thus faster) wheel size is if you wish to fit ‘fatter’ tyres for rougher trails. Luckily, most gravel bike manufacturers build their frames to also fit the smaller 27.5 size, thus opening up the choice of wider, high-volume tyres (over 40mm wide – even up to 50mm), ideal for your gravel bike on a particularly rough route.
A tubeless tyre allows more control over air pressure you run inside it, which can aid comfort and traction; a tyre with lower pressure will ‘fold over’ rocks and rough terrain more easily than one that is too firm.
One other tyre-related decision is whether you decide to run your tyres with inner tubes or opt to go the slightly more expensive route of tubeless tyres. A tubeless tyre allows more control over air pressure you run inside it, which can aid comfort and traction; a tyre with lower pressure will ‘fold over’ rocks and rough terrain more easily than one that is too firm. Plus, you reduce the chance of a puncture considerably with no tube in your tyre. The tubeless tyre works with the use of a liquid sealant that you put inside your tyre. If you cop a puncture, the sealant will usually do its job and seal that small hole. You will, however, need to bring a tubeless puncture repair kit (and know how to use it) as some holes may be too big and you’ll need to repair the tyre with a tyre plug or a patch, if the sidewall has been torn. We’d also consider it good practice to pack a spare inner tube in case the tyre plug does not work. It’s the ultimate ‘just-in-case’ scenario…
Drivetrain
With the chance of fast descents, long flat fast sections of trails and roads, plus the always-dreaded climbs, the correct gearing is key to a successful bikepacking adventure. Firstly, all road cyclists need to forget the ‘big gears’. And by that we mean bikepacking is little about speed and most about efficiency over long distances – and distances that include knee-killing ascents. Gravel bikes still may feature a 2x crankset, with a corresponding 10- or 11-speed cassette at the rear, for that optimal ratio spread. For simplicity, some gravel bikes (and most of today’s MTBs) will offer a 1×12 setup, where the front chain-ring is small (think a 34 down to 28-tooth ring), while the rear cassette features what is jokingly referred to as ‘the dinner-plate’ (think 50T to 52T). These single-ring drivetrains go very close to matching the limits of a 2x drivetrain setup – especially in terms of those granny-gear ratios.
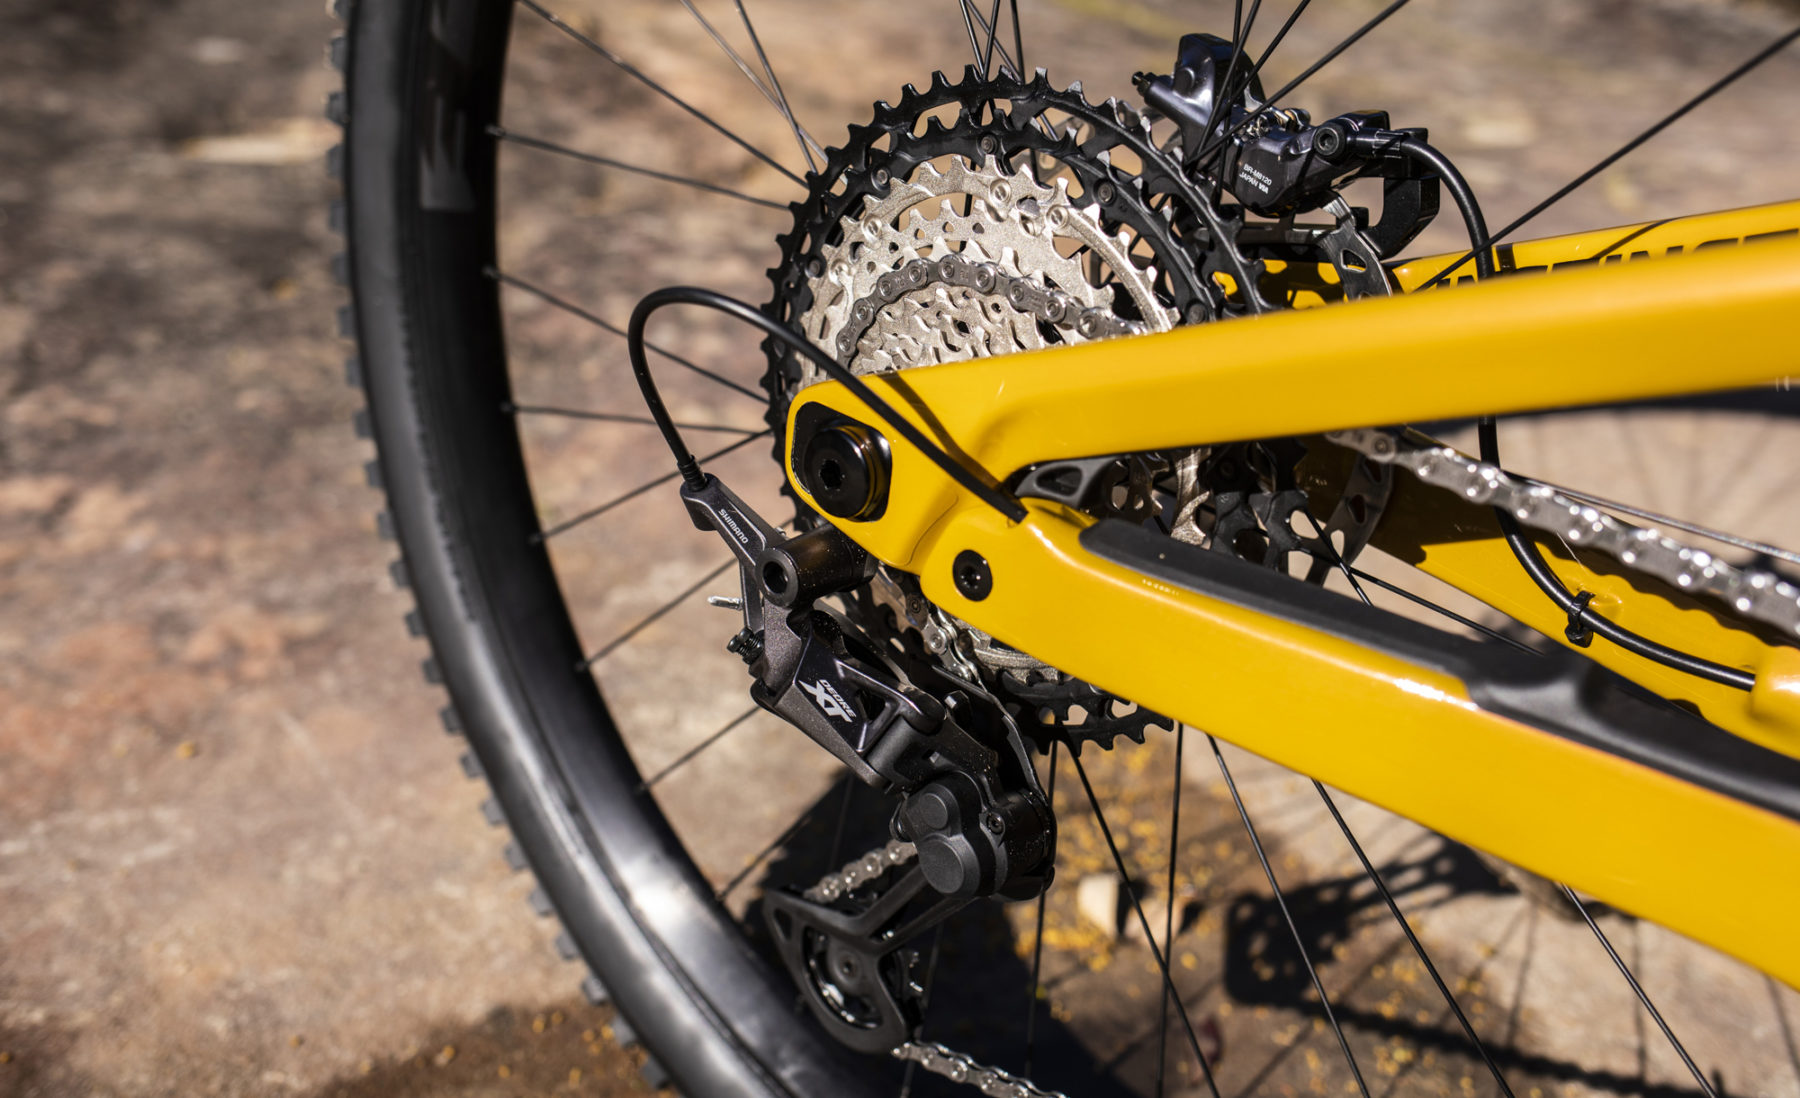
Drivetrain selection will, however, still come down to personal preference. A road rider will feel most comfortable with a 2x setup, whereas a mountain biker might go with a 1x system. Neither is better than the other, really. After all, if you do run out of gears – and legs – you can just walk up that hill! And before you ask: as much as we do love the efficiency and accuracy of electronic drivetrains, that added complexity makes it a little less appealing for more remote and long-distance bikepacking.
Brakes
It’s never a race when bikepacking, but reliable brakes are still a must. Bike stopping power today is very much the realm of the disc brake, with the main decision whether to opt for mechanical (cable-operated) or hydraulic. Mechanical discs offer the appeal of simplicity. You can store a spare brake cable in one of your bags and the pads used are pretty common. Negatives are a lack of power compared to their hydraulic brethren and there’s barely any modulation.
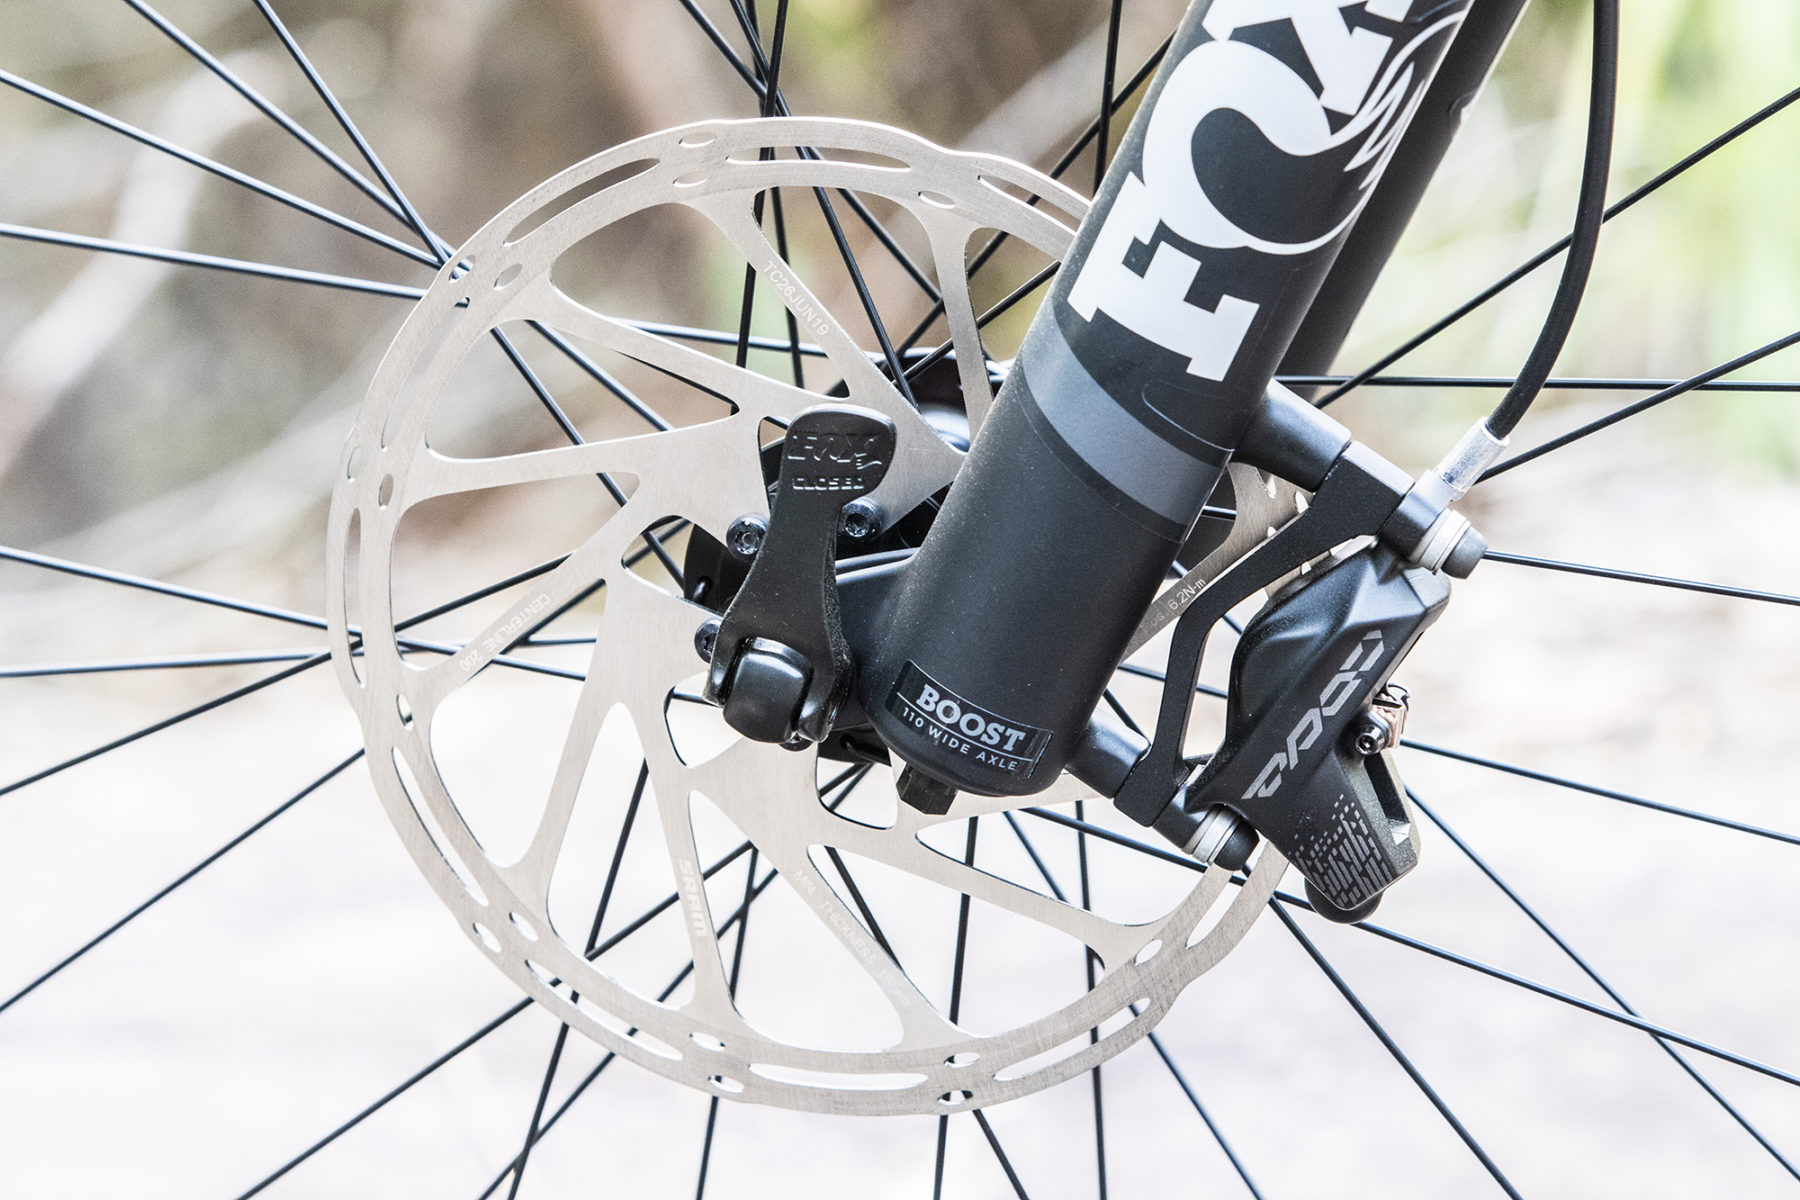
Hydraulic disc brakes operate exactly the same as motor vehicle brakes: the brake fluid is pushed (via your brake lever) through the hose and the resultant pressure activates small pistons in the calliper, which then squeezes the brake pads against the rotor. As well as better braking power and modulation, they require less user input: well set-up hydraulic disc brakes will require only one finger to use. Negatives are they need bleeding (albeit usually once a year); if you get a cable snagged and broken on a tree/branch, you’re pretty much stuffed; and if the fluid is contaminated or you cop a slow leak (which means you need to bleed them), you’d better be near a bike shop…
We’re a fan of both brake types when applied to different scenarios. For anything from an overnighter to a two-week-long trip, hydraulic brakes would be our choice. For that around Australia (or the world) expedition we’d go mechanical disc brakes.
THE GEAR
So you’ve sorted your bike its drivetrain, brakes and the wheel size. Next up is the gear, and selecting this correctly – whether it is the right combo of bike bags and/or the camping kit you’ll go with – is a key point to an enjoyable bikepacking experience. Thankfully, it’s not that painful; bike bags are, truly, a godsend for the two-wheeled off-road explorer, and here’s why…
How to carry your gear
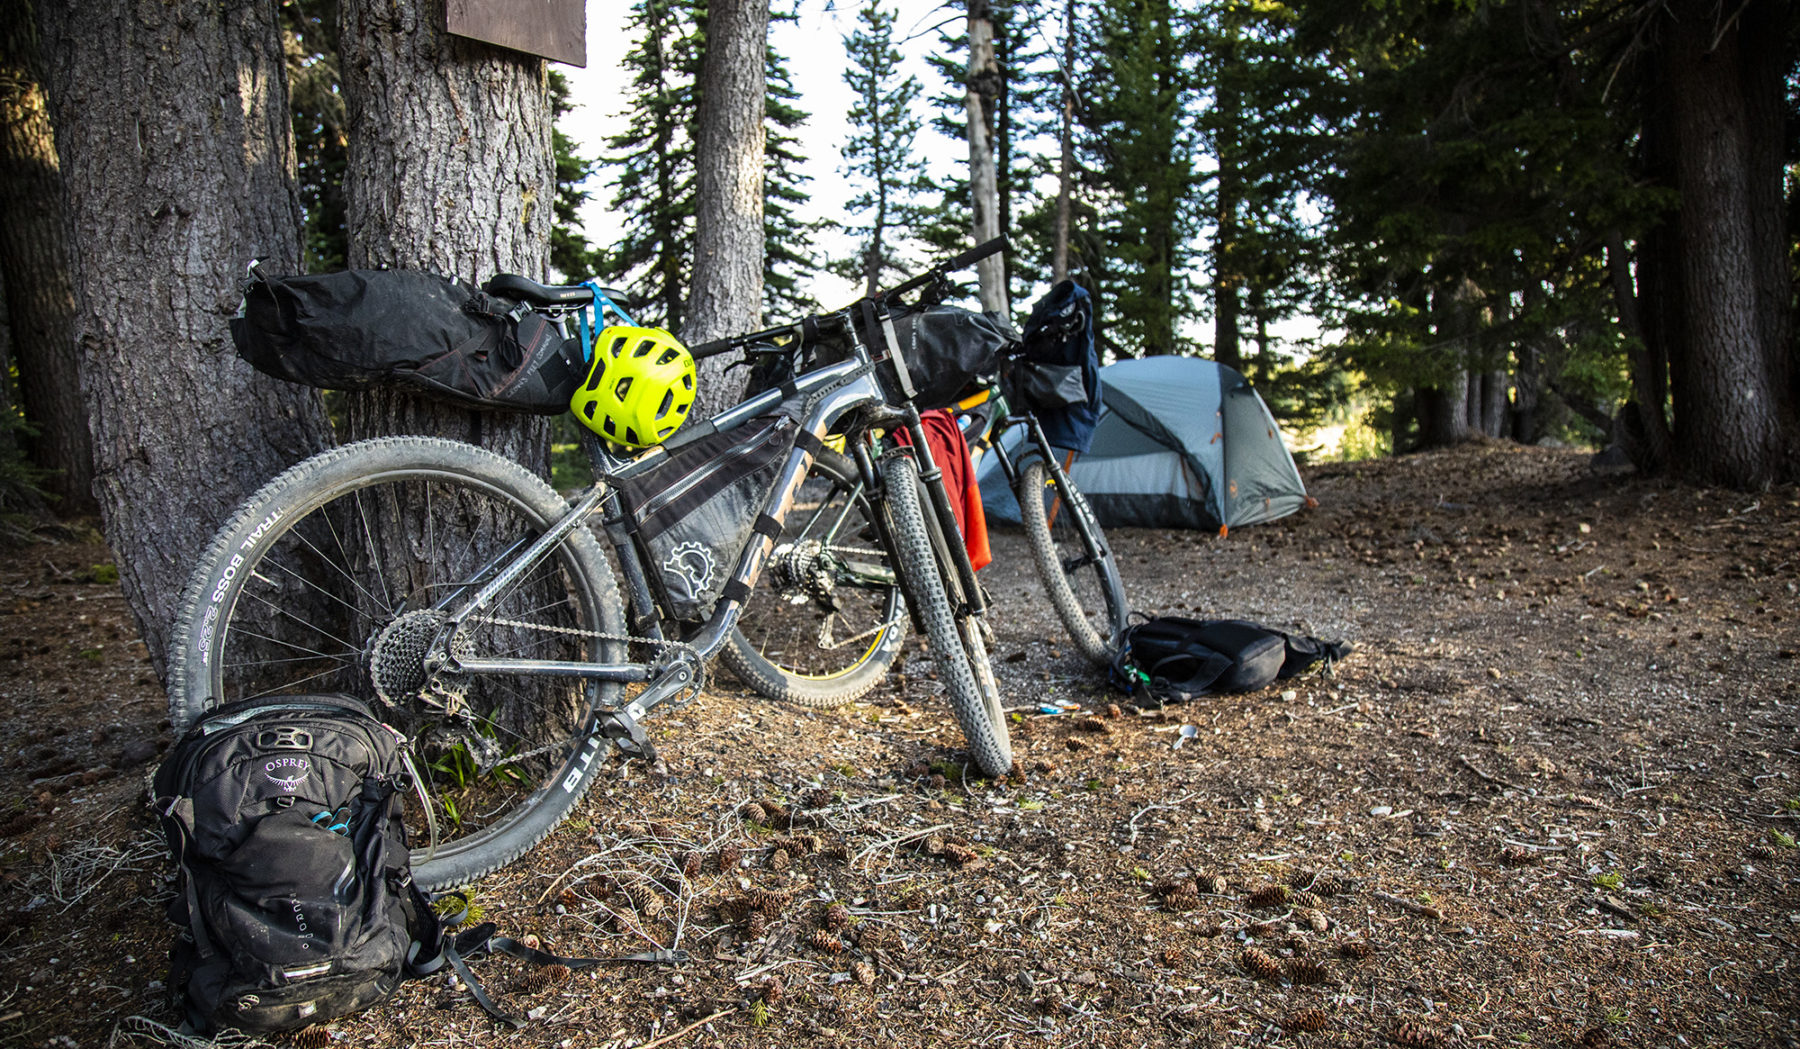
Bike bags have revolutionised two-wheel travel. Before these arrived on the scene, cycle tourers had no choice but to use panniers. These were very effective if touring on road, but as soon as you veered onto narrow bush tracks, the additional width created by the panniers meant you had to be very careful you didn’t hook your bike (and yourself) on a surrounding tree or similar. (As mentioned earlier, the new cargo-carrying options, such as Aeroe’s Spider Rear Rack, Handlebar Cradle and accessories, has meant racks are a viable – and reliable – option for those who like a ‘system’ type of approach, with dry bags designed specifically for this rack type).
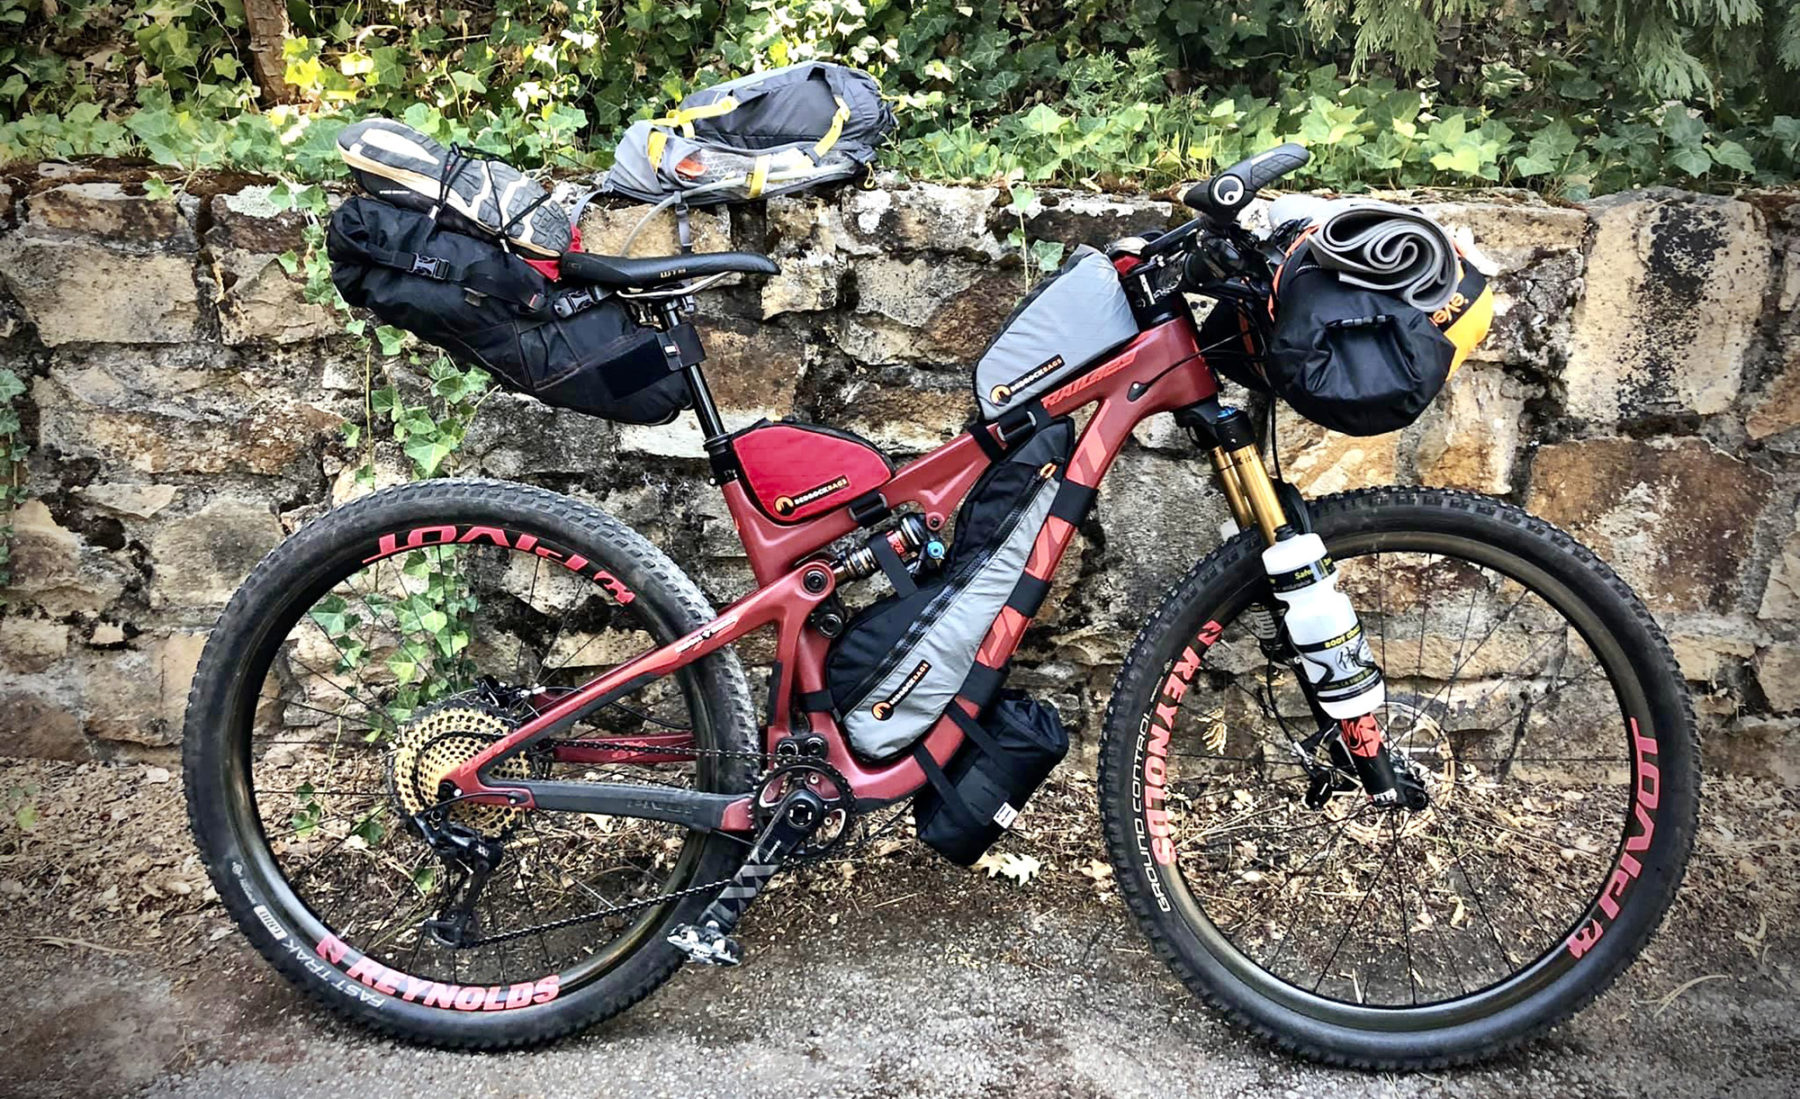
Bikepacking’s exploratory (and fun) ethos, and its focus on going lightweight where possible, saw a resultant need in a new, effective way of lugging gear, where those narrow trails wouldn’t cause any grief, and you could still ride your bike as it was meant to be ridden, i.e., you didn’t have to make allowances for wonky weight distribution and that wide rear end. Enter the bike bag that, in its various designs, can attach to your bike via the main frame, handlebars, top tube and seat-post, plus there are smaller ones for the forks. Revelate, Porcelain Rocket and Aussie-based Bike Bag Dude are all highly regarded bike bag brands.
The basics would include a handlebar bag, a frame bag and a saddle (seat-post) bag. If you went the rack option, we’d recommend a rear rack firstly, and then decide on how you wish to utilise that space in your bike frame, as well as the handlebar area. We’d also probably add a top-tube bag, for items you want at-hand, such as snacks, phone, tools, camera, etc. The only possible addition to this ‘basic’ set-up would be – for those riding a dual-suspension MTB – a small backpack. This compensates somewhat for the smaller frame bag you’d have to use and could include a hydration bladder for easy access to water, plus lightweight clothing or, again, some snacks. You really don’t want to have too much weight on your back, though, as you want to keep all the weight low down on the bike for better handling.
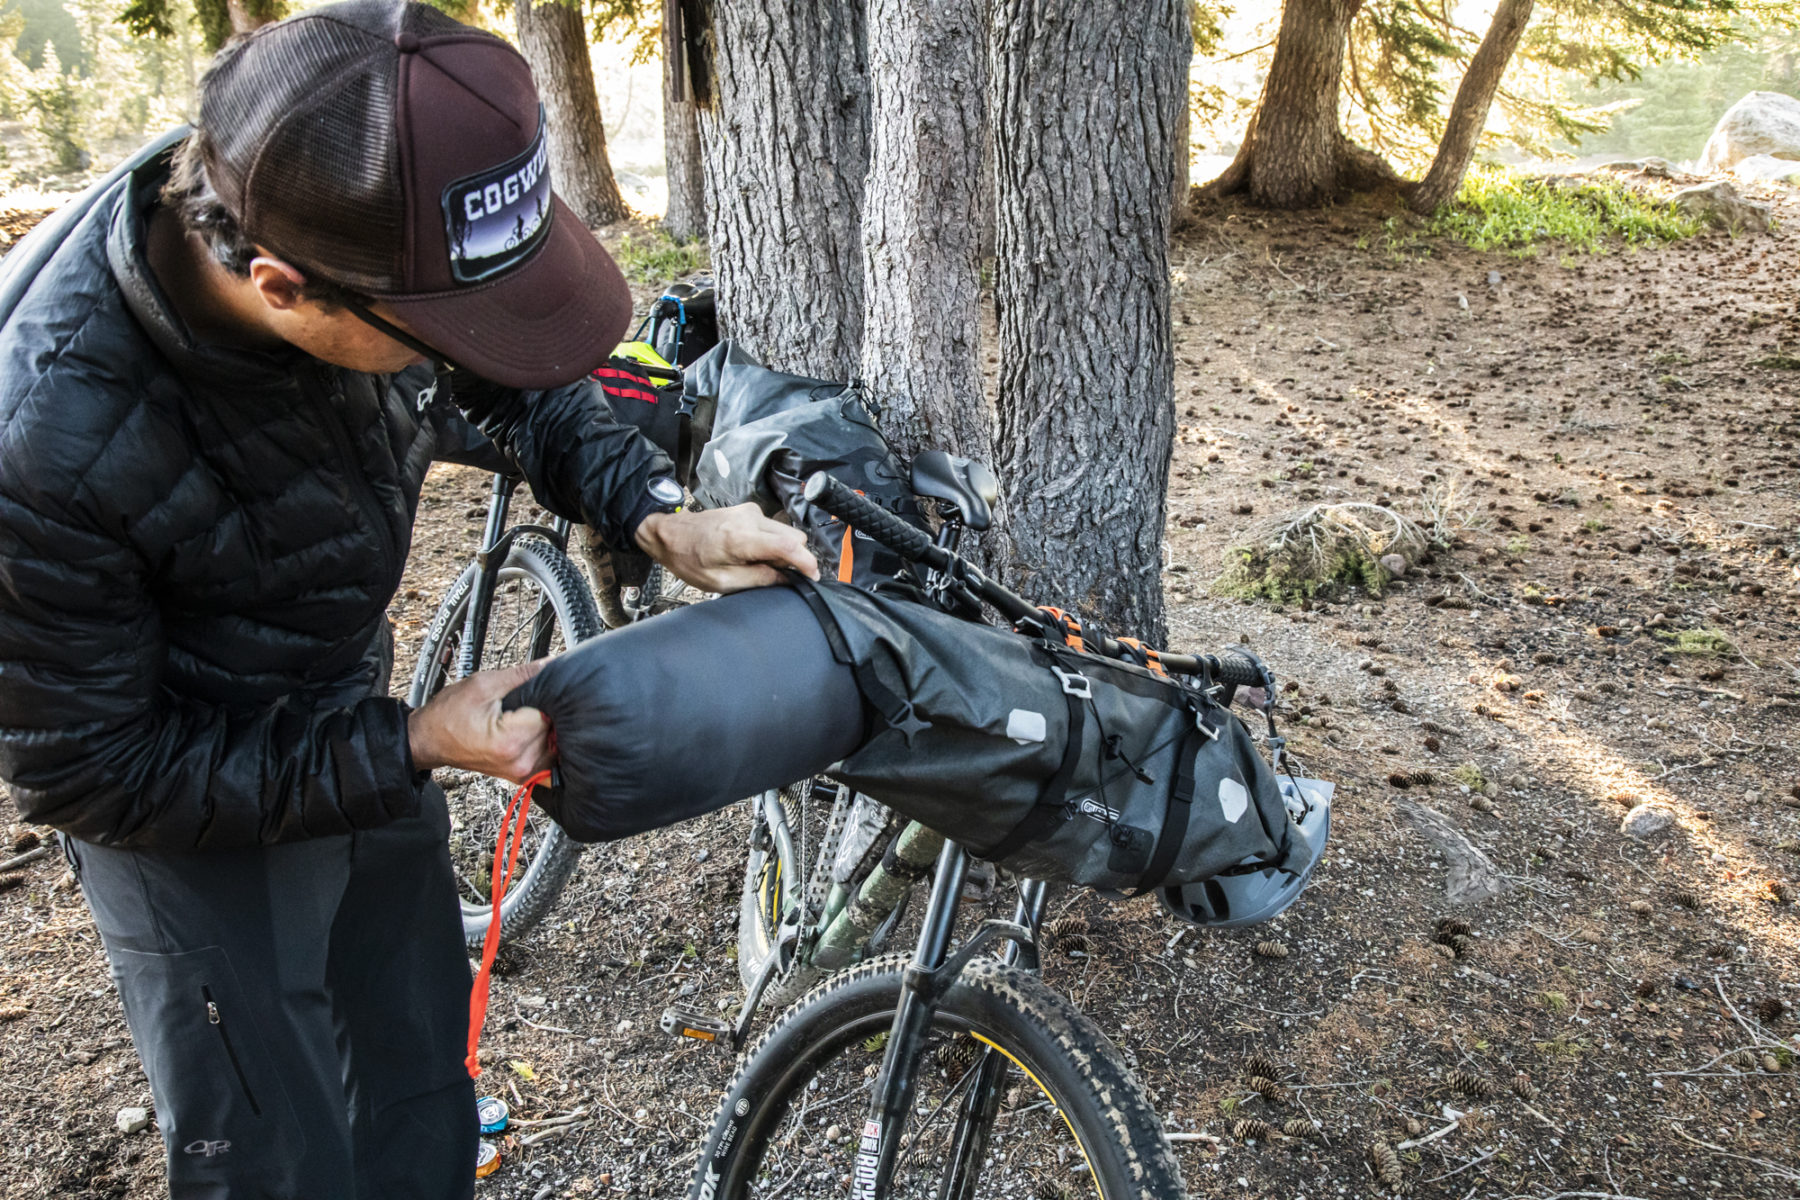
The seat bag ranges in volume from 6L to 16L and is one of the mainstays of a bikepacking system. It is used to pack lightweight, bulky items, such as sleeping bags, down jackets, and spare clothing. The seat bag attaches via a strap system to your bike’s seat-post and seat rails, ensuring it doesn’t wobble while riding and affect your balance. For those who run a dropper seat-post, there are seat packs that compensate for the vertical movement of those as well.
The frame bag – or half-frame bag – is the main load lugger for heavier gear, such as stoves, water (if you’re running your hydration bladder in there, with the tube outside for easy access), food and clothing plus, often, your spare parts and tools. It attaches to a number of frame points via Velcro straps or buckle systems. These vary in size according to the bike style they are designed for and can range from a half-frame volume of between 3L to 6L, through to a full-frame sizing of between 5L and 10L.
A handlebar bag attaches (obviously!) to your handlebars via buckles or Velcro strap set-ups. This is used for more lightweight gear, such as your tent, sleeping mat, and lightweight clothing. The size of your handlebar bag will, to an extent, be governed by what type of handlebars you run; MTB bars allow the bag to be wider, gravel/road drop bars are narrower so you have less width to utilise.
These bike bags will be probably the biggest investment in your bikepacking gear (provided you already have a bike), but they will return that investment ten-fold thanks to their longevity and simplicity of use. Nearly all bike bags use oversized zips and clip systems that are super tough, minimising any chance of damage or need of repairs.
Essential gear
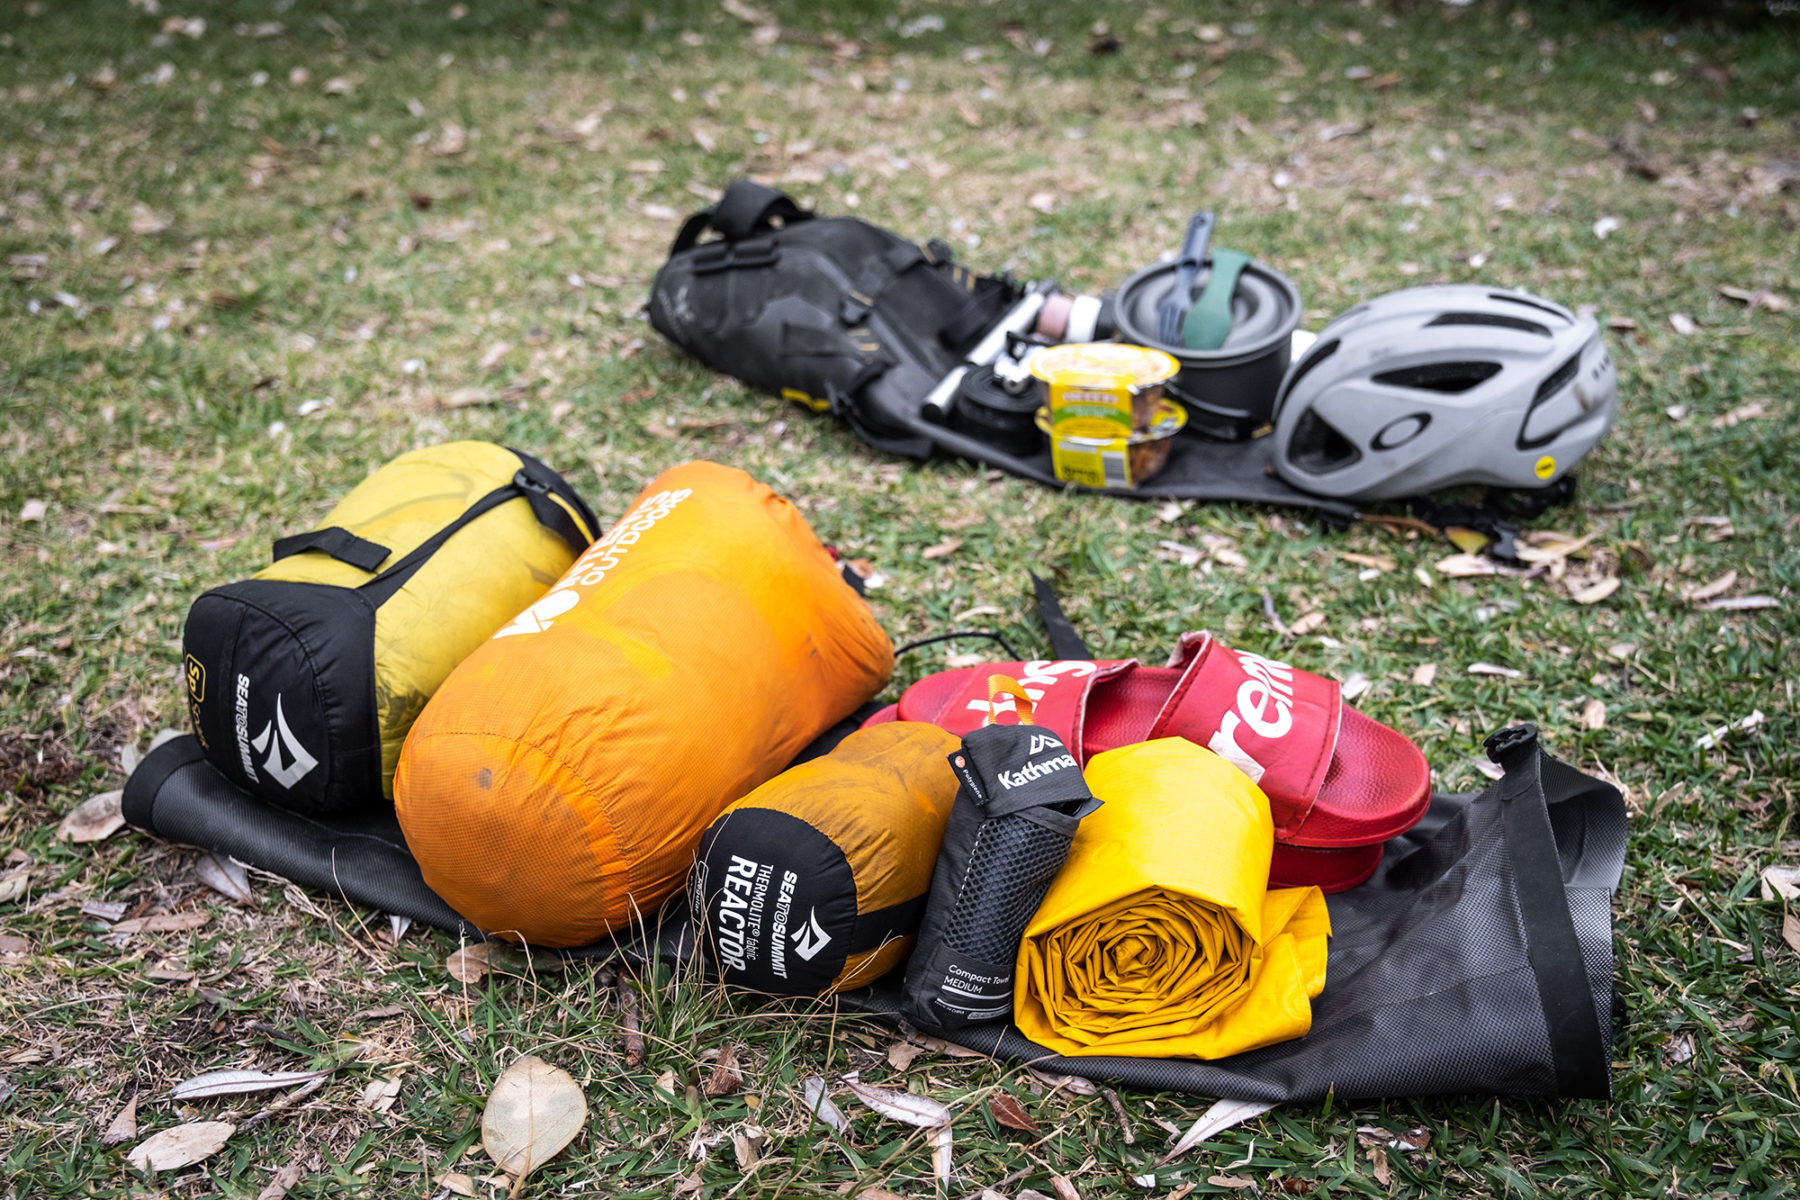
So, this is where the fun starts! Trying to squeeze, shove and cajole your gear into your bike bags is probably the most stressful part of what is a relaxing activity. Having said that, opting for compact, lightweight gear and clothing – and there is some incredibly light and compact gear on the market these days – will see that stress a distant memory. Similar to the bike bags, going lightweight is not cheap but, again, the initial investment will see you reap the benefits for many years of bikepacking adventures.
If you are already a serious hiker, you will be well used to packing light and compact so will (hopefully) have gear that can do double-duty, such as lightweight stoves, tent and clothing.
For cooking, we’d recommend an all-in-one gas canister stove. Brands such as MSR and JetBoil offer these types of stoves. They are most suited to solo adventurers but there are additional accessories (larger pots, pans) for bigger groups if need be. The other option is a methylated spirits stove (metho can be found in most places) that also offers a wider, more stable base and is still light in weight. Trangia is the most well-known brand of this type. Regarding cookware, seek out lightweight titanium pots and pans if you can. Other cooking essentials include a water filter and spare matches/lighter.
For food, that will depend on your tastes. These days, dehydrated meals are pretty damn good and easy to pack in your bike bags. Dried fruit is a great snack option, as are your regulation muesli bars. Oh, and for those caffeine freaks out there, there are some magic mini coffee presses. We know; it’s a luxury but hey, why the hell not?!
In terms of shelter, a lightweight hiking tent is our preferred option and, if possible, we’d look at a two-person version even if travelling solo. The reason being is that minimal increase in weight and packing size pays off with loads of interior space if one-up and, if it does rain, you’ll be able to bring all your gear inside the tent. Some two-person hiking tents can be as light as 1kg. Be sure, however, to check the length of the tent’s poles and if they will fit inside one of your bike bags length-wise.
Another popular shelter option is a lightweight tarp. These are excellent if you camp where you can set them up, i.e., strung between trees (or carry a couple of tarp-specific poles), and are very light and compact. Negatives are that you have no ‘floor’, condensation can be an issue in more humid climes, and that creepy-crawlies have free reign. Note: you can get insect-mesh inners for some tarp systems but then, you might as well have a tent… Oh, and in storms, you will be hoping you’ve secured your tie-down points very, very well.
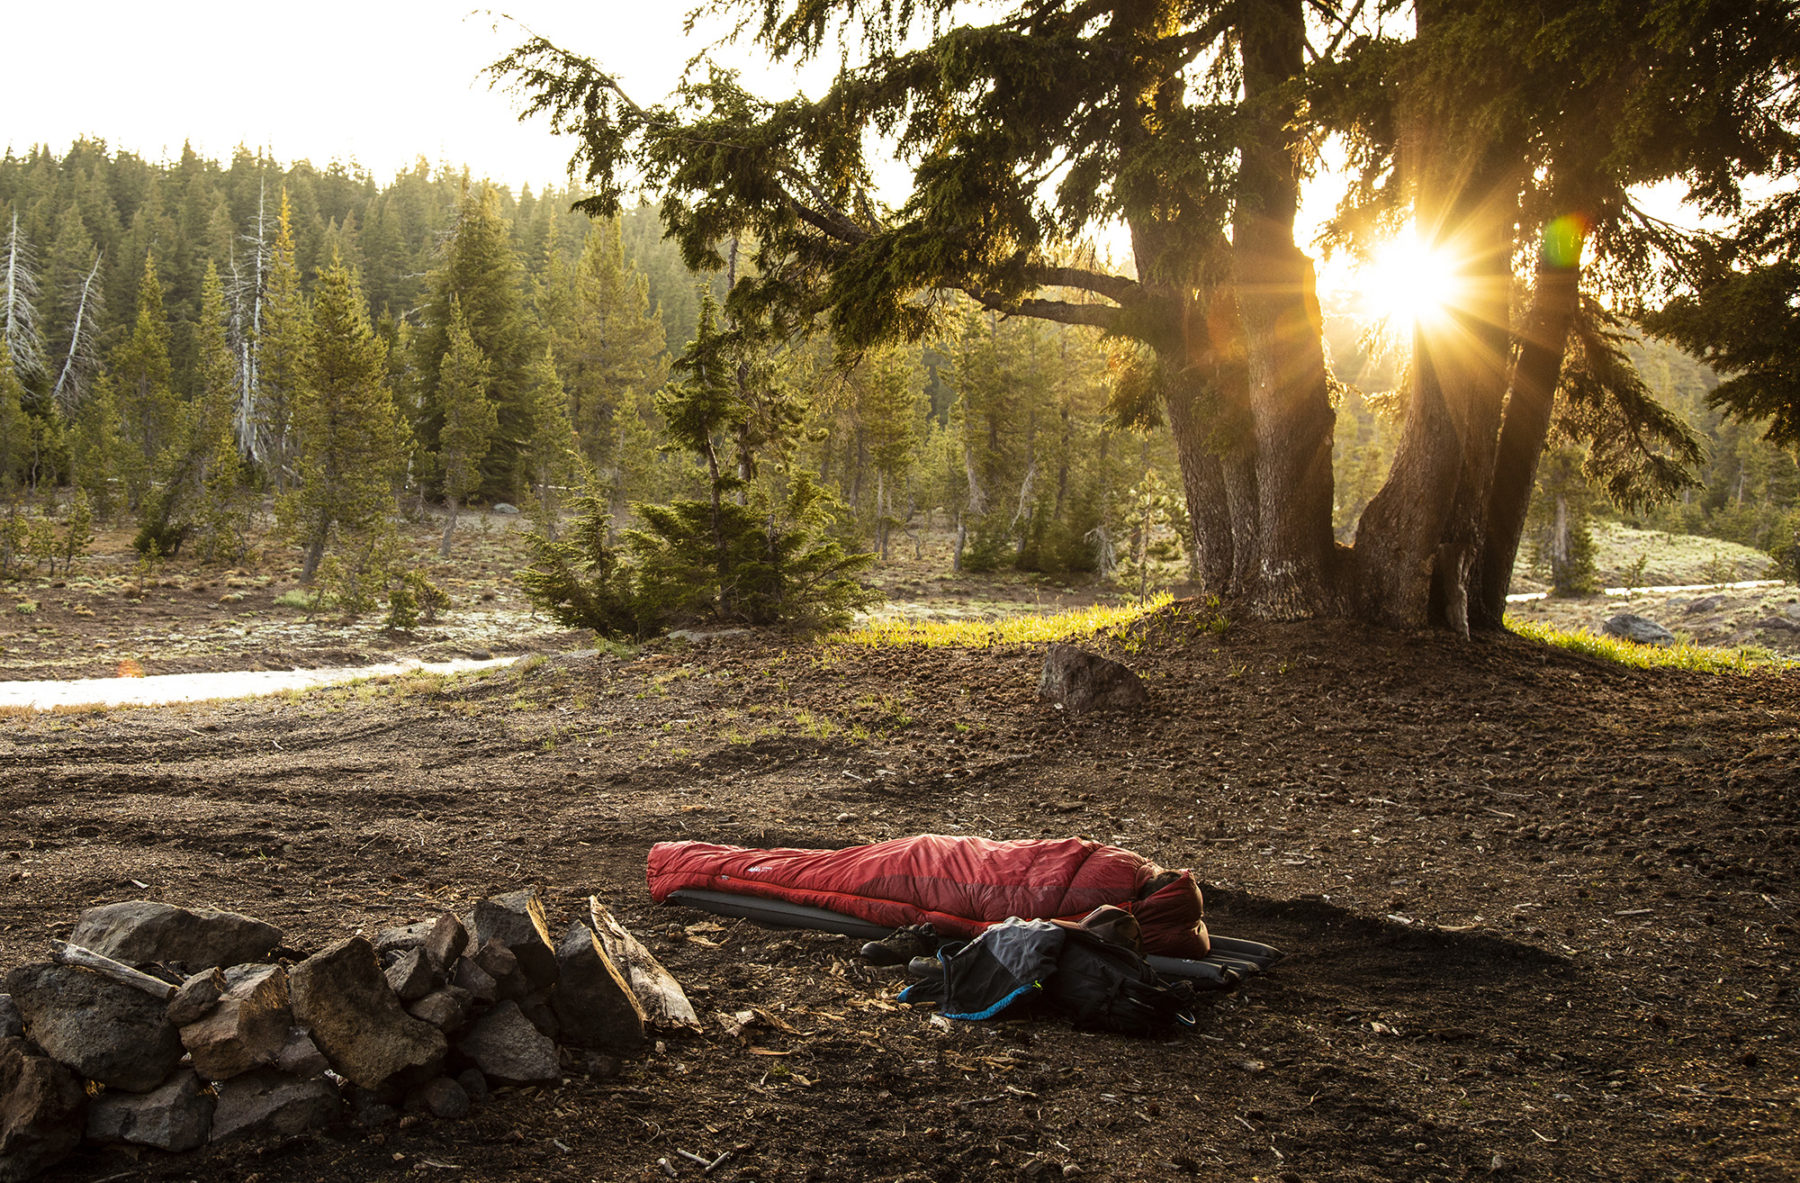
For bedding, a down sleeping bag is the best option. Not only do they provide more warmth per gram than a synthetic bag, but they also pack down smaller – always important when loading your bike bags! For a sleeping mat, you have the choice of an ultra-light (and unbreakable) old-school sleeping mat, or the comfier air-inflated mats. There are a number of brands that offer lightweight and compact inflatable mats, including Therm-a-Rest and Sea To Summit, that can weigh from 300g to 750g. One other night-time camp essential is a head-torch – and don’t forget to bring spare batteries.
For the rider, your general bike clothing works perfectly. It’s worth adding in a mid-layer (merino or synthetic) and we’d always recommend packing a down jacket. Even in summer, nights may be cool and these pack down super-compact. Plus, they are a great double for a pillow. A few pairs of knicks are obvious essentials, too, along with a lightweight rain jacket and (a bit of indulgence) a pair of sandals/thongs for around camp. Nothing beats getting out of your bike shoes after a day in the saddle…
Get on ya bike!
So now it’s time to head out. You’ve researched your route, most likely via maps originally and then one of the excellent trail apps, such as TrailForks, and you’re all set to go. You will have spent a few weeks finessing your packing system and getting your bike serviced, and now it’s just a matter of turning that first pedal stroke. If you’ve ticked off all our advice – and tweaked or added to it with your own preferences – the only thing you have to worry about is whether that last-day country pub you plan on being picked up from has a good counter lunch and cold beverages on tap to celebrate that first of no doubt many two-wheeled wilderness adventures.