How to shoot the Moon

THERE’S AN ART to photographing the moon. Many people know the frustration of a beautiful night sky that won’t transfer over into your shot – looking at your photo, it seems completely different.
It is possible to take a spell-binding picture complete with crater detail and depth – all it takes is some adjusting of your camera settings and a little bit of patience.
But before we get into the nitty-gritty of picking around within your camera settings, it’s worth knowing one or two things about our subject and its orbit around the Earth.
This will help you in your pursuit of a shot that’s ‘out of this world’…

Phases of the moon
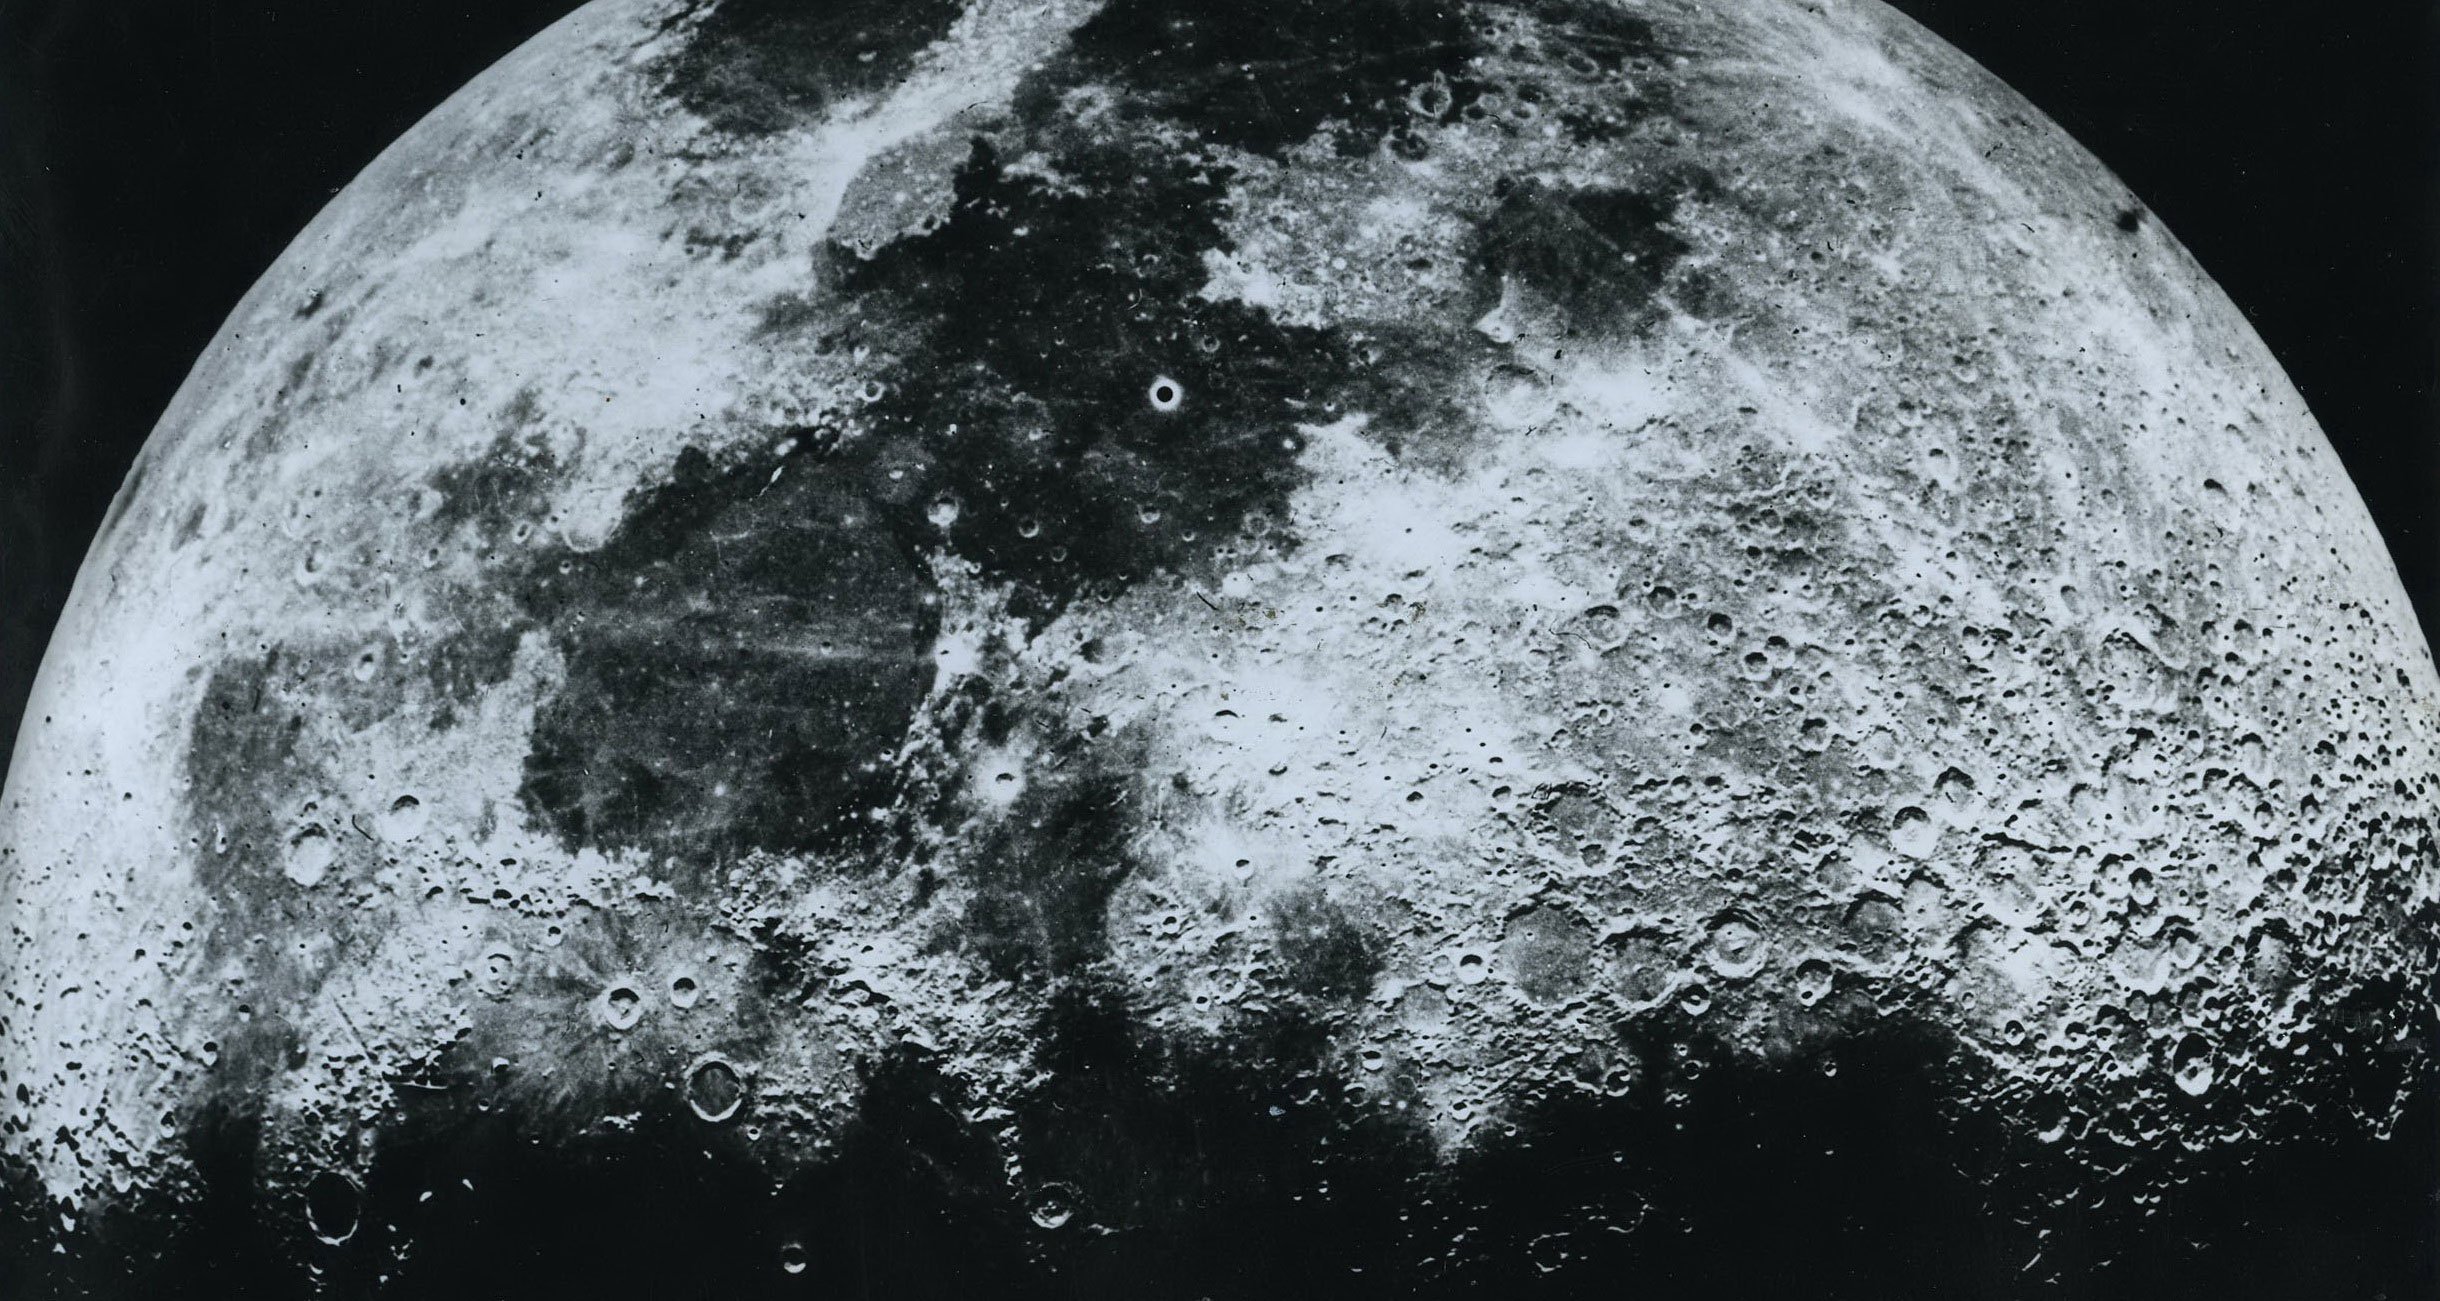
A photo of the Moon taken in 1964 as part of Archives New Zealand’s former Post and Telegraph/Telecom Museum Holdings collection. (Photo Credit: Archives New Zealand)
The Moon has different ‘phases’. While we are always seeing the same ‘side’ of the Moon from Earth, its position in relation to the sun (which is lighting its surface for us to see) means we see different amounts of that surface. This happens in a regular cycle known as lunar phases.
Many people start out photographing a full Moon. While this is obviously the biggest and brightest phase, if you want to capture the detail and texture on the Moon’s surface it’s better to photograph the Moon when it’s NOT full.
This is because the beautiful detail of the Moon is accentuated by shadows and the contrast of light and dark near the Moon’s ‘terminator’ or border, where it turns from bright to shadow. In a full moon there is no terminator and therefore the 3D depth and detail of the surface is somewhat lost to us. Just like in portrait photography, we need shadows to reveal shape and texture.
- Unlock rarely used features of your DSLR
- Tutorial: Photographing fireworks
- Smartphone photography tips
The best phases to take photos are during a gibbous Moon (i.e the Moon is more than half illuminated). Whether it is ‘waxing’ (getting bigger towards a full moon) or ‘waning’ (getting smaller after a full moon) isn’t too much of a concern.>
While small crescent moons are very interesting, they often don’t provide enough size for really dramatic images. It’s worth checking a lunar calendar to know when the Moon is going to be best for photography (and when it will be visible in the night sky). A couple of days either side of a full moon is usually ideal.
Photographing a super moon
A super Moon, or perigee, forms when a full moon coincides with its closest approach to Earth.
It’s worth noting when these perigees happen because, if they coincide with an illuminated Moon, the Moon can appear up to 14 per cent larger to us on Earth and 30 per cent brighter which is excellent for photographing it! You can find out when the Moon is closest by looking at an online calendar. A couple of days either side of this will be an excellent opportunity to take your photos.
Of course you can still photograph a non ‘super Moon’ and get great results!
What you need
- Your longest lens. 200mm, 300mm, 400mm (or longer if you have it!). You could even put on a tele-extender if you’ve got one. The Moon is bright but because it’s so far away it will appear small in your frame so pick your longest focal length to zoom in as much as you can.
- A sturdy tripod and cable release to remove tripod wobble when pressing the shutter button. Shutter buttons are handy but not essential – a 2-second timer delay in your ‘drive mode’ settings will also work instead of a cable release, and you can even shoot the Moon without a tripod, providing your shutter speed is fast enough to prevent significant camera shake – you may just need to turn up your ISO a bit more to achieve this.
- A clear night.
Camera settings
Shoot in RAW
This is in your image quality settings. While shooting large JPEG’s is adequate for most of your photography, in this case you’ll benefit from doing a fair bit of post processing on your image so shooting in RAW allows you to pull a bit more detail out of your shots on the computer later.
Be aware that the files are significantly larger in size, so they will fill up your memory card a lot faster. For those who are really keen on post processing there is an extension section below you can try which involves stacking a few images together in order to increase saturation without introducing too much ‘noise’ in your final photograph.
Set (and lock) your focus.

Lock focus by selecting MF (Photo credit: Chris Bray Photography)
The Moon is plenty bright enough for your camera to autofocus on. Once you’ve grabbed an autofocus, you can ‘lock’ this focus distance in by flicking the AF/MF switch on the side of your lens to MF.So long as you don’t touch the manual focus ring, you’ll remain locked at this focus.
If you’d like to be super accurate, you can zoom in on the Moon x10 in ‘live view’ on your LCD screen and tweak the manual focus ring to ensure the craters are precisely in focus.
Use a cable release (or an in-built 2-second timer delay)
This will help reduce tripod wobble, especially since you’re using a long lens! When taking multiple photos, make sure you let the tripod absorb the shake between shots.
Shooting Mode
Select Aperture priority mode (‘Av’ on Canon or ‘A’ on other brands) using the mode dial of your camera. For practical purposes, as the Moon is so far away, Depth of field is not hugely important here so you don’t need a big f/number. Plus a smaller f/number will allow more light to pour into the lens allowing for a faster shutter speed. There is no need to go to your lens’ extreme, though; something around an f/8 is usually sufficient.
By being in Av mode your camera will select the shutter speed for you. Shutter speed is more important than you think. The Moon moves surprisingly quickly in the sky so long photos will therefore be less sharp. Quicker photos also help eliminate any camera shake or tripod wobble. Something around 200th second is quick enough on a stable tripod. If it’s quicker than that, great! But it doesn’t need to be super fast. If the shutter speed is a little slow, just bump up the ISO a little.
ISO
Since Aperture mode is selected, increasing the ISO will automatically increase the shutter speed. However high ISO’s create ‘noise’ in your photo and reduce image quality, and reducing noise wherever possible is important as we’ll be cropping the image later on the computer.
Keep your ISO as low as possible, but still make sure you’re achieving a fast enough photo. Start on ISO 100 or 200 and see what shutter speed you’re getting.
If you’re not getting a fast enough photo (ie your photo is blurry due to camera or Moon movement), then bump up the ISO as needed.
Turn down exposure compensation

Dial down exposure compensation to capture the Moon’s details. (Photo credit: Chris Bray Photography)
This is the secret to capturing a detailed Moon – without adjusting your exposure compensation, you’ll probably get frustrated, pack up and go inside.
If you leave your camera’s exposure compensation on zero in Evaluative metering your camera will automatically try and give you a ‘mid brightness’ photo. It’ll interpret the scene as ‘dark’ and therefore try to bump up the brightness a lot to generate that default ‘mid brightness’ photo. This means that the Moon will be pure white, completely washed out and over exposed. All detail on the surface will be completely lost.
But by turning your exposure compensation down (eg minus 3, 4 or minus 5), your camera will adjust its settings (by tweaking the shutter speed) to give you a darker shot, allowing you to capture the detail in the Moon! Play around with your minus exposure compensation until you achieve the detail you’re after in the moon.
Note that the longer your lens, the larger the Moon will look in your shot and the brighter that photo is supposed to be (and the brighter you’ll have to set your exposure compensation). The smaller the Moon looks in your shot, the darker you’ll need to set your exposure compensation to reveal it’s detail.
If your camera’s exposure compensation doesn’t go low enough – ie. below minus 2 exposure compensation, you can still control your exposure, you just have to take complete control of your camera.
Using ‘Manual’ (M) mode, pick the same settings as above (a small-ish f/number and a fairly low ISO eg 200). Now you can play around with your shutter speed making it faster and faster until you get the detail back in the Moon.
Start at something like 200th of a second. If the Moon is too bright, make your photo faster (perhaps 300th second). By incrementally increasing the shutter speed you’re letting less light into the camera, so more detail should pop up in your photos.
Later, load your RAW files into a photo editing program, crop in on the sharpest image, perhaps play with the ‘contrast’ a little and you’ve got yourself an amazing moon photo!
Experiments
See the colours of the Moon

Saturate your photos to reveal the Moon’s colours. (Photo credit: Chris Bray Photography)
There are several minerals on the Moon which each reflect sunlight in different ways. Just because our eyes do not pick up those subtle differences doesn’t mean they don’t exist. Unlike your eyes, your camera can pick up the various colours of the Moon, especially when saturation is enhanced in post processing afterwards.
Revealing the colours of the Moon is as simple as cranking up the saturation of the photo. Yet any time saturation is greatly increased, noise also increases, reducing the quality. To help reduce noise, start with a high quality, noise-free photo by shooting on a low ISO.
If you’ve got a program that can do it, it may also be possible to reduce the noise by ‘stacking’ several photos on top of each other. You’ll need to have taken several shots of the Moon to do this, one after the other. If you’re able to stack your images, it’s better to enhance each individual image a little and stack them on top of each other, rather than just excessively enhancing a single photo.
Not every photo editing software program can do this. I tend to use Adobe Lightroom, and for this I downloaded a plugin called ‘Enfuse’ designed for averaging exposures of several photos of the same scene.
This is often referred to as HDR, and allows average exposure to be achieved in both the bright and dark parts of an image by mixing three or more images of the same scene on top of each other. The trial version of Enfuse is available as a free plugin download – make a small donation for access to the full plugin.
Using Enfuse, select the images you want to combine, increase the saturation in them all a little and proceed to stack them on top of each other ensuring that the ‘auto align’ box is selected (this will make sure the different shots of the Moon all line up correctly).
You can then increase the saturation on the final image, slowly revealing the colours in a noise free fashion. If you’d like, you can repeat this process and then combine several of your final images into a single shot. Have a play around, it’s good fun, and the results can be pretty impressive!
Landscapes under moonlight
Moonlight is an incredibly soft and even light, which can make for some interesting landscape shots, particularly when the Moon isn’t in the frame.
Moonlight is a lot less intense than sunlight so you’ll need to use a much longer shutter speed to achieve correct exposure than you would during daylight.
The easiest way to achieve this is to flick your mode dial into Tv (or S) mode and just scroll the shutter speed to 30 seconds. Your camera will automatically select the f/number for you.
Keep your ISO as low as is convenient, as high ISO’s will create some noise in your photo. If your f/number is blinking at you, you’ll need to bump up your ISO a bit. Assuming the f/number isn’t blinking, you’re good to go! If you want a brighter photo, just nudge your exposure compensation up a little until you achieve the brightness that you’re after.
Quick tip
By keeping your camera on a tripod and taking a series of photos continually, you can also use a program like Star Stax to create a star trail.
Star trails under moonlight can make for creative results as the foreground remains evenly lit by the Moon. Check out the Chris Bray Photography Star trail tutorial to learn how to do this.
Landscape shots
Including the Moon in a landscape shot often leads to disappointment, not because it can’t or shouldn’t be done, but rather because we often have photographic expectations that can’t be met. These expectations come from a couple of common misconceptions about photographing the Moon.
The Moon looks huge to our eyes when it’s peeping over the horizon so we grab the camera and snap a shot, only to be disappointed that the Moon looks so small in our photo.
This is the trap psychologists term the ‘Moon illusion’, one of the most famous of all illusions. When the Moon is on the horizon our minds interpret it to be larger than it really is, compared to when it is overhead, even though it’s the same distance away.
We also get disappointed when we see landscape photos which include the Moon with all its detail as a huge circle in the scene. Most of those shots you see of the Moon in a landscape photo are in fact composite shots. The photographer has blended together two photos – one photo of the landscape taken with a wide angle lens and another of the Moon taken with a telephoto lens as described above. It’s impossible to achieve the same result with a single image.
Landscape shots can still look great with the Moon included, but just think of it more like a lightbulb. Your camera can’t correctly expose for the dark foreground and the bright Moon at the same time, so your Moon will be likely overexposed. It can look great at times, especially when it’s light is reflected over water) but just be aware you’ll lose the detail on the Moon’s surface.
Quick tip
If the photo is taken using a big f/number, it’s possible to give the Moon a ‘starburst’ effect. If you’re getting this effect unknowingly and would prefer a more rounded Moon you’ll need to take a slightly quicker photo and use a smaller f/number.
Jonathan Ives runs photography courses and safaris with Chris Bray Photography. His photos have appeared in AG and Australian Geographic Adventure. He has a Bachelor of Science in Advanced Biology and a Master of Arts. Chris Bray Photography also runs one-day photography workshops in capital cities around Australia. Find out more.