Coral reef deaths: mystery solved

QUEENSLAND SCIENTISTS HAVE for the first time uncovered the timing and cause of a significant loss of Great Barrier Reef coral captured in a series of historic photographs.
In 1890, English marine biologist William Saville-Kent photographed two thriving reefs off the coast of Bowen, Queensland, about 200km southeast of Townsville. Another photo in 1915 showed a similarly healthy environment.
Then, in 1994, the reefs – called Stone Island and Bramston Reef – were photographed from the exact same location by the Great Barrier Reef Marine Park Authority (GBRMPA), but with one stark difference: almost complete loss of coral cover.

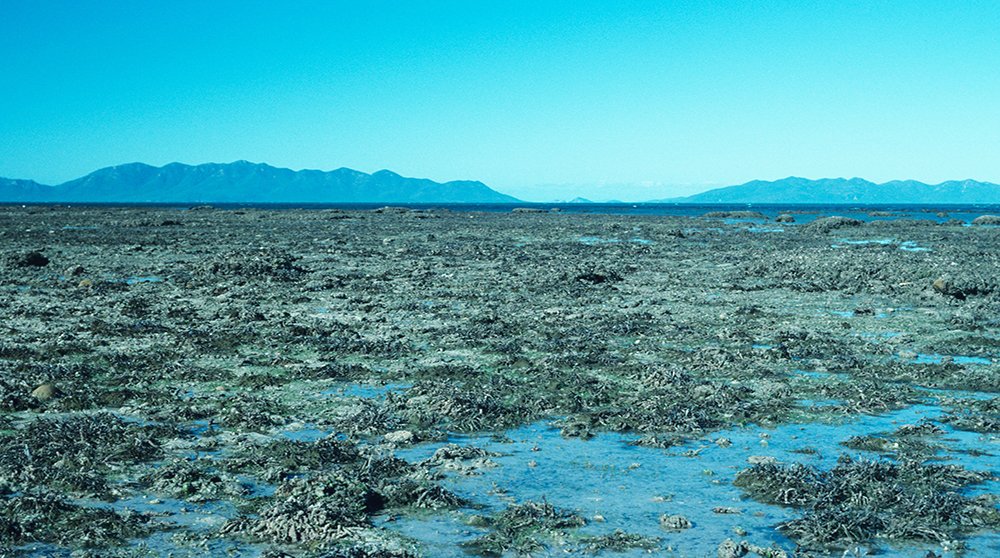
Photograph of Bramston Reef taken in 1994 looking south-east towards Gloucester Island revealing a large number of the faviid colonies to be dead and covered in sediment and algae. (Photographer: A. Elliot / Commonwealth of Australia GBRMPA)
For decades these images provided a powerful visualisation for the overall decline of the Great Barrier Reef over the past century, but until now no one actually knew when or why the dieback depicted in the photos occurred.
“No information has been available on when these [die-offs] took place, or what caused these changes – which can lead to the photos being misinterpreted,” said Professor Jian-xin Zhao, from the School of Earth Sciences at the University of Queensland (UQ). “Without the exact timing, the reasons for the loss depicted in the historical photos would have remained speculative,” he added.
Finally shedding light on the mystery, Zhao, working with a team of researchers from UQ, James Cook University and the GBRMPA, has published research in the journal Scientific Reports pinning down the timing and cause of the coral reef deaths.
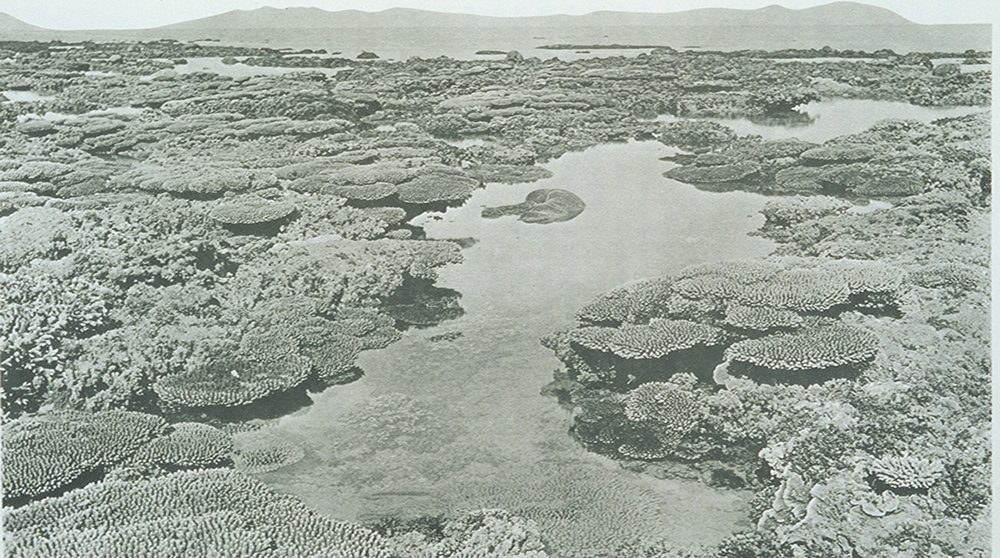
Historical photograph taken by William Saville-Kent in c.1890 depicting high cover of branching and tabular Acropora coral. (courtesy Clark et al.)
Photograph of Stone Island taken in 1994, showing no living coral cover. (Photographer: A. Elliot / Commonwealth of Australia GBRMPA)
Massive flooding event
Using modern-day radiometric dating techniques, the researchers were able to determine the age of calcium carbonate (the structural part of coral) to determine when the corals died with a precision of about 1–2 years. This allowed them to correlate the die-off events with environmental events of the same time period.
“For Bramston Reef, our results revealed that mortality was more recent than previously thought, coinciding with a big flood event and extreme low tide in 1990–91,” said Dr Tara Clark from UQ, lead author on the paper.
In another series of photos taken in 2012, Bramston Reef was shown to have made some recovery, while Stone Island – just a stone’s throw away – is showing little evidence of recovery. Tara said she is unsure why Stone Island was recovering so poorly, but suggested it might be due to the site lacking suitable habitat for coral polyps to attach and develop.
Despite the restricted study area, Tara said the team plans to revisit and examine more locations of historic study sites. With scouting already underway, the team is examining sites along the entire Great Barrier Reef (GBR).
“Not a lot of work has been done looking at reefs along the inner GBR and this [dating technique] is a useful tool to highlight the changes in these systems,” said Tara, adding: “It’s important to reliably assess the current state of these reefs and whether they are indeed undergoing a decline as a result of human influences.”
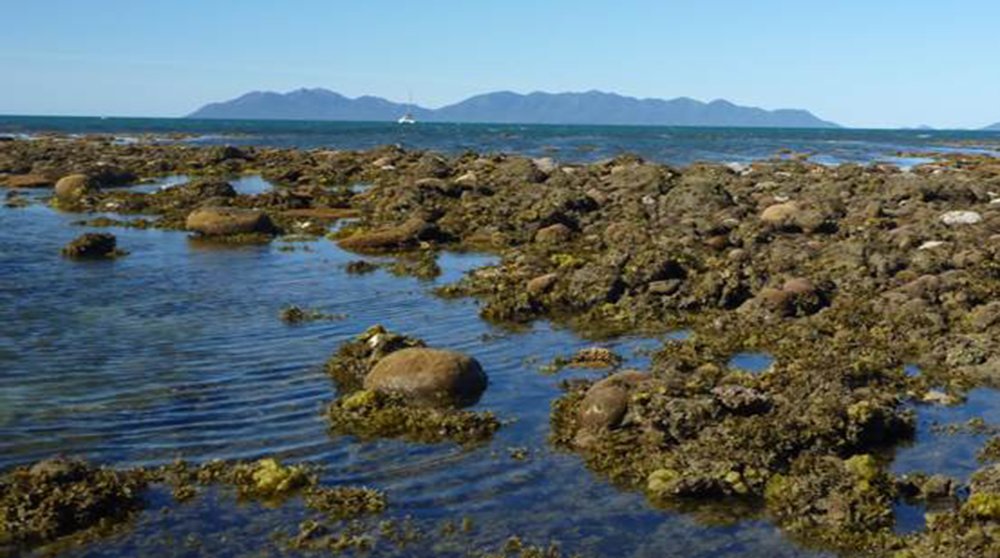
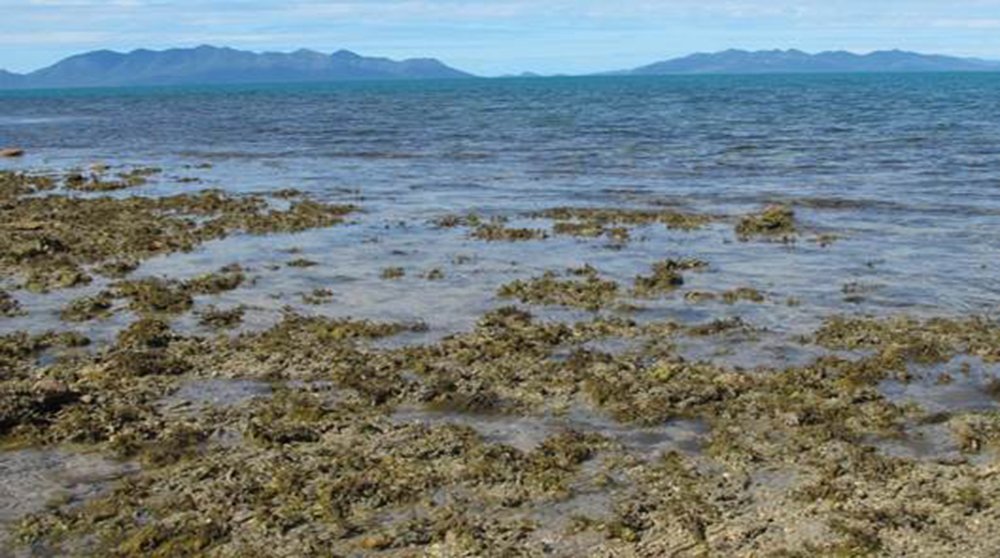
Modern photograph of Bramston Reef taken during this study in 2012 at the same locations as the photographs taken in 1994 (Photographer: H. Markham).
Modern photograph of Stone Island taken during this study on 30 July 2012. Geological features in the background of the images were used to identify the location of the historical photographs. (Photographer: T. Clark)